Adventures In Budgeted Nookery
As an Amazon associate, I may earn a small commission if you navigate to Amazon from my site and buy something. This will not result in an extra cost to you.
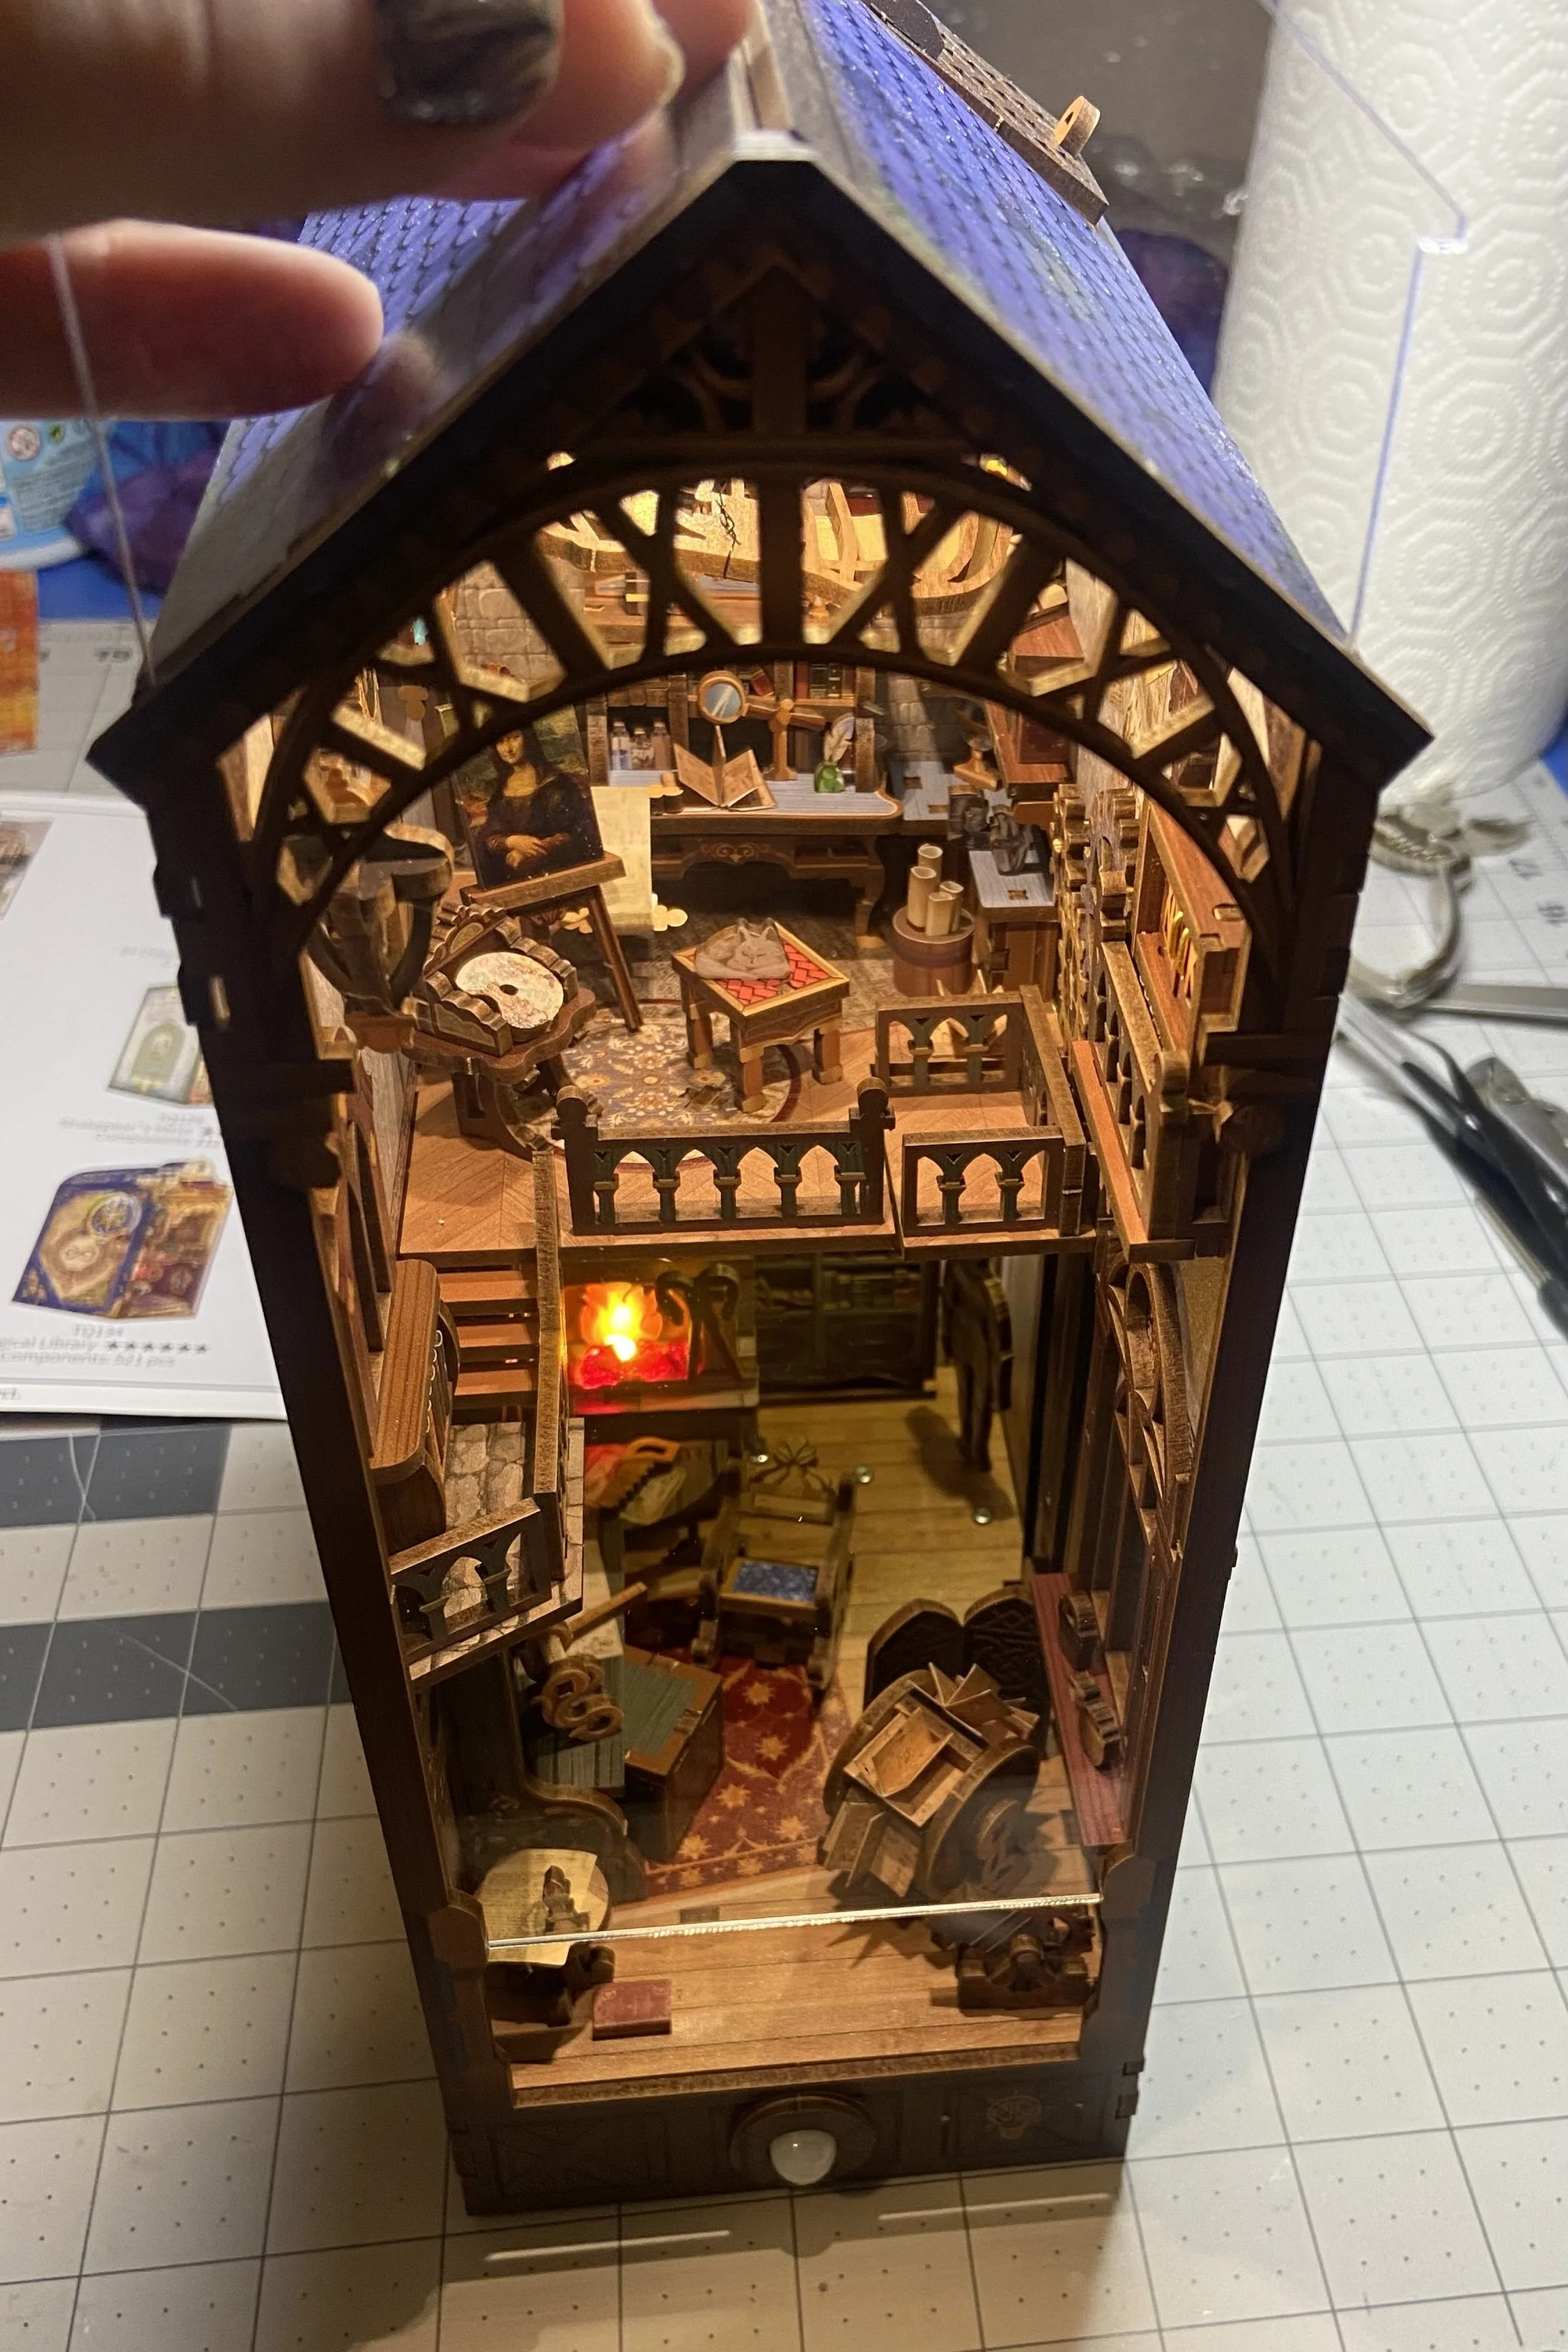
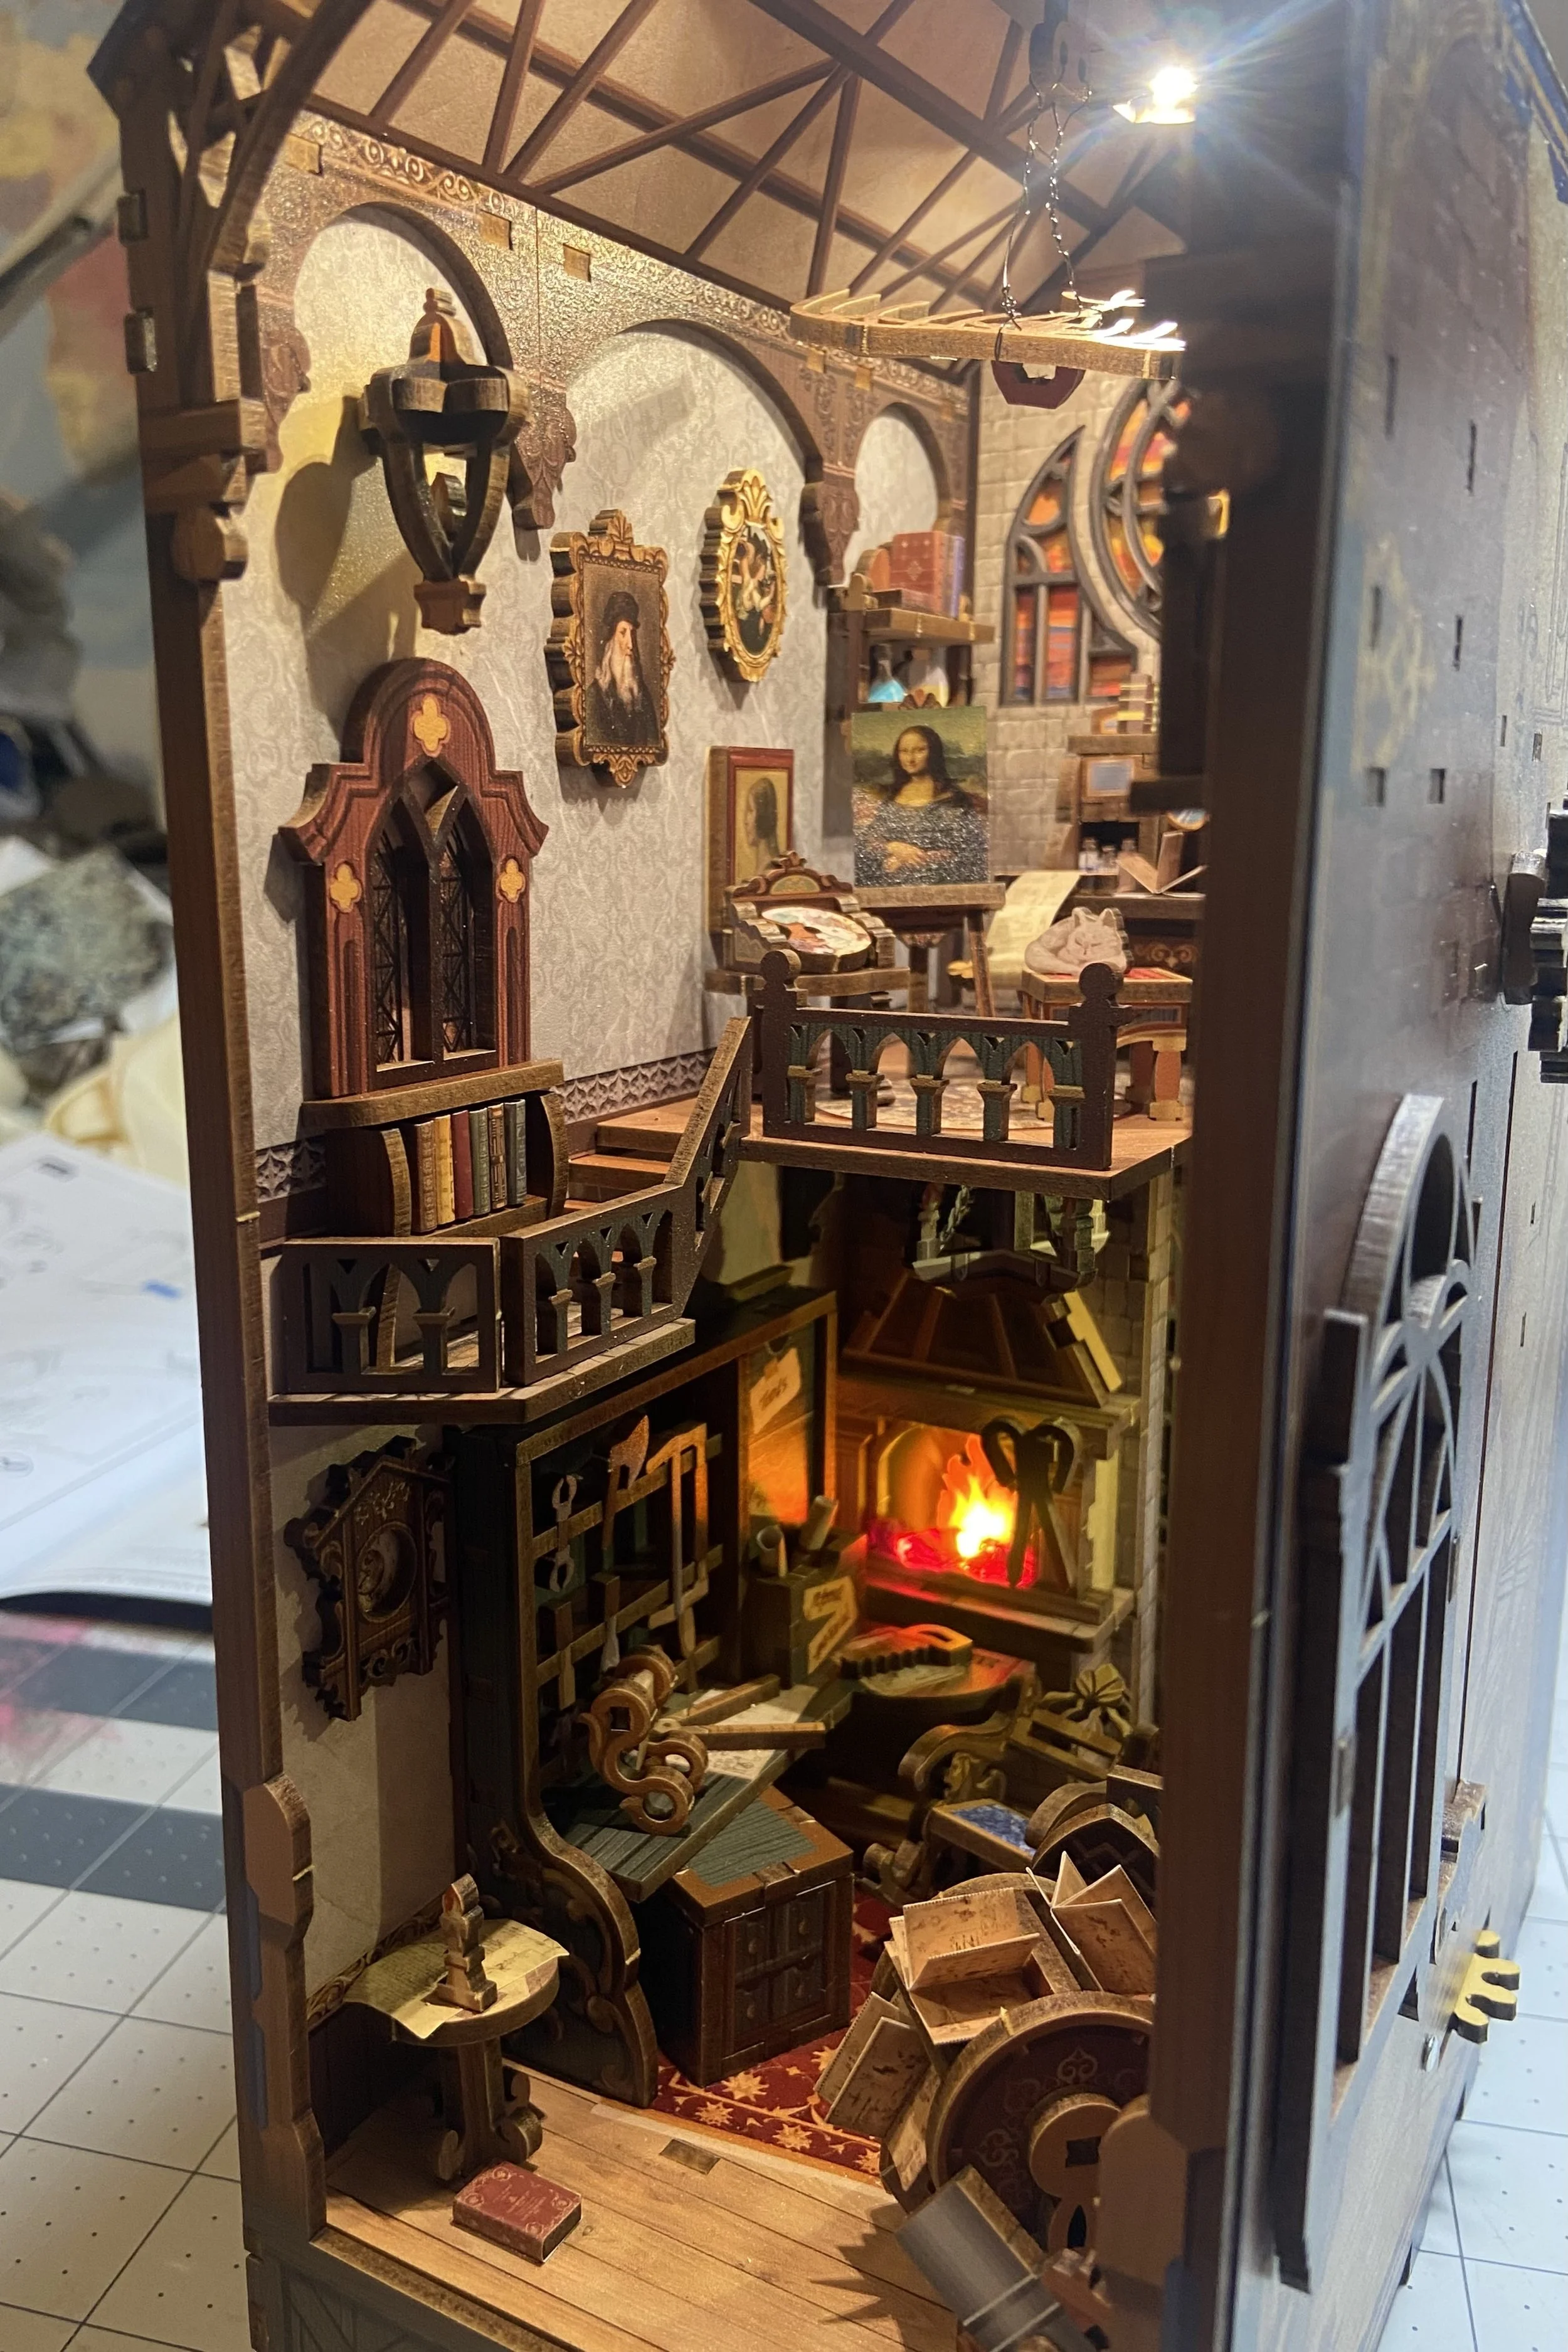
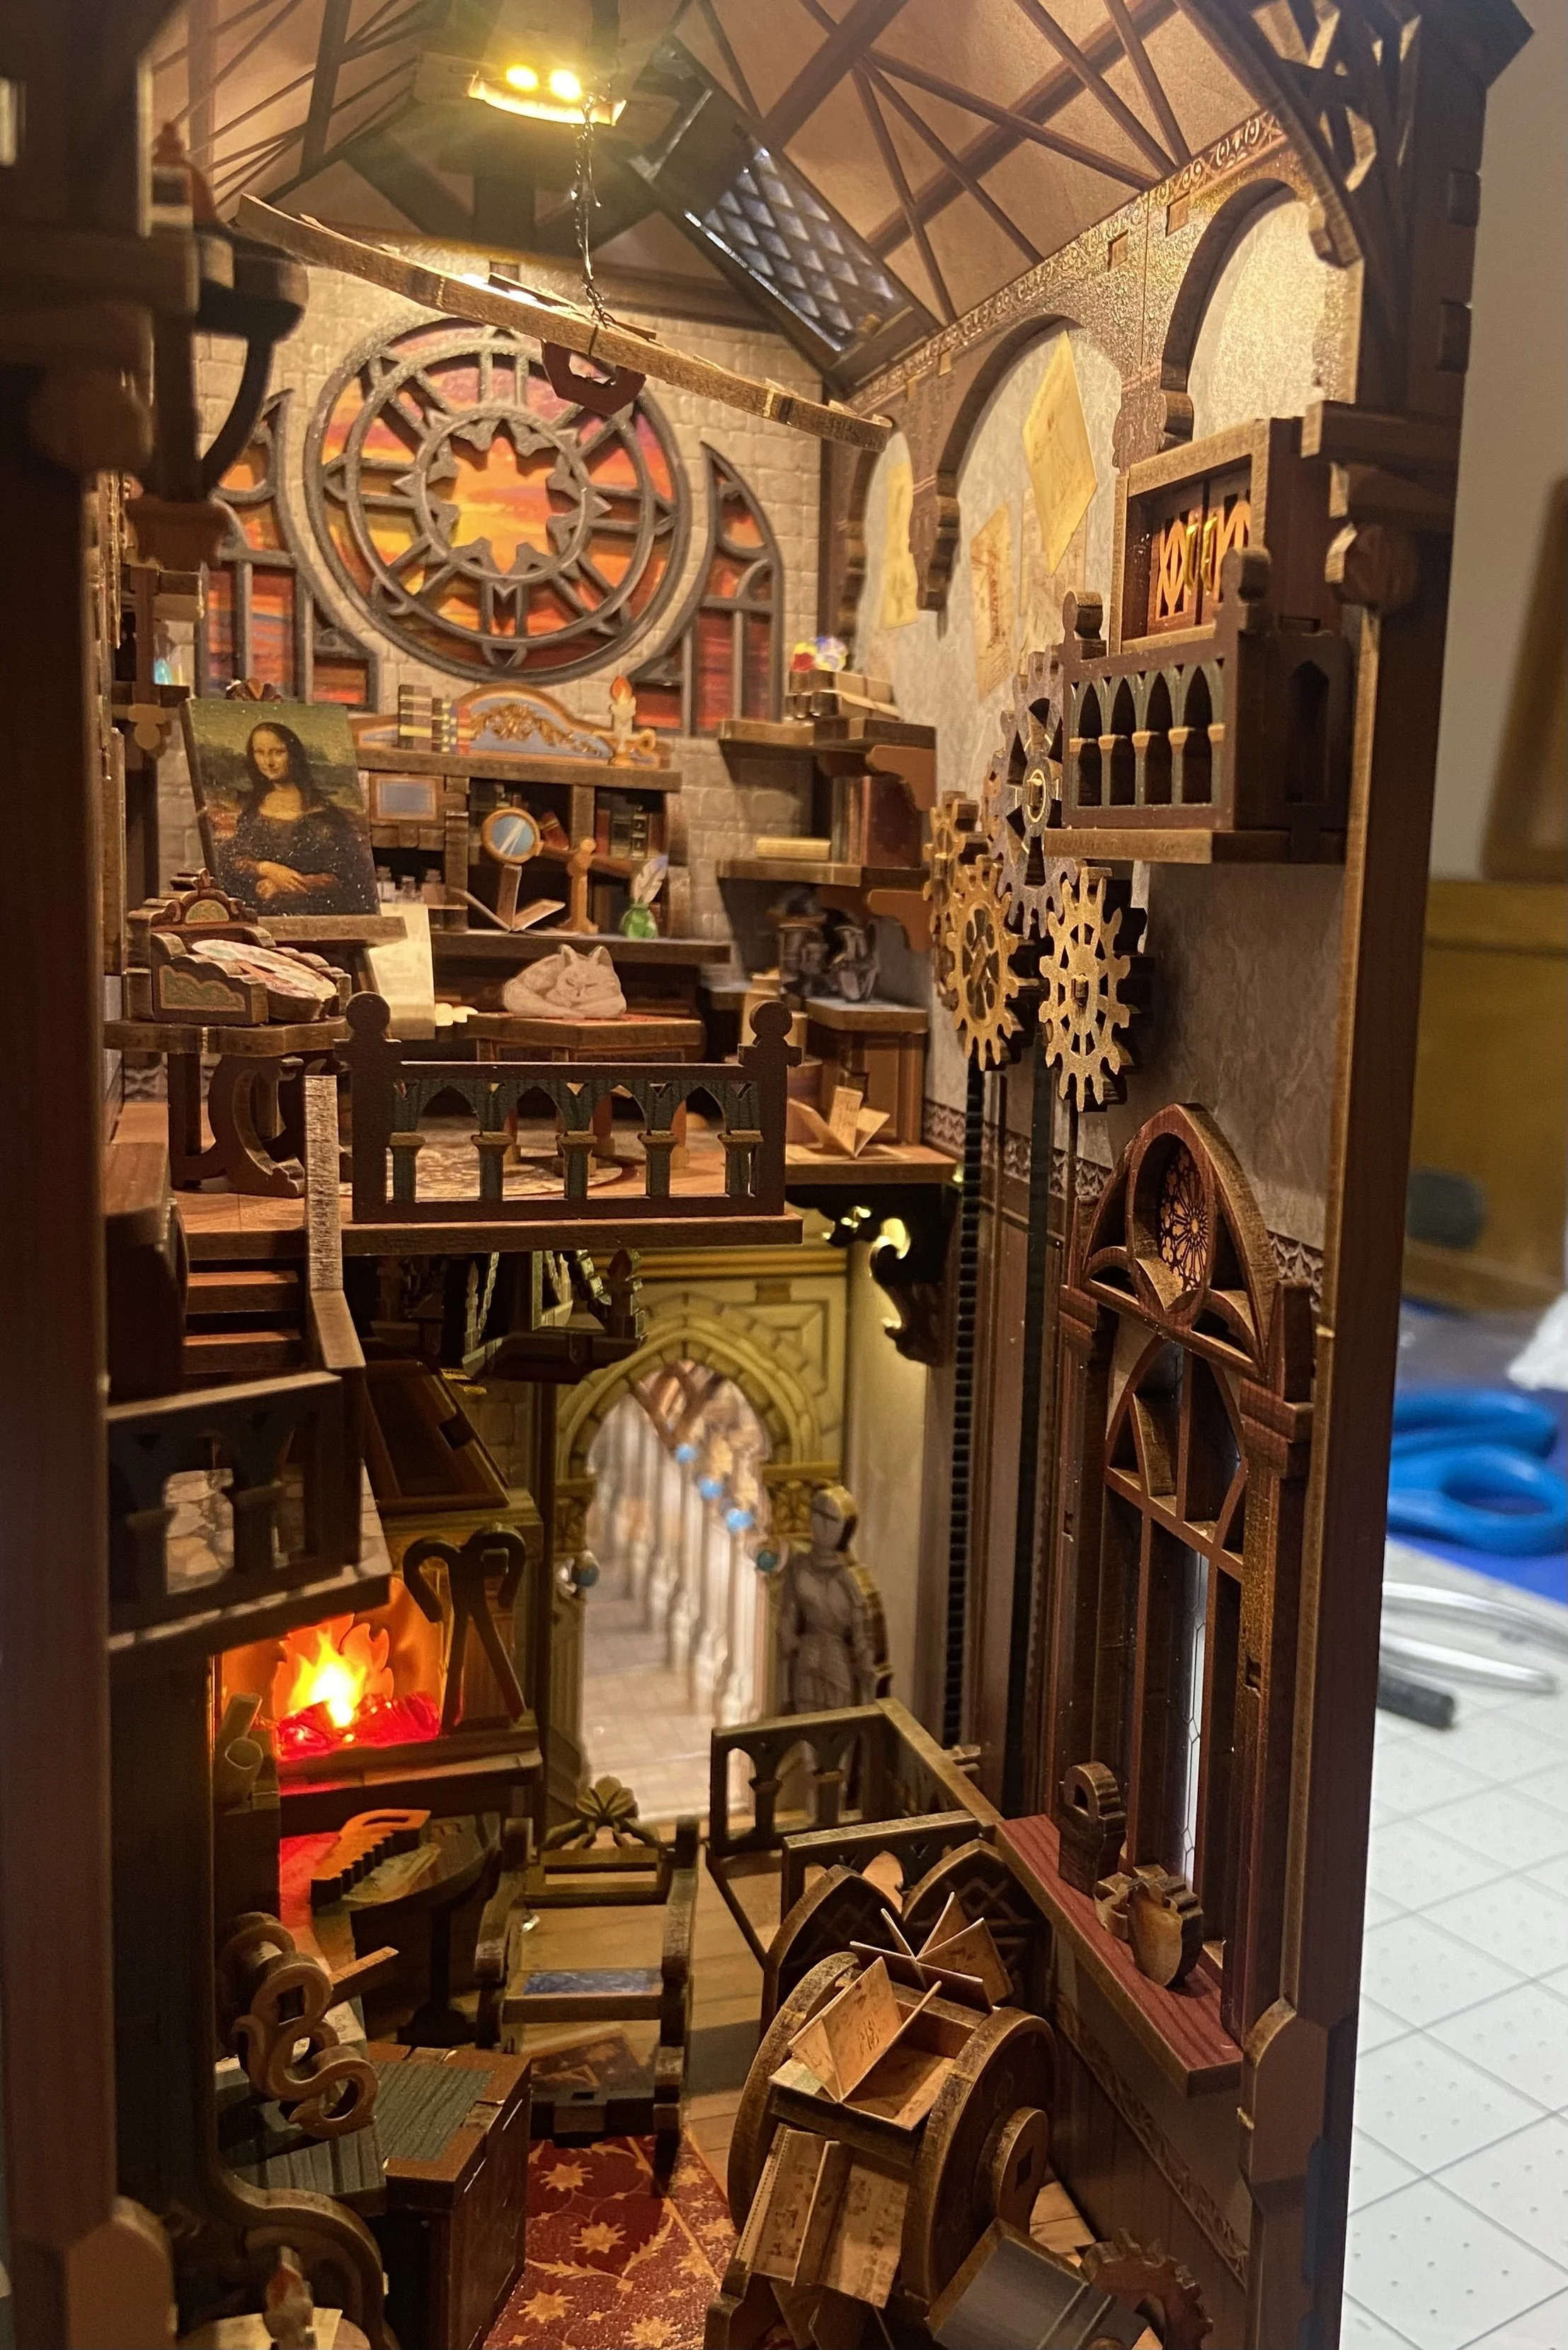
It’s now the third quarter of the year and I just finished my third book nook of the year. I have to say, this book nook budget plan is working out well! This time, it was a Leonardo da Vinci themed book nook and it was fabulous. I even almost made it through without any major errors. So close…
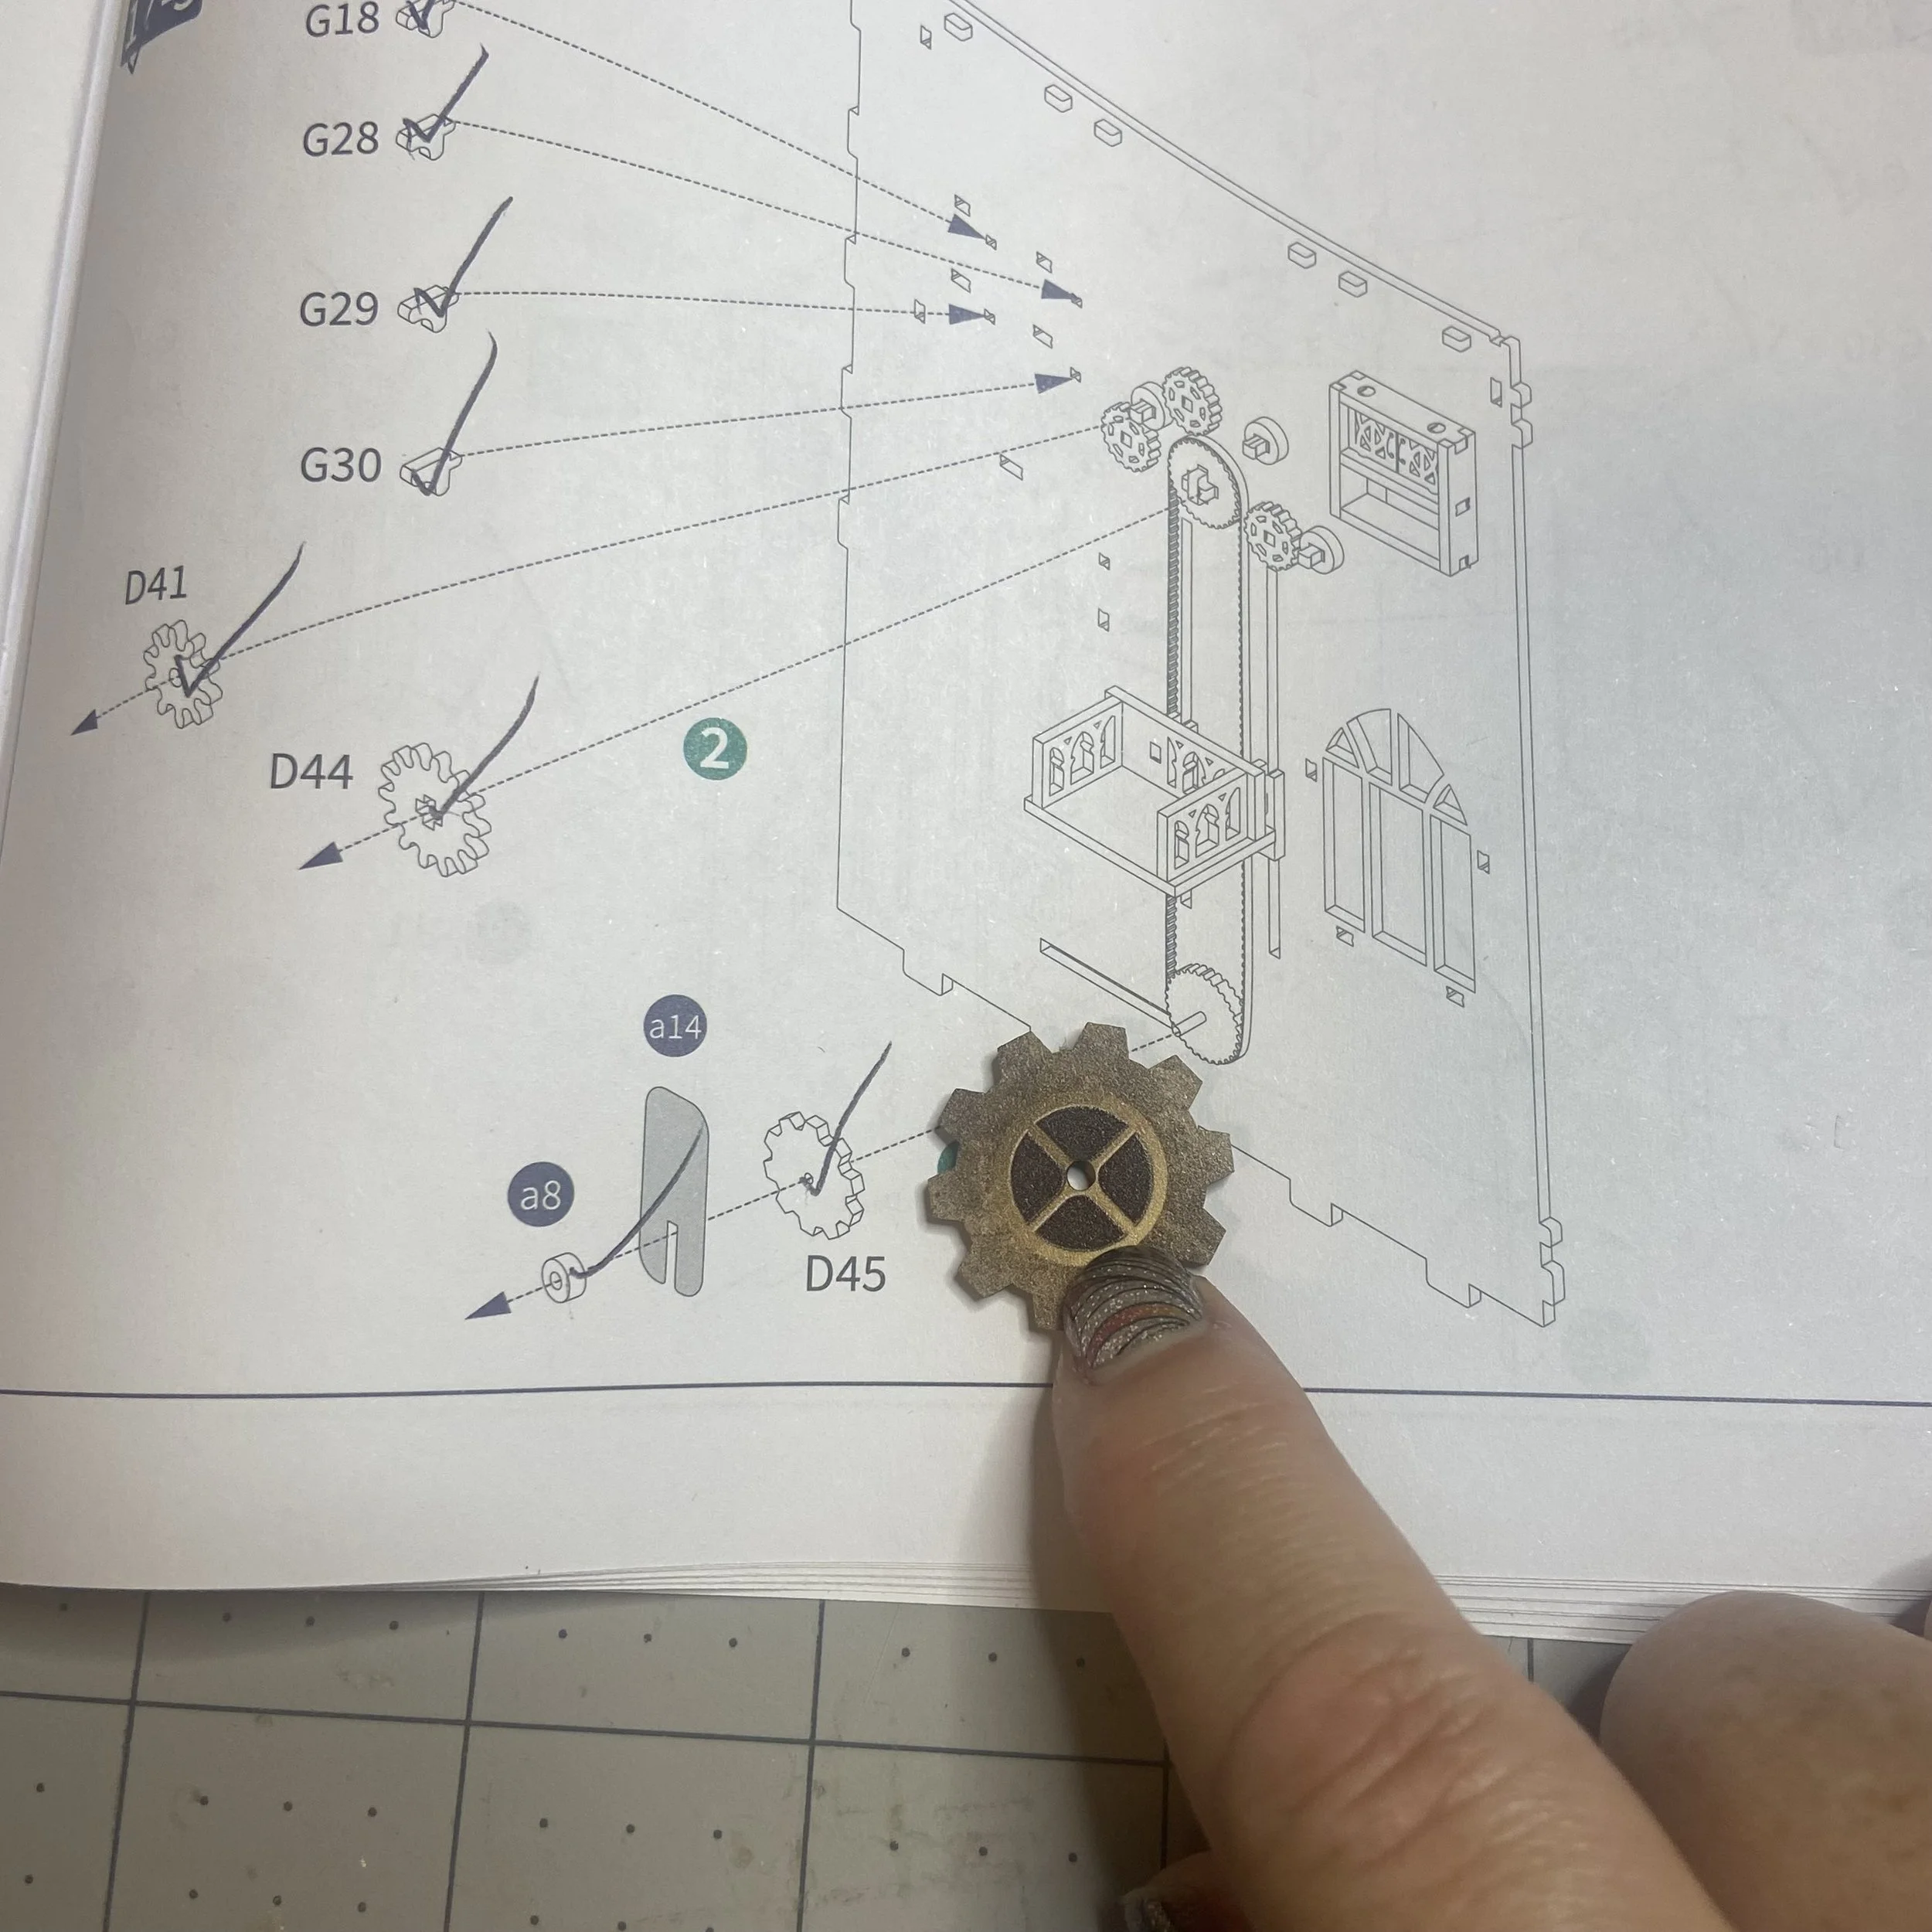
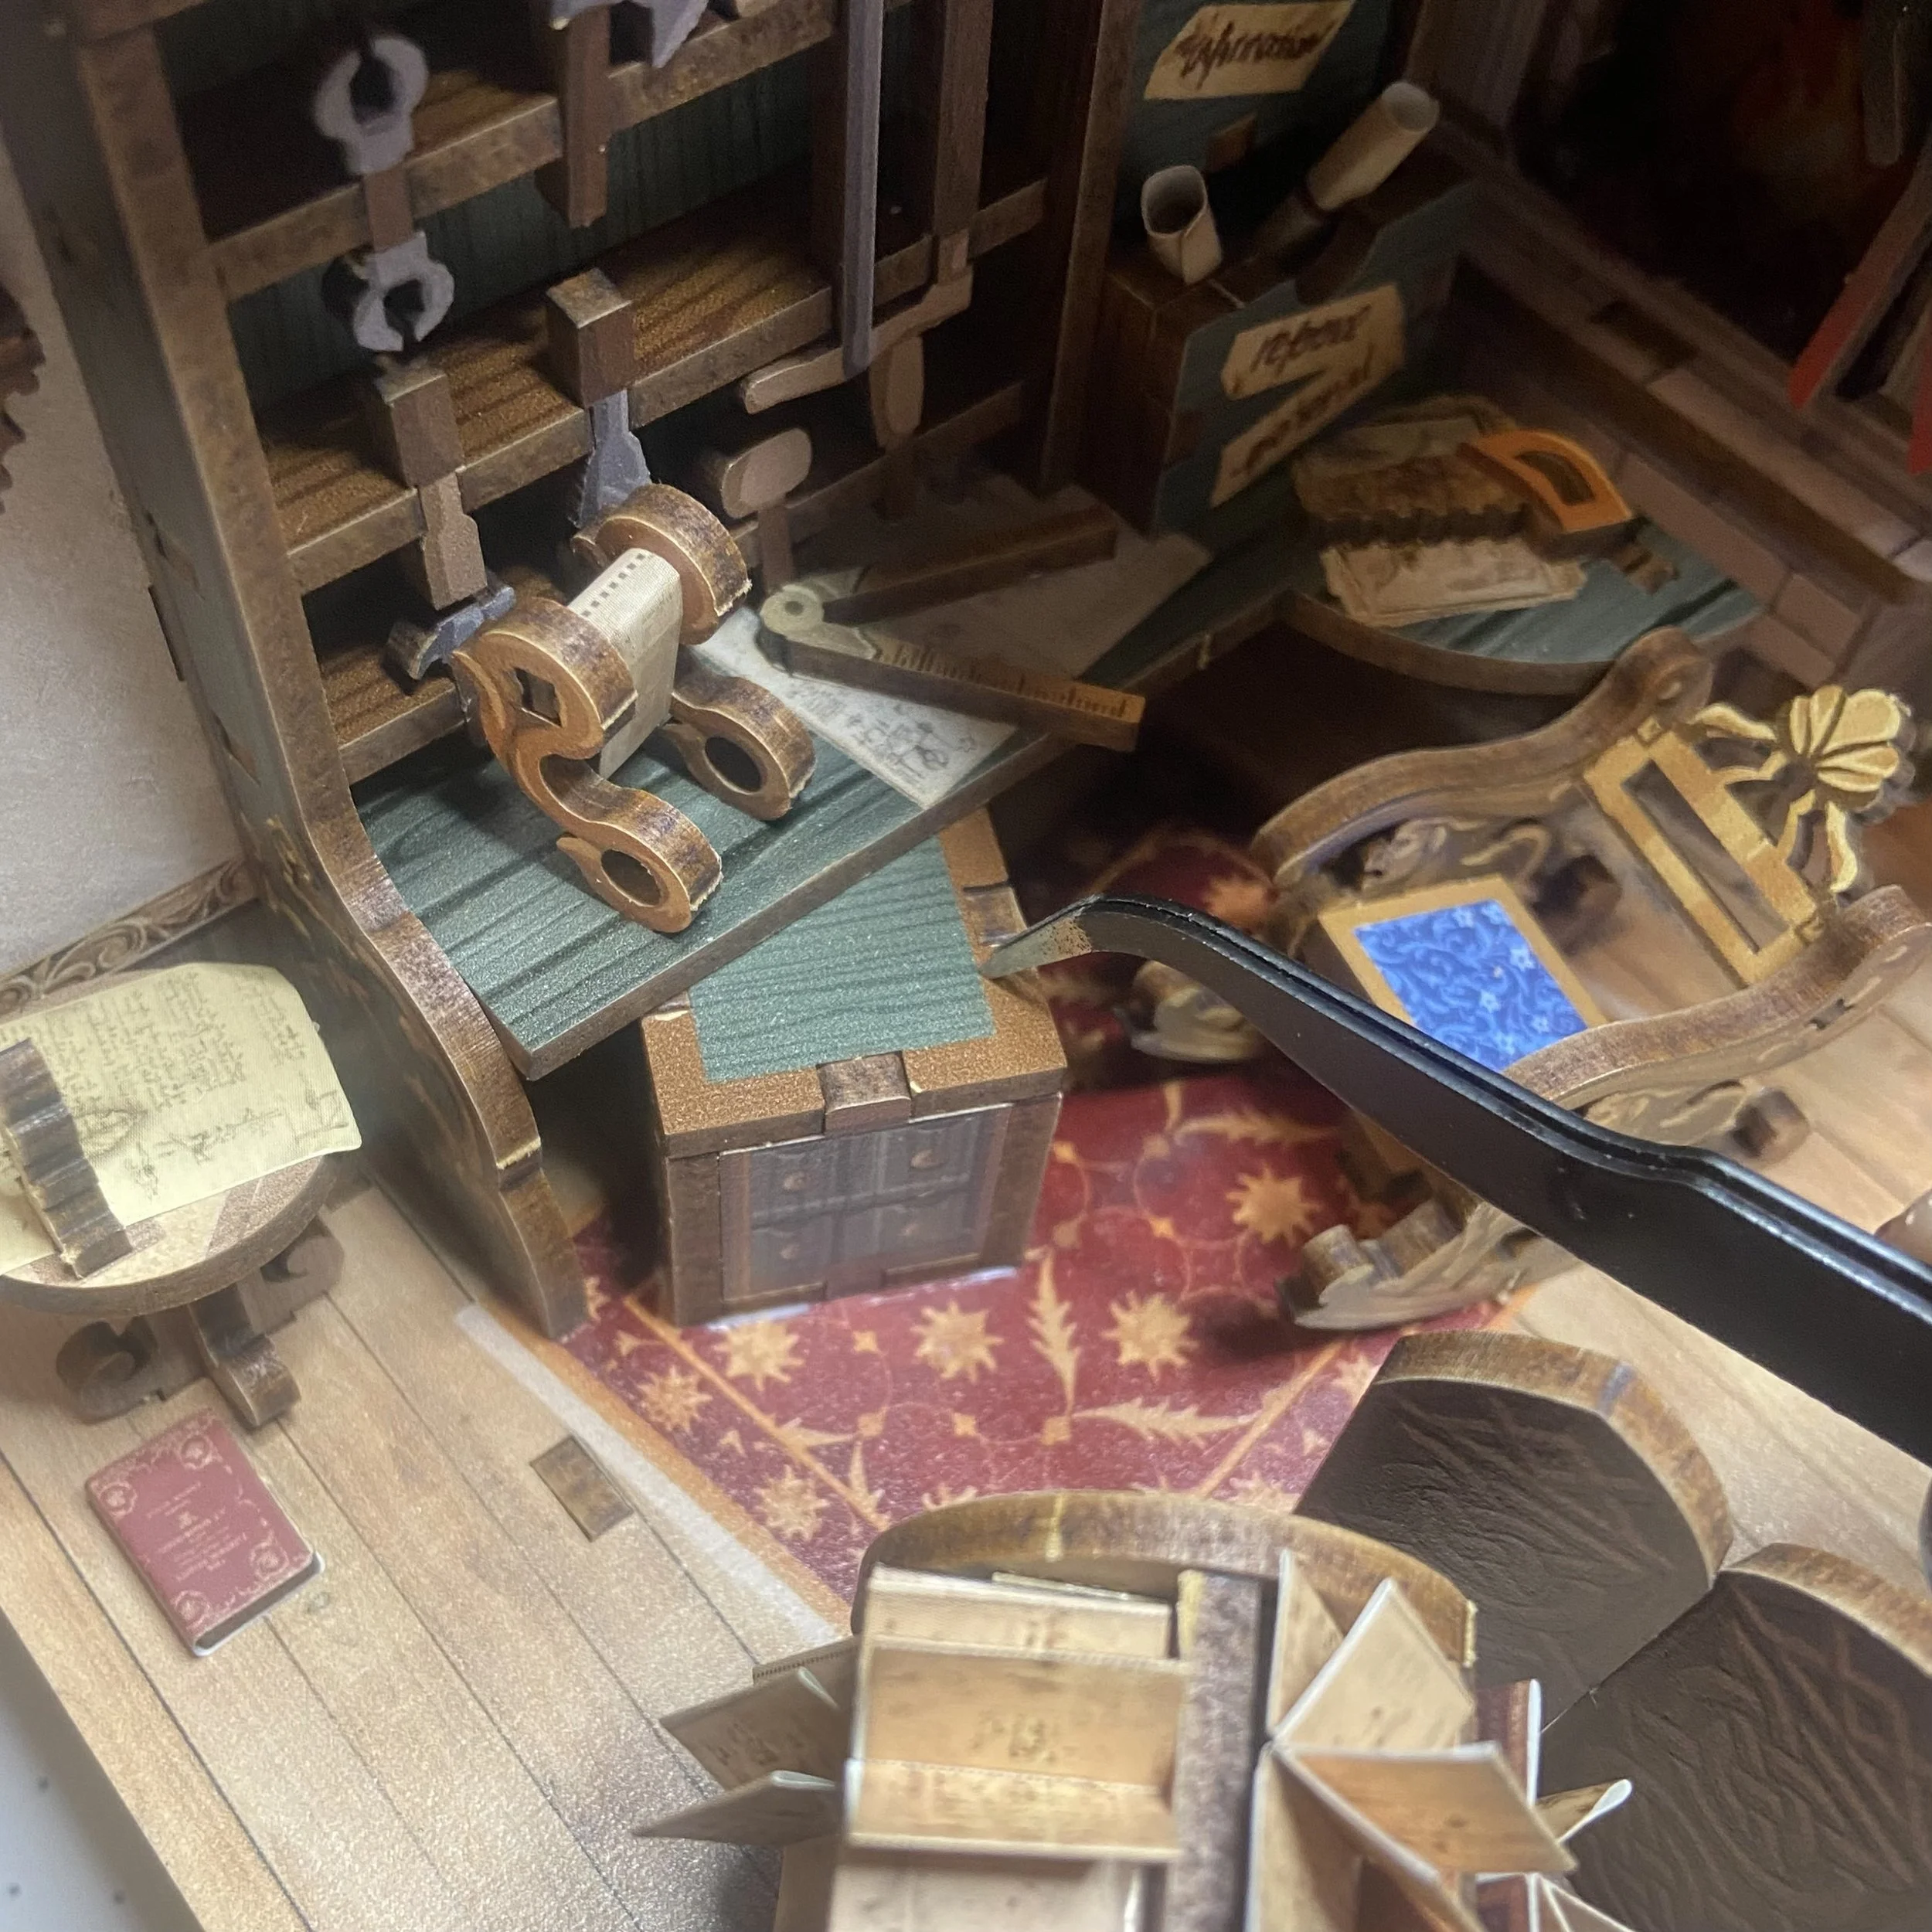
First, the instructions were light on words, but still sufficiently clear. I didn’t have a problem figuring out the orientation of the various pieces as they went together. Also, another nice (previously unseen in prior book nook assemblies) feature was that in each section where a piece was being built, for the most part, all the pieces came from the same sheet. In the example below right, you can see that assembly instruction 8-1 uses all pieces from sheet G. In other kits, a single assembly instruction might include pieces from alllll the sheets.
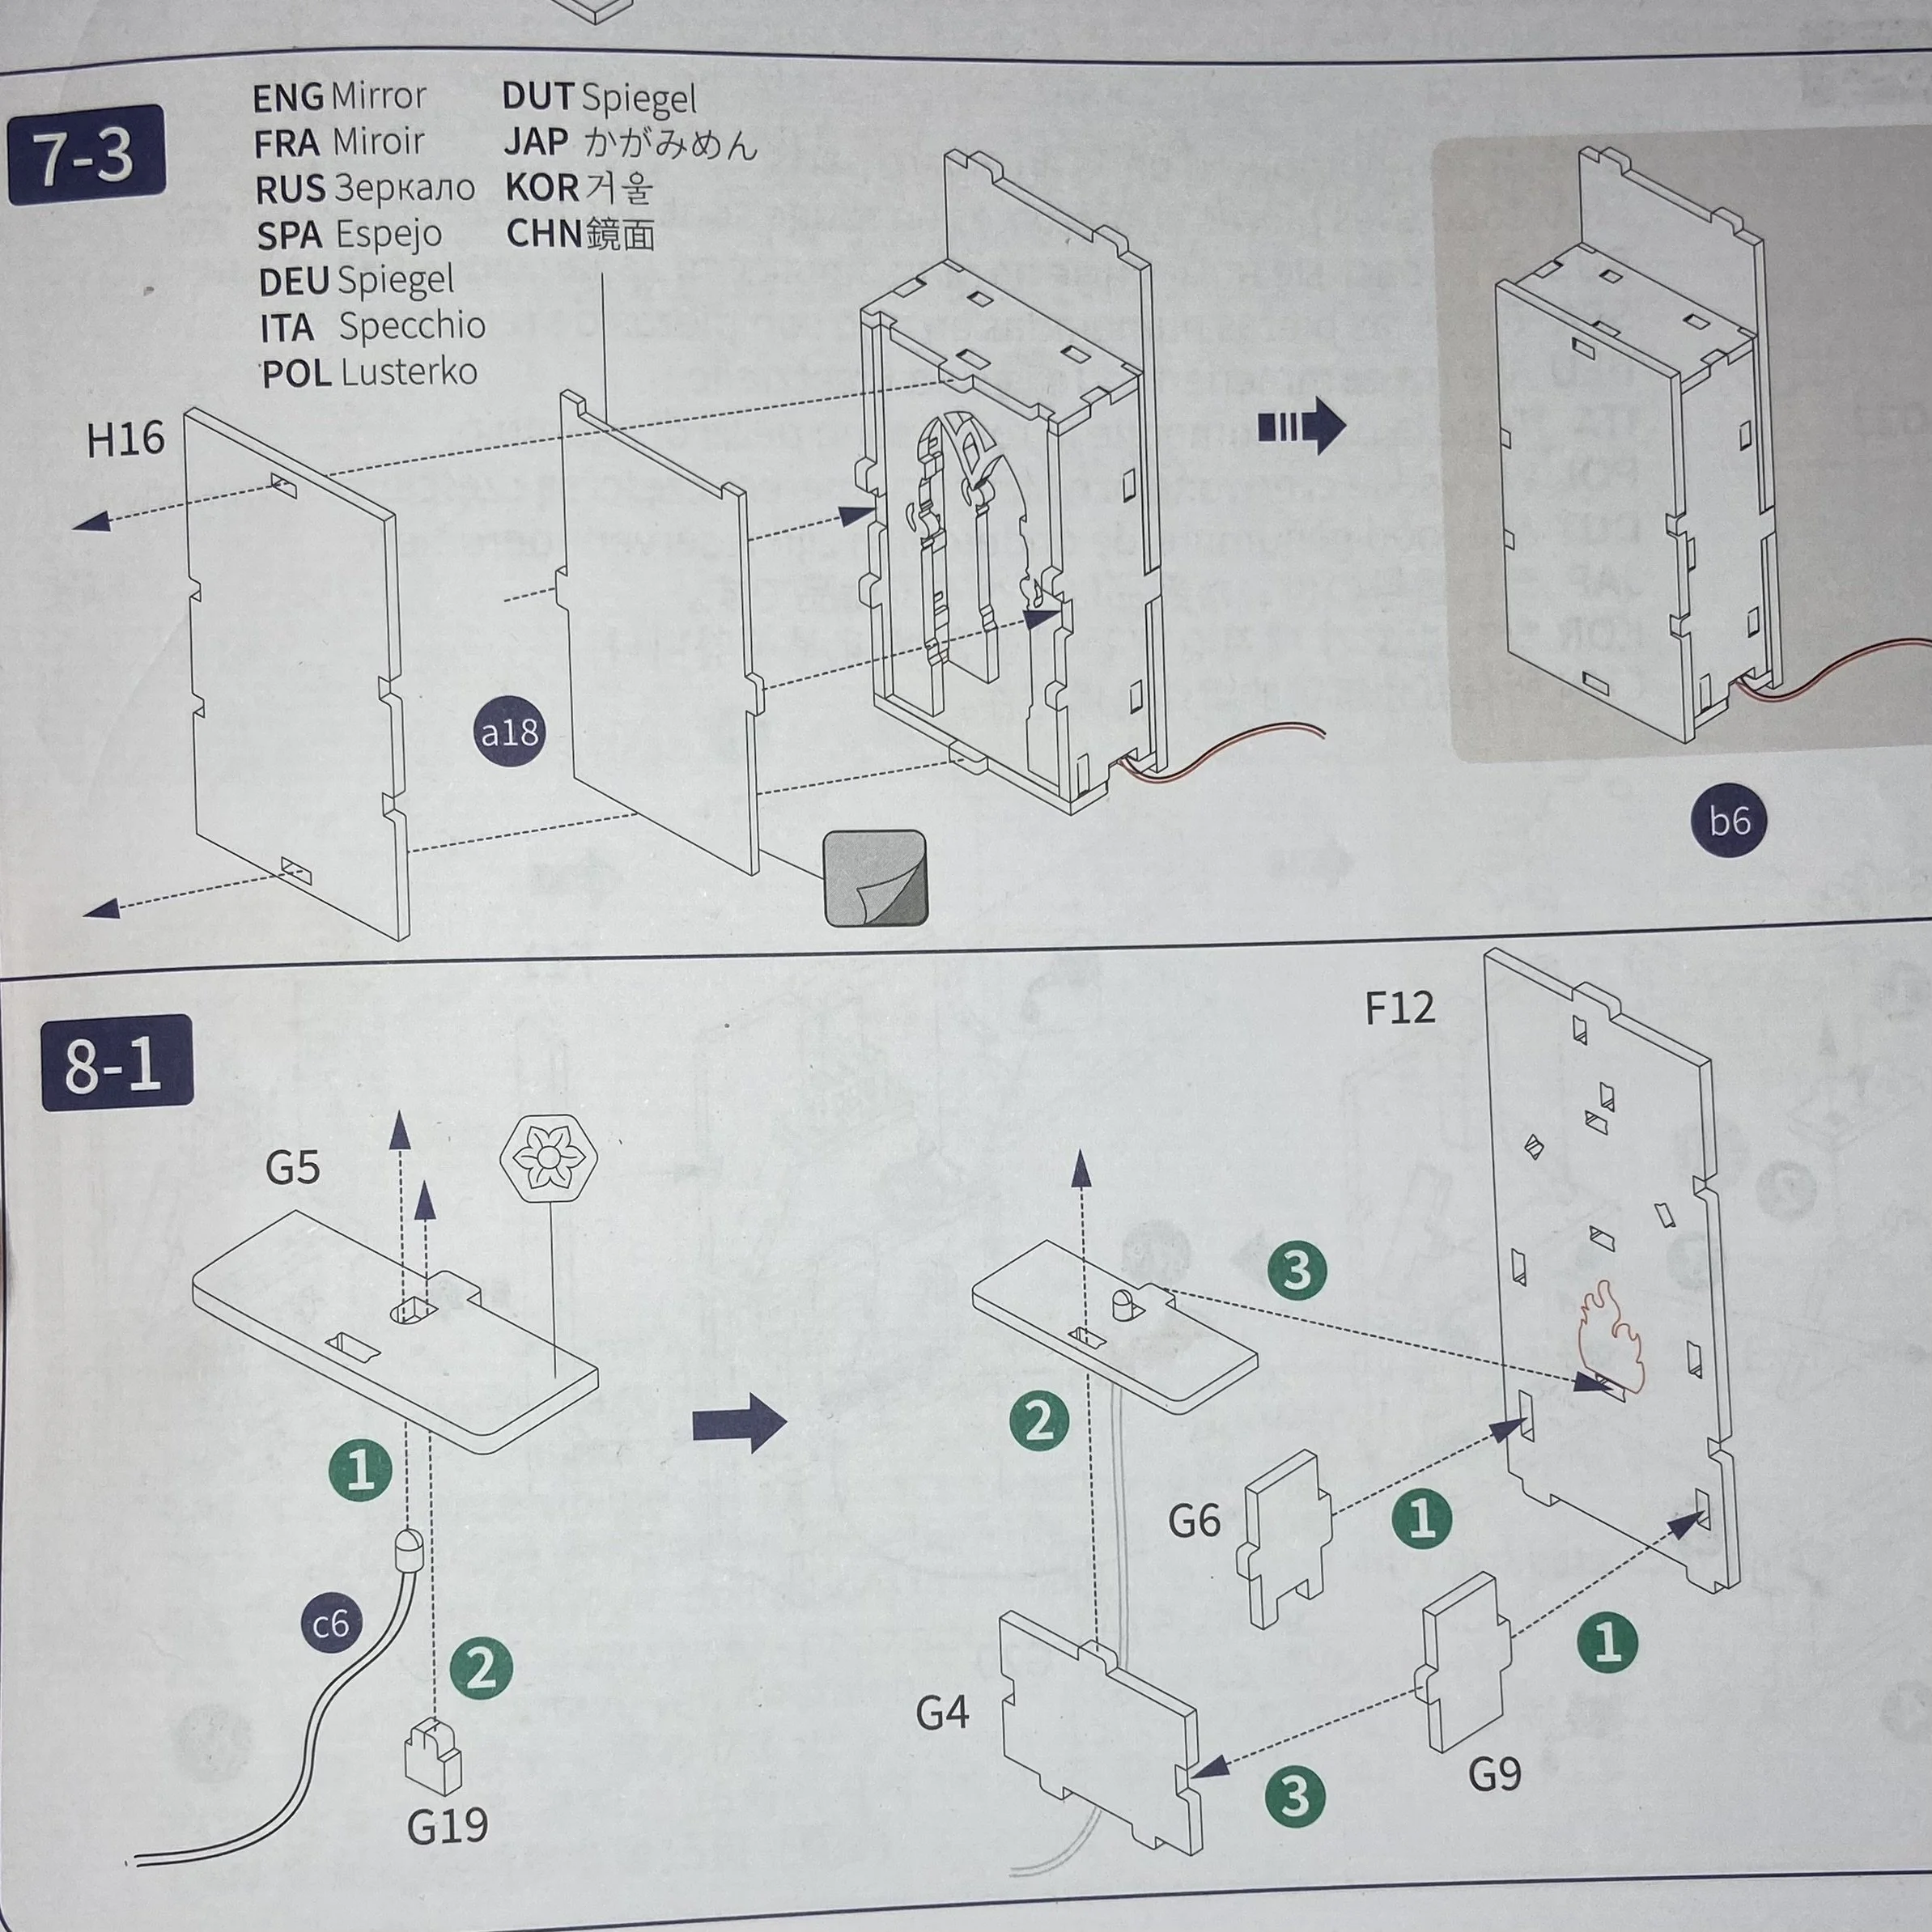
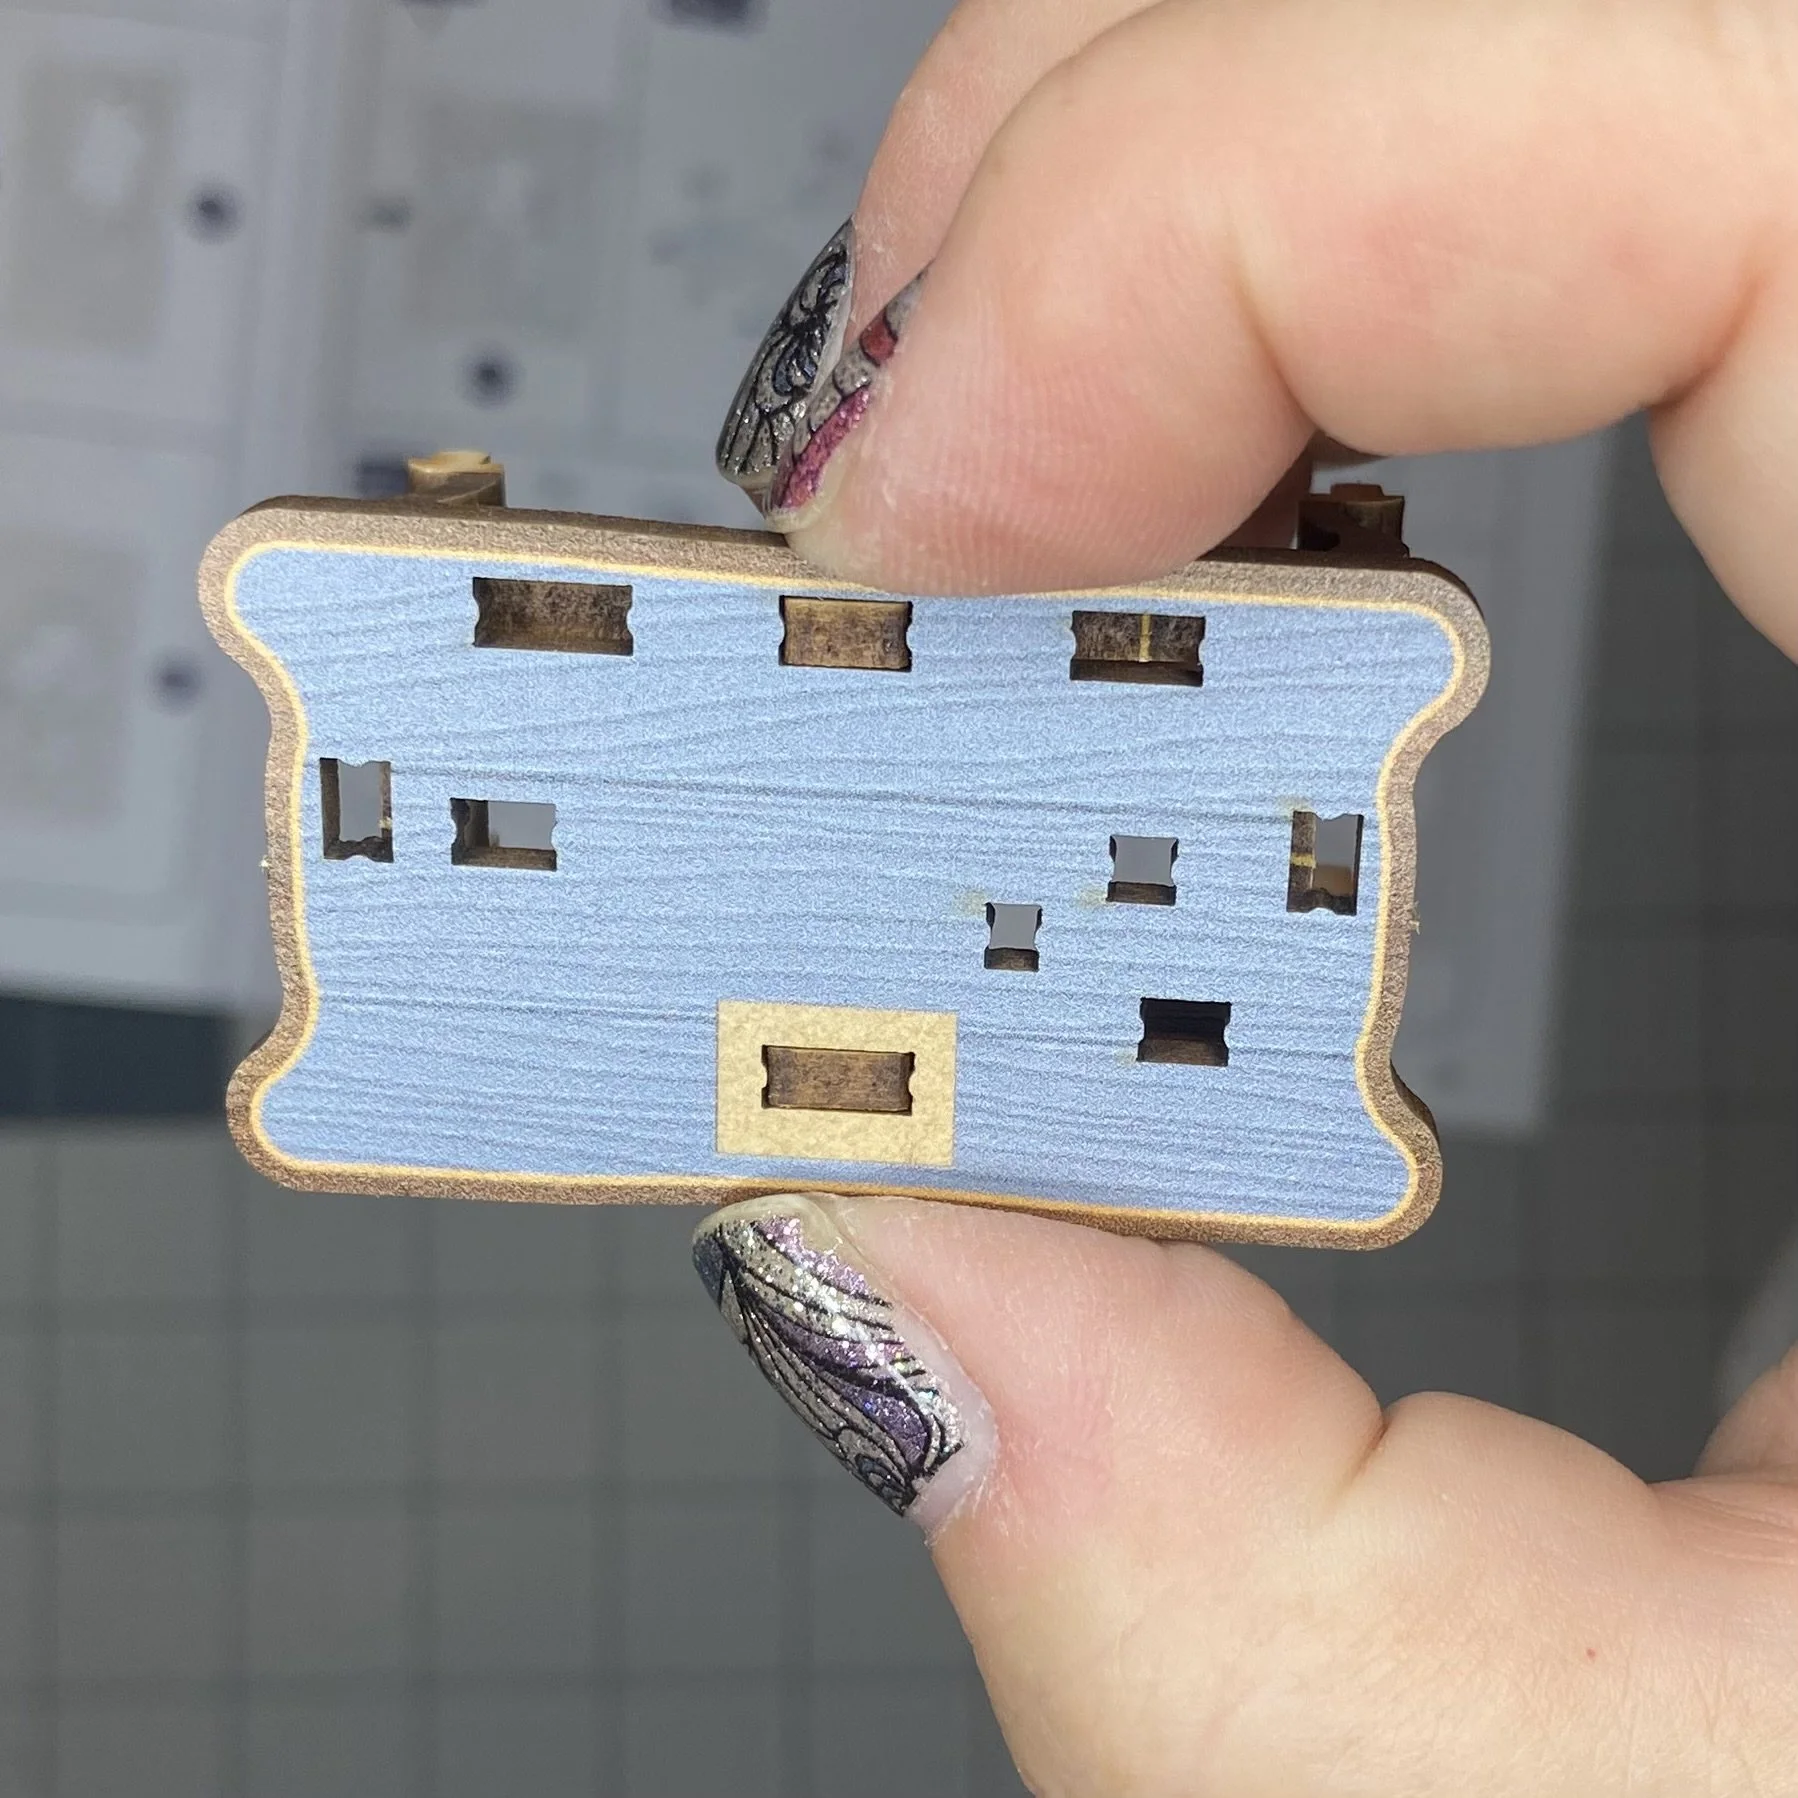
Another nifty feature is that in many cases, the position of various pieces was designated by the size of their notches. In the picture here, you can see the top of a table…on the upper edge, the opening is smaller than the mirror opening on the bottom edge (with wood-colored rim around it). This again is a feature I’ve not previously encountered in a book nook and it was fabulous.
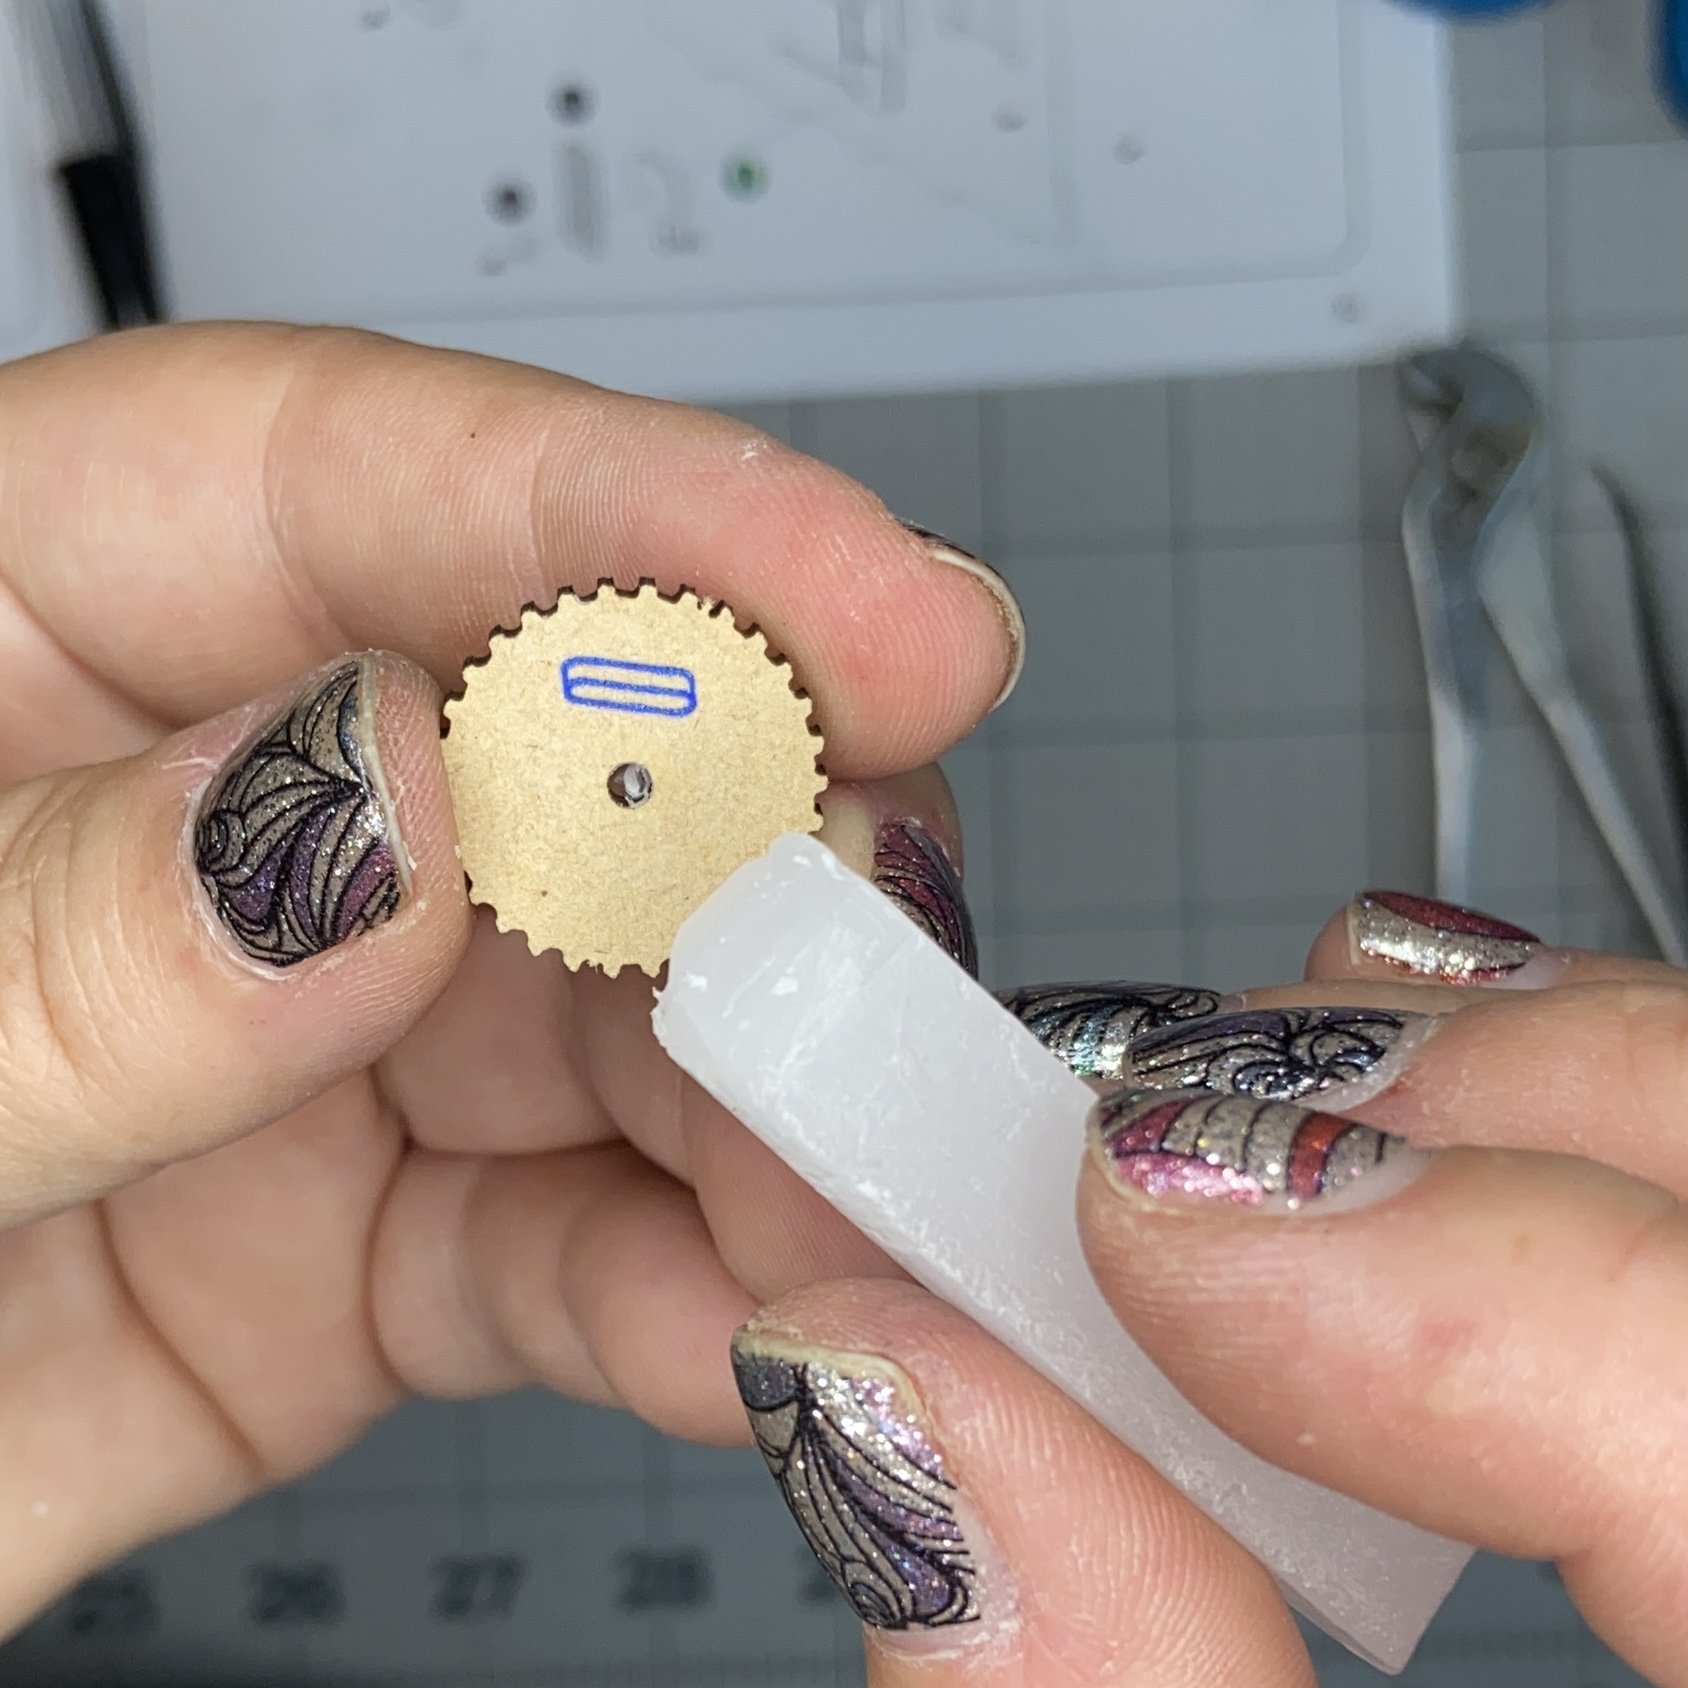
This book nook had some moving parts, so as a sort of lubrication, the kit included a stick of wax, with clear indications in the written directions and also on the piece itself where wax needed to be applied. Additionally, there were lots of larger pieces that had imprints of where smaller pieces needed to be added.
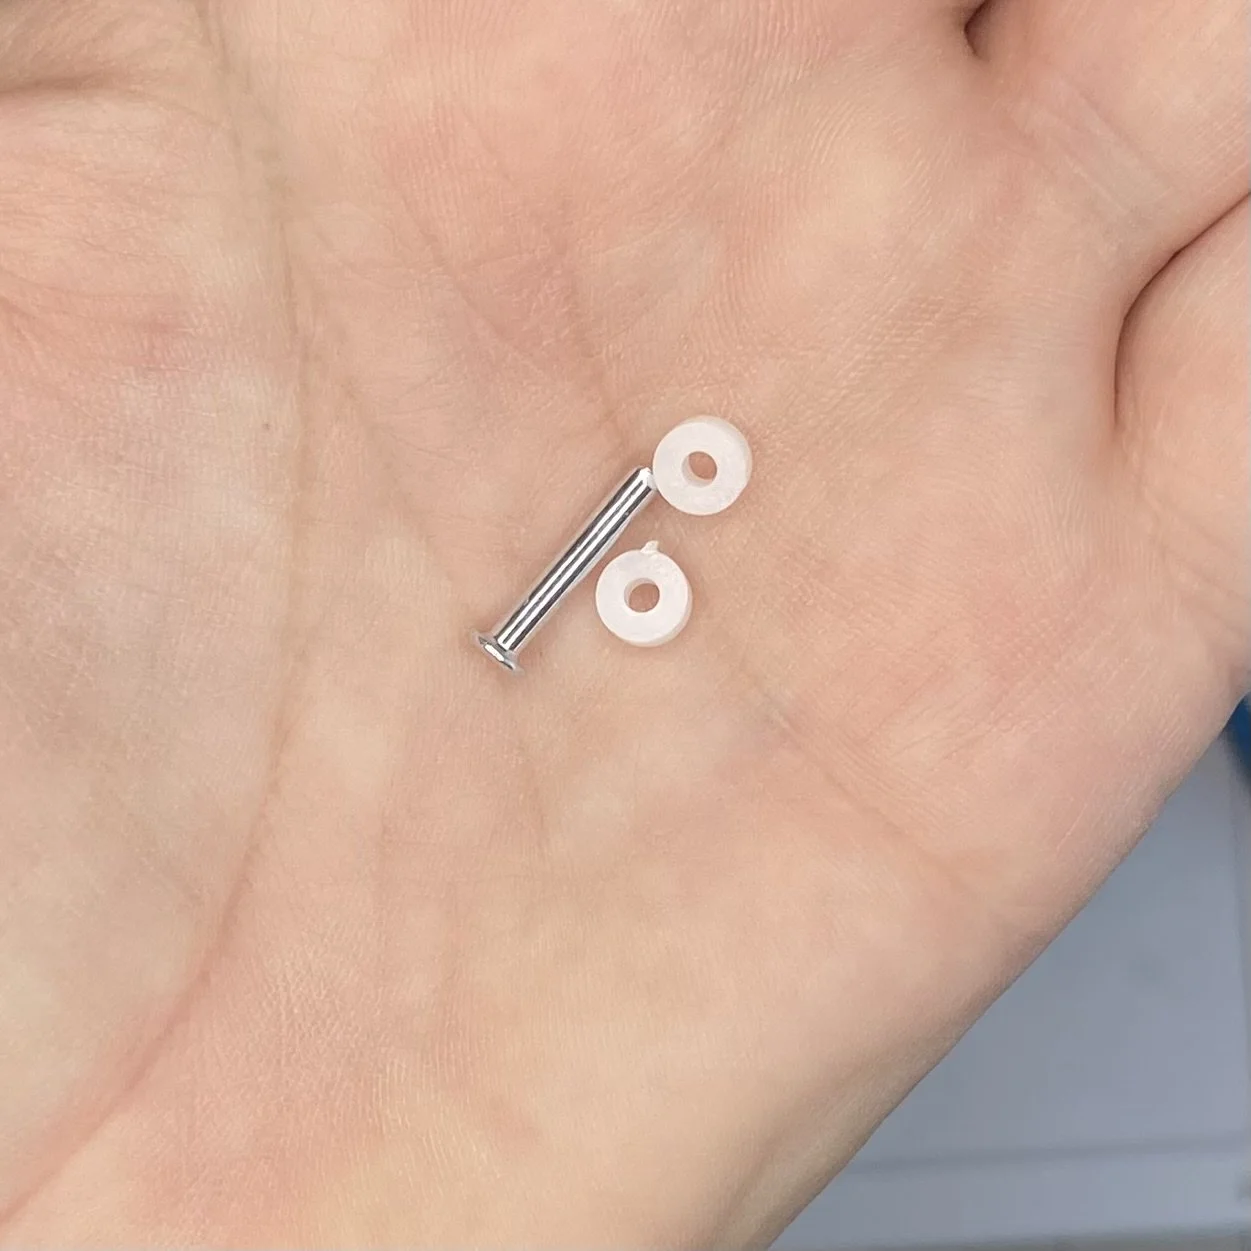
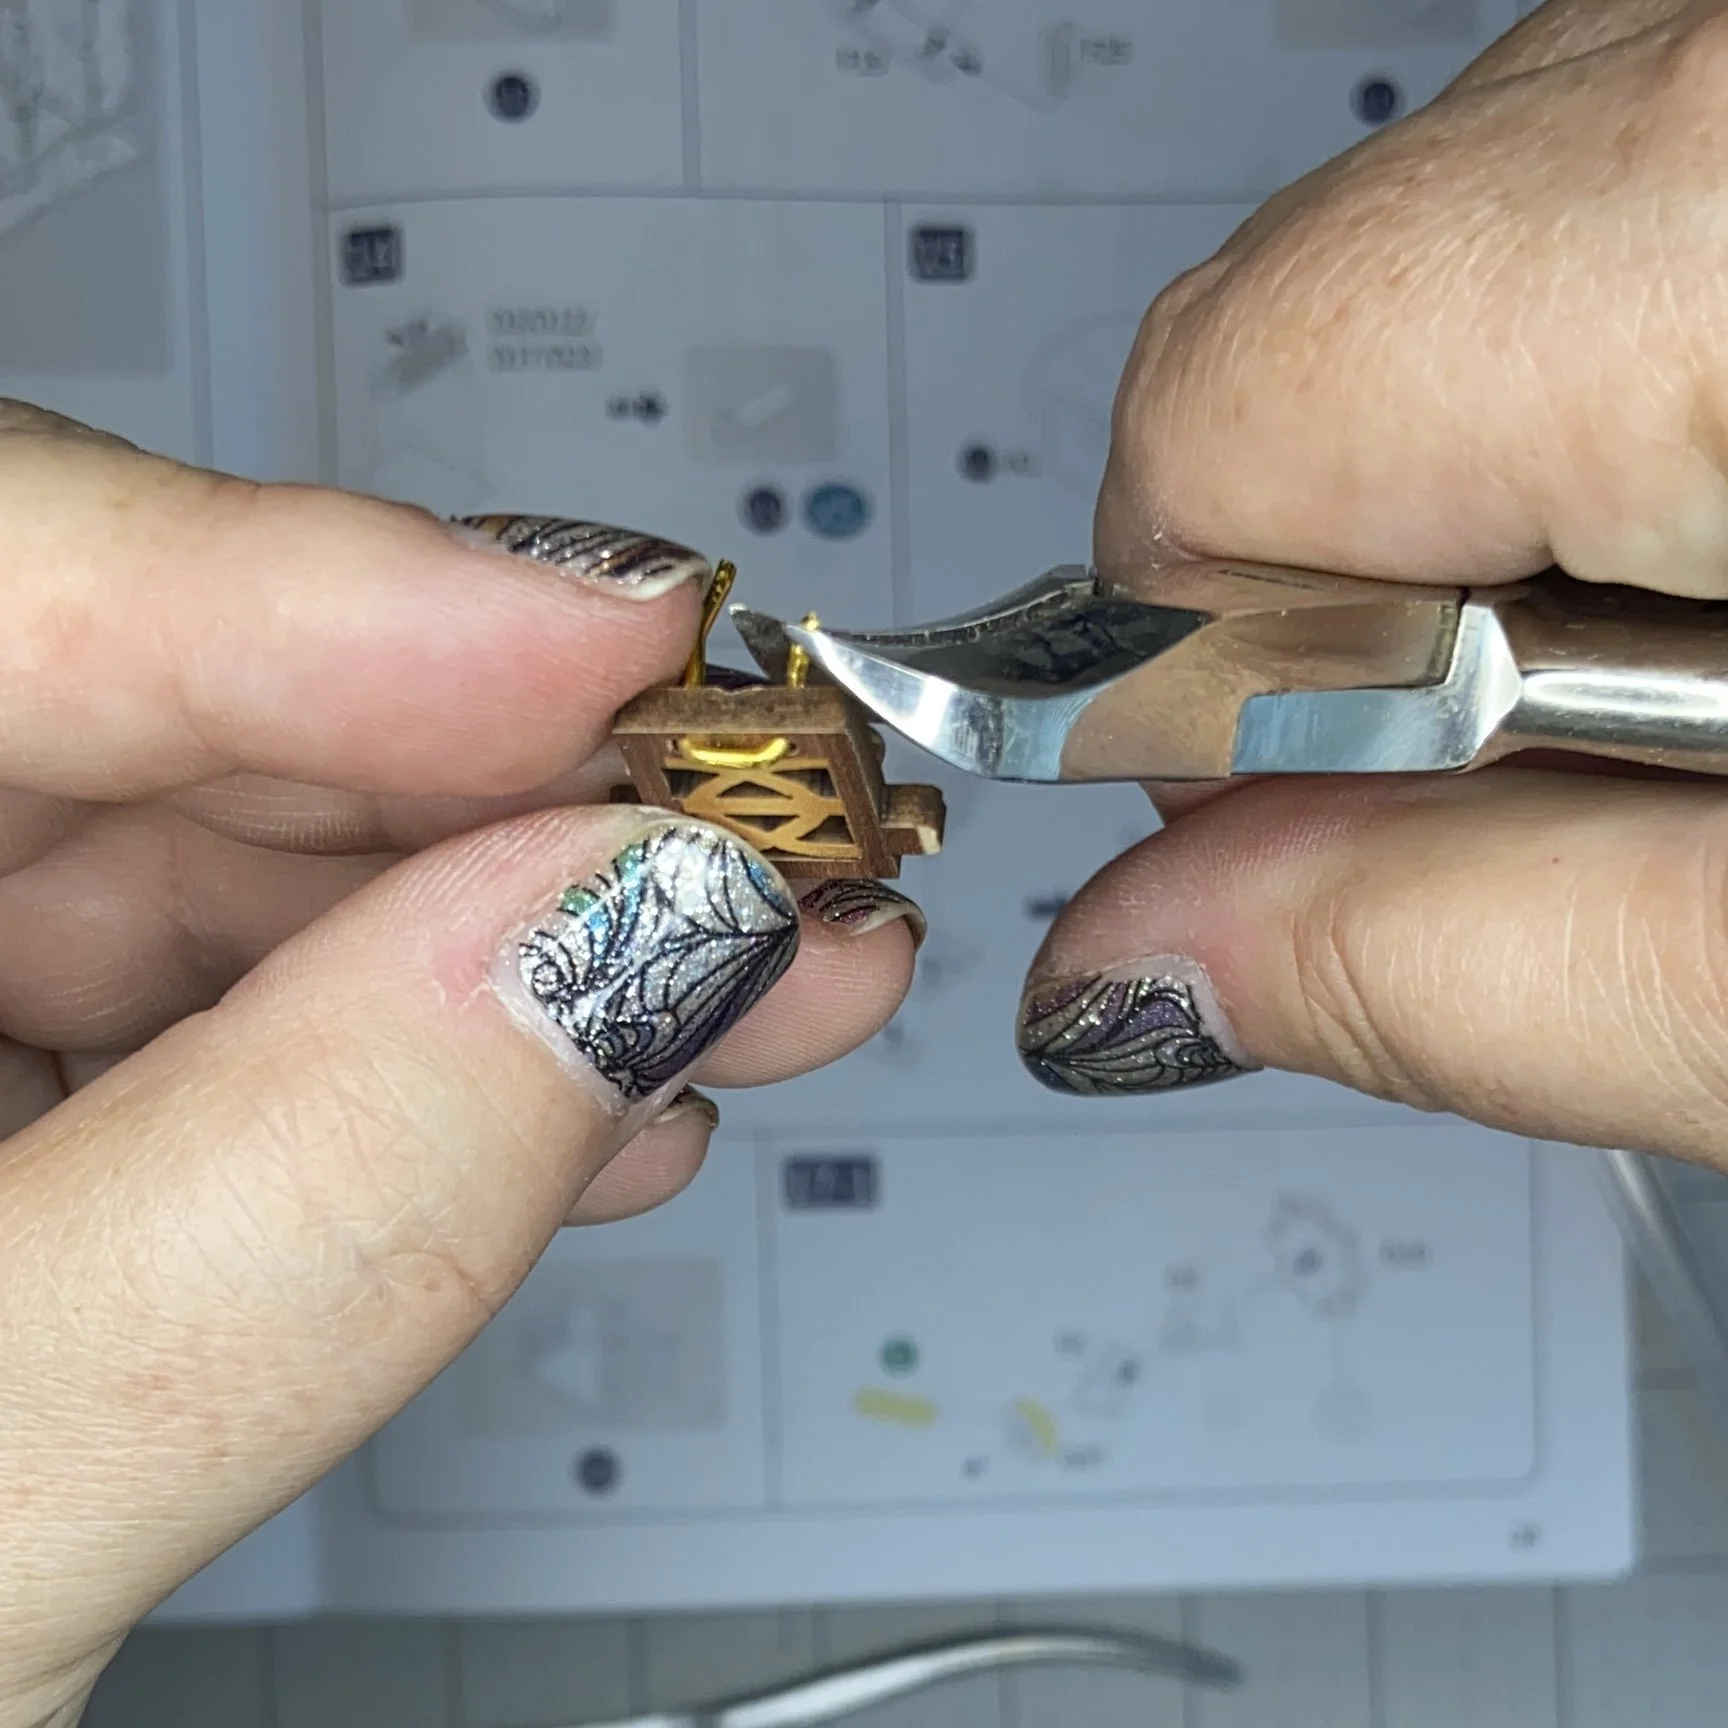
In most cases where working gears (rather than just decorative gears) were required, they were held in place with a metal pin that had a head on one end and then the other end would have to be secured by some little plastic rings. This wasn’t difficult, but those little rings were lively. The very first one I picked up leapt out of my hand and is still hiding somewhere in the studio. Since I now had one plastic ring less than metal pins, I cleverly concocted an alternate plan. I would finish off the cottage cheese in the fridge, then clean the lid, cut a tiny circle out of it with a hole punch, and then poke a hole in that with my sewing awl. However, my cunning plan was never tested because this kit had extra of everything. In fact, there is a gear that I never used at all, even though it was not a duplicate. I suppose it’s possible that I missed something somewhere…
As a matter of fact, right after I wrote the above paragraph, I realized where that missing gear must belong…it should have gone against the working gear holding the rubber belt along the wall. That would have kept the rubber belt from slipping off. However, at this point, I’d have to take off one of the walls to fix that, and I just don’t see myself doing that, since I got the walls to go together so beautifully.

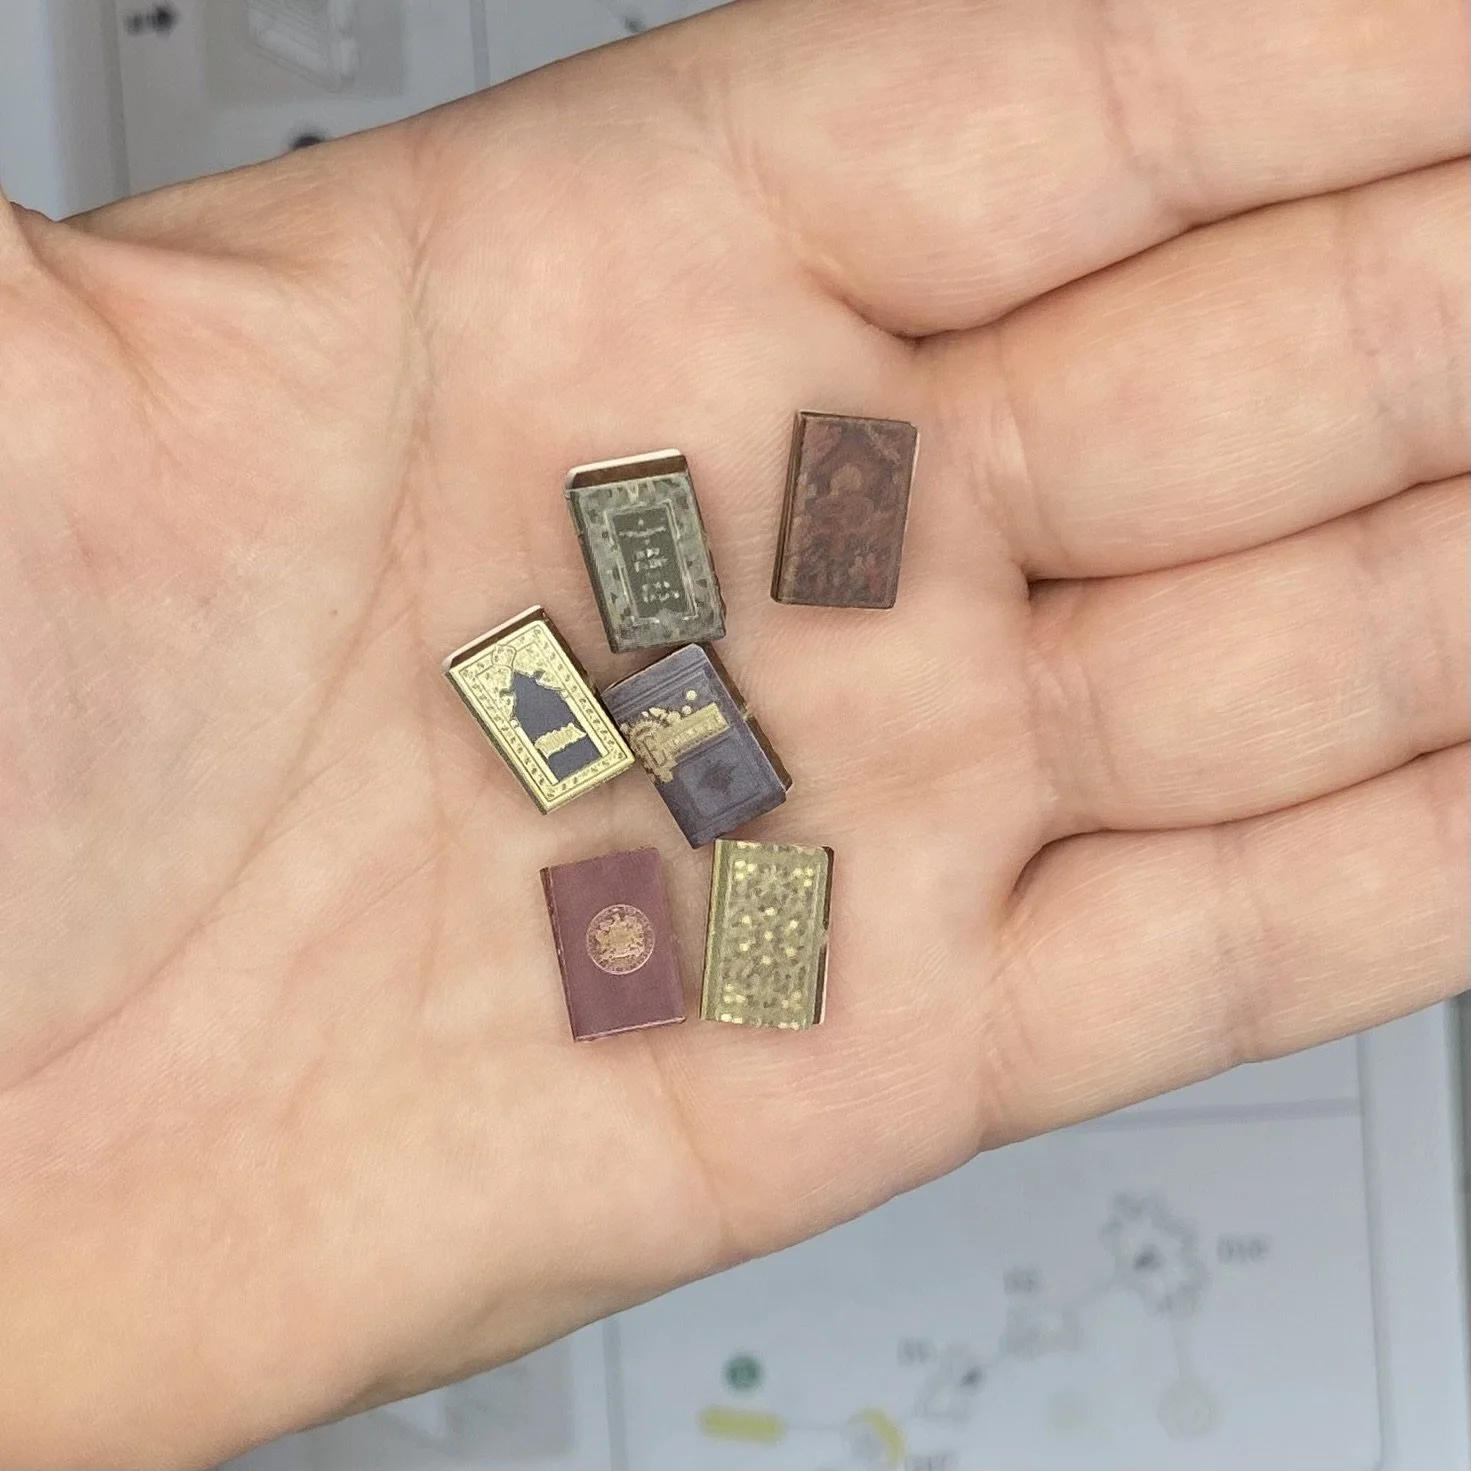
There was the usual assembly of tiny books…this kit had stickers, so the books went together fast, since I didn’t need to use any glue.
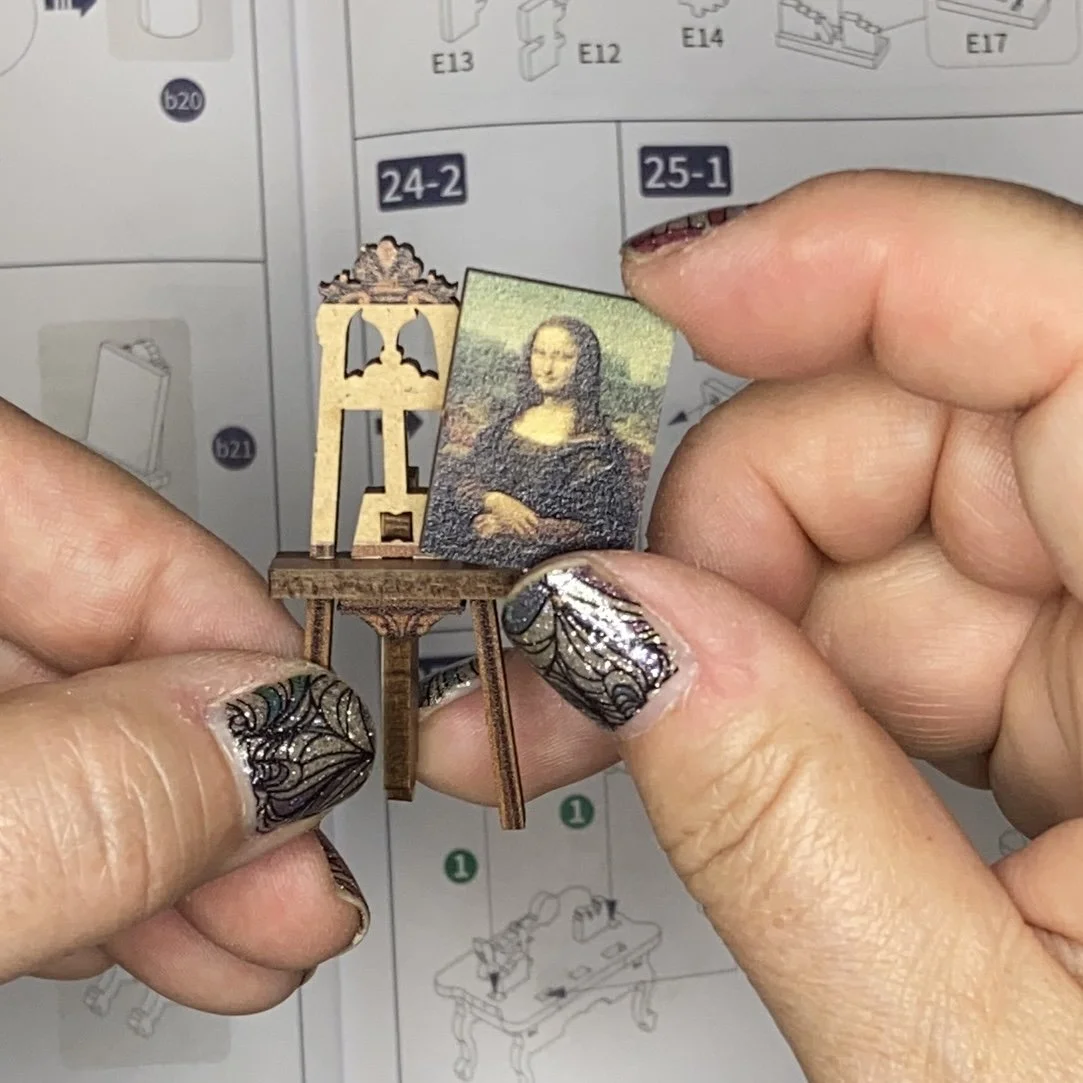
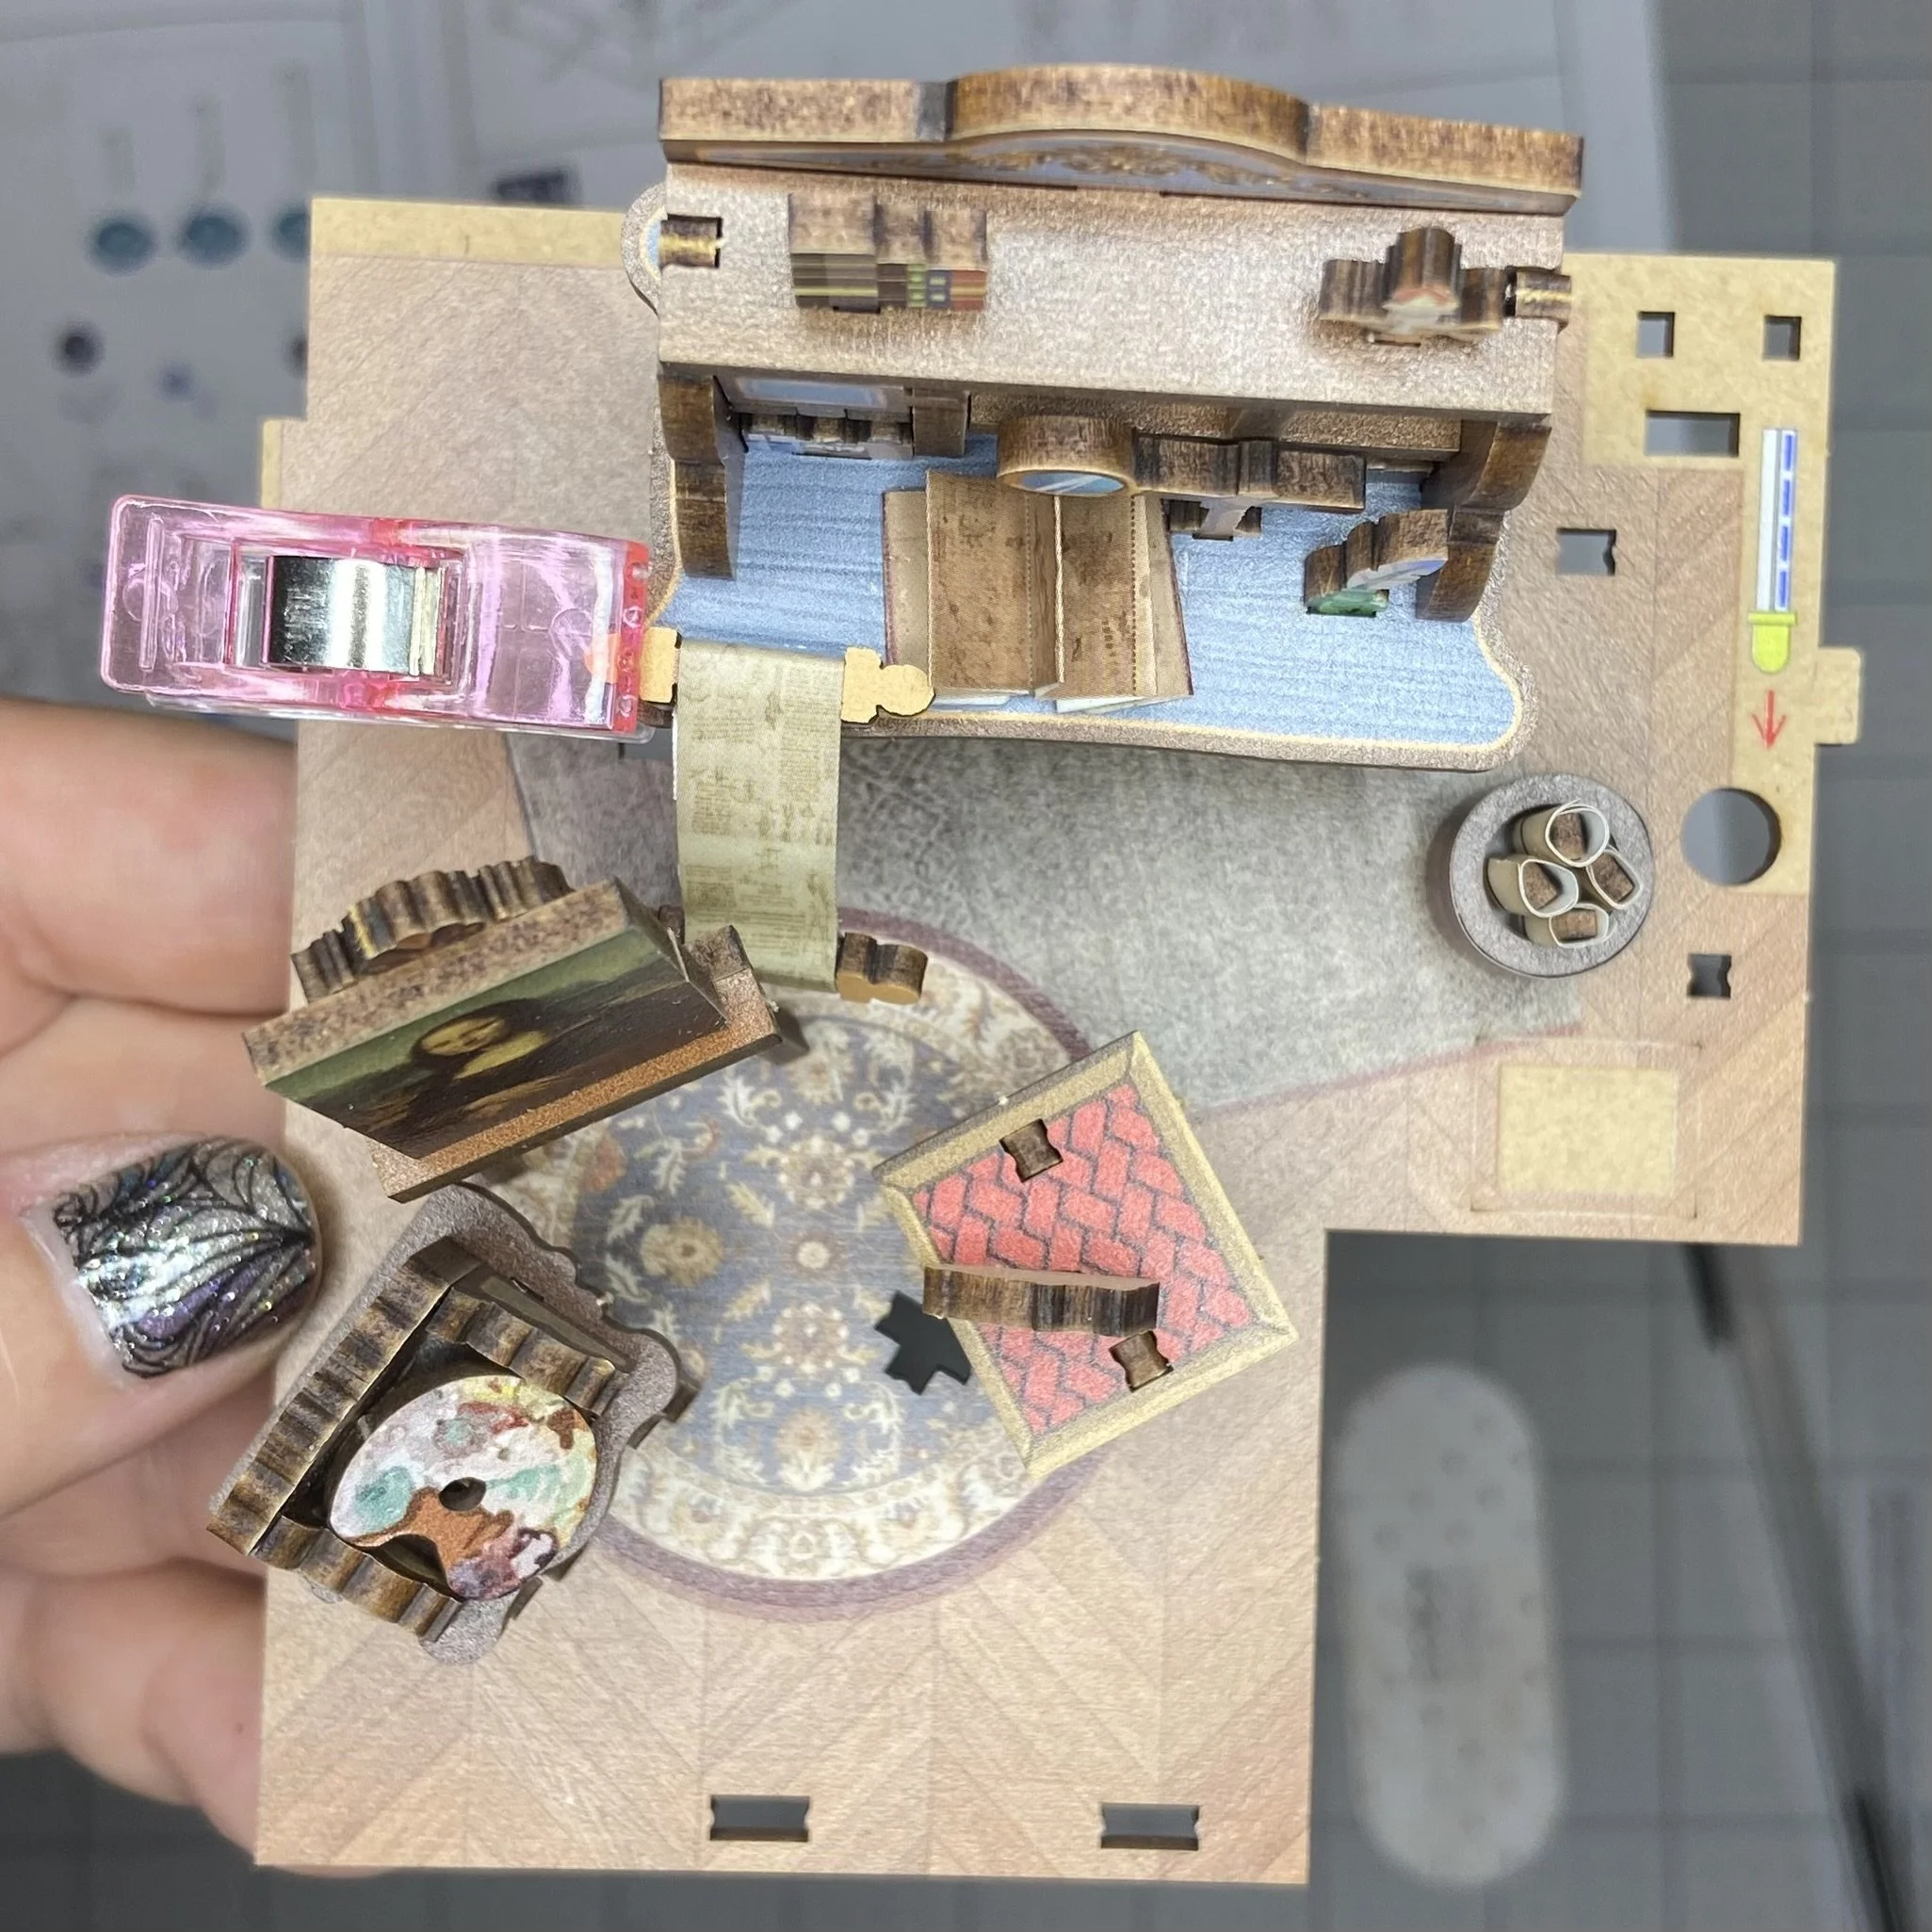
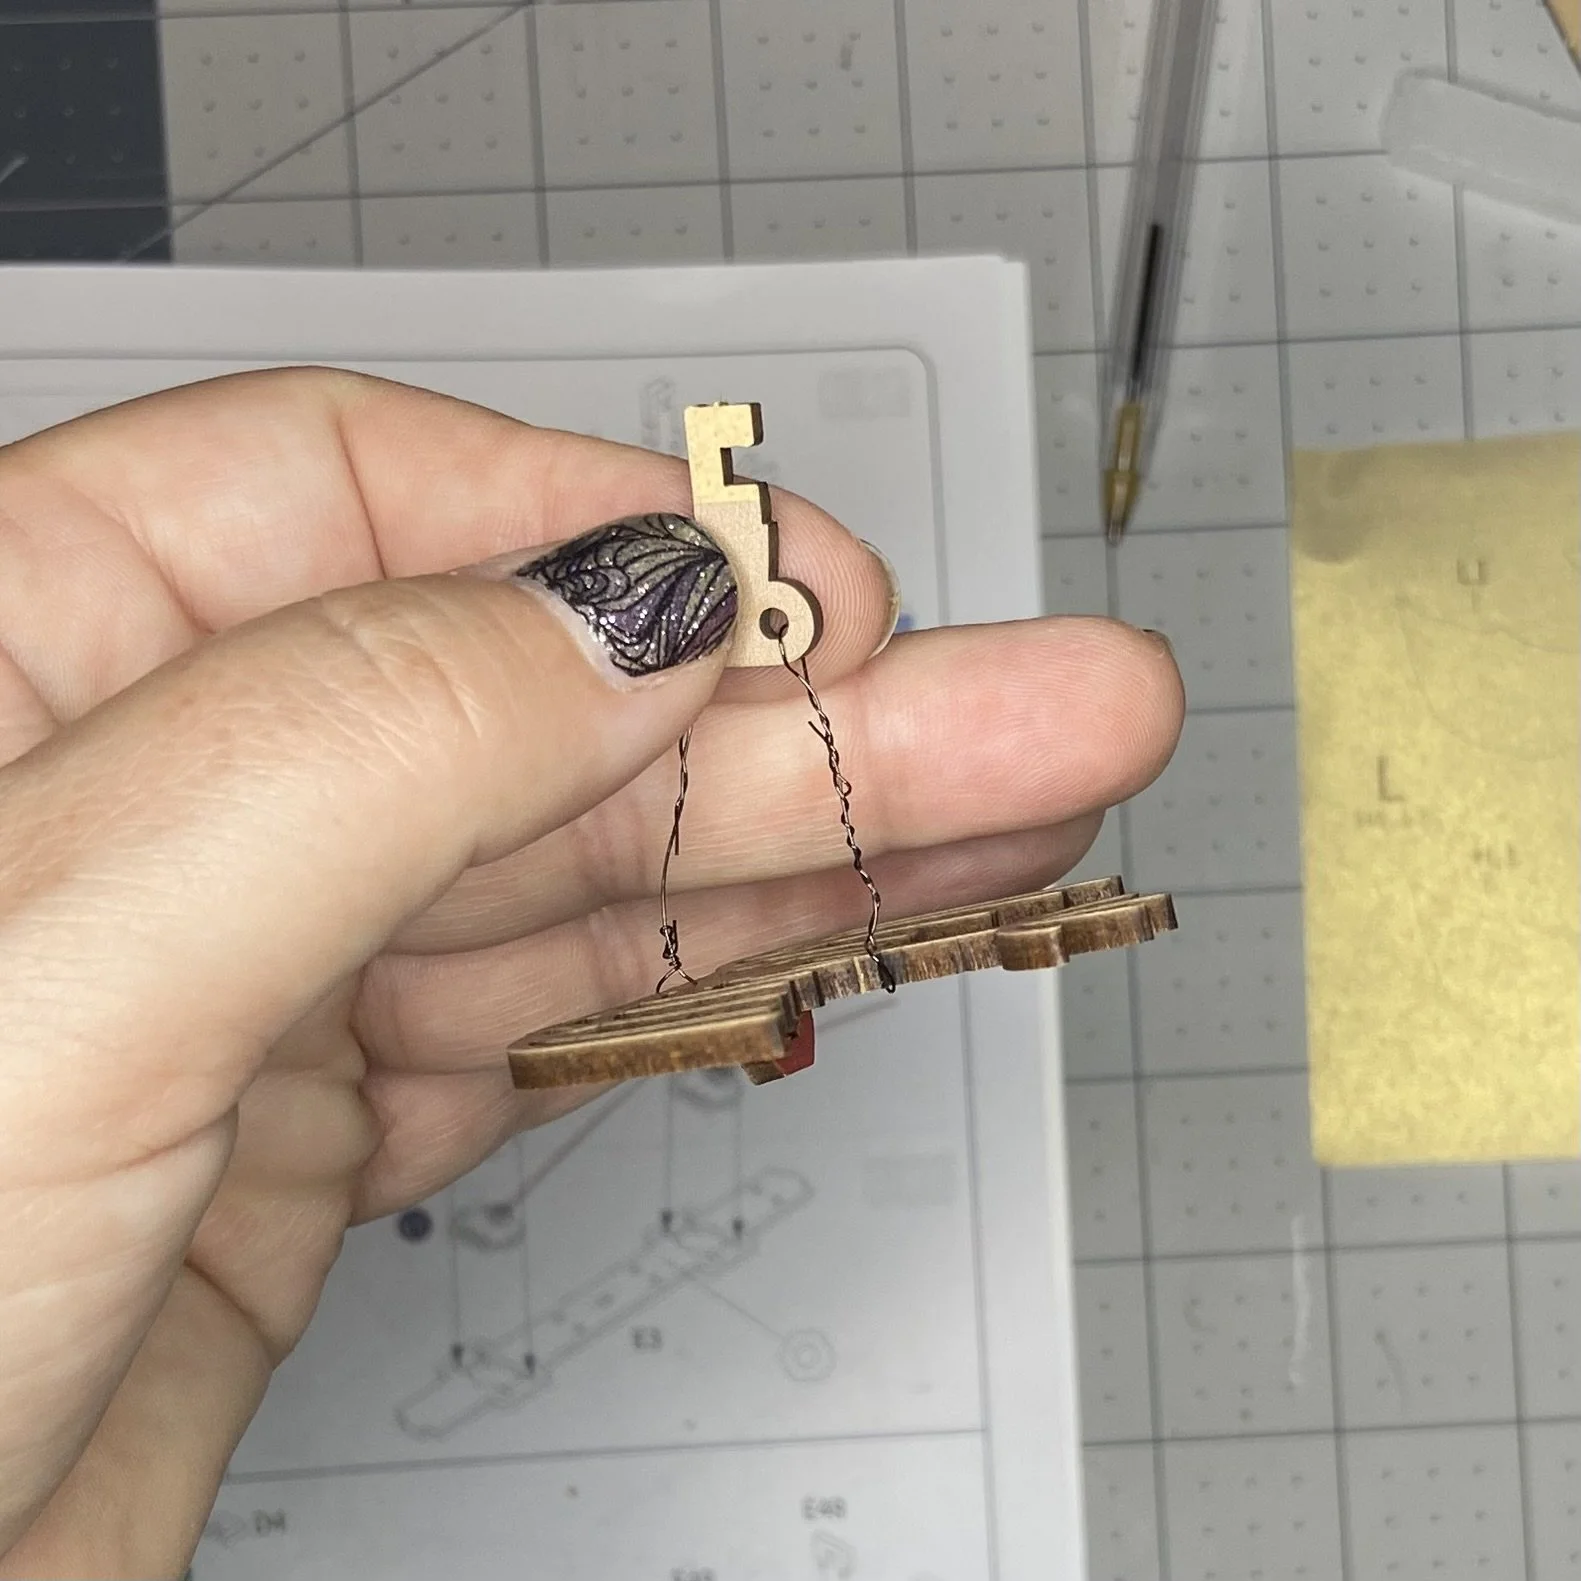
The kit included a short length of gold-colored wire, which was inserted in a couple wood pieces to simulate metal handles. So clever…looked great. And of course, the Mona Lisa made an appearance.
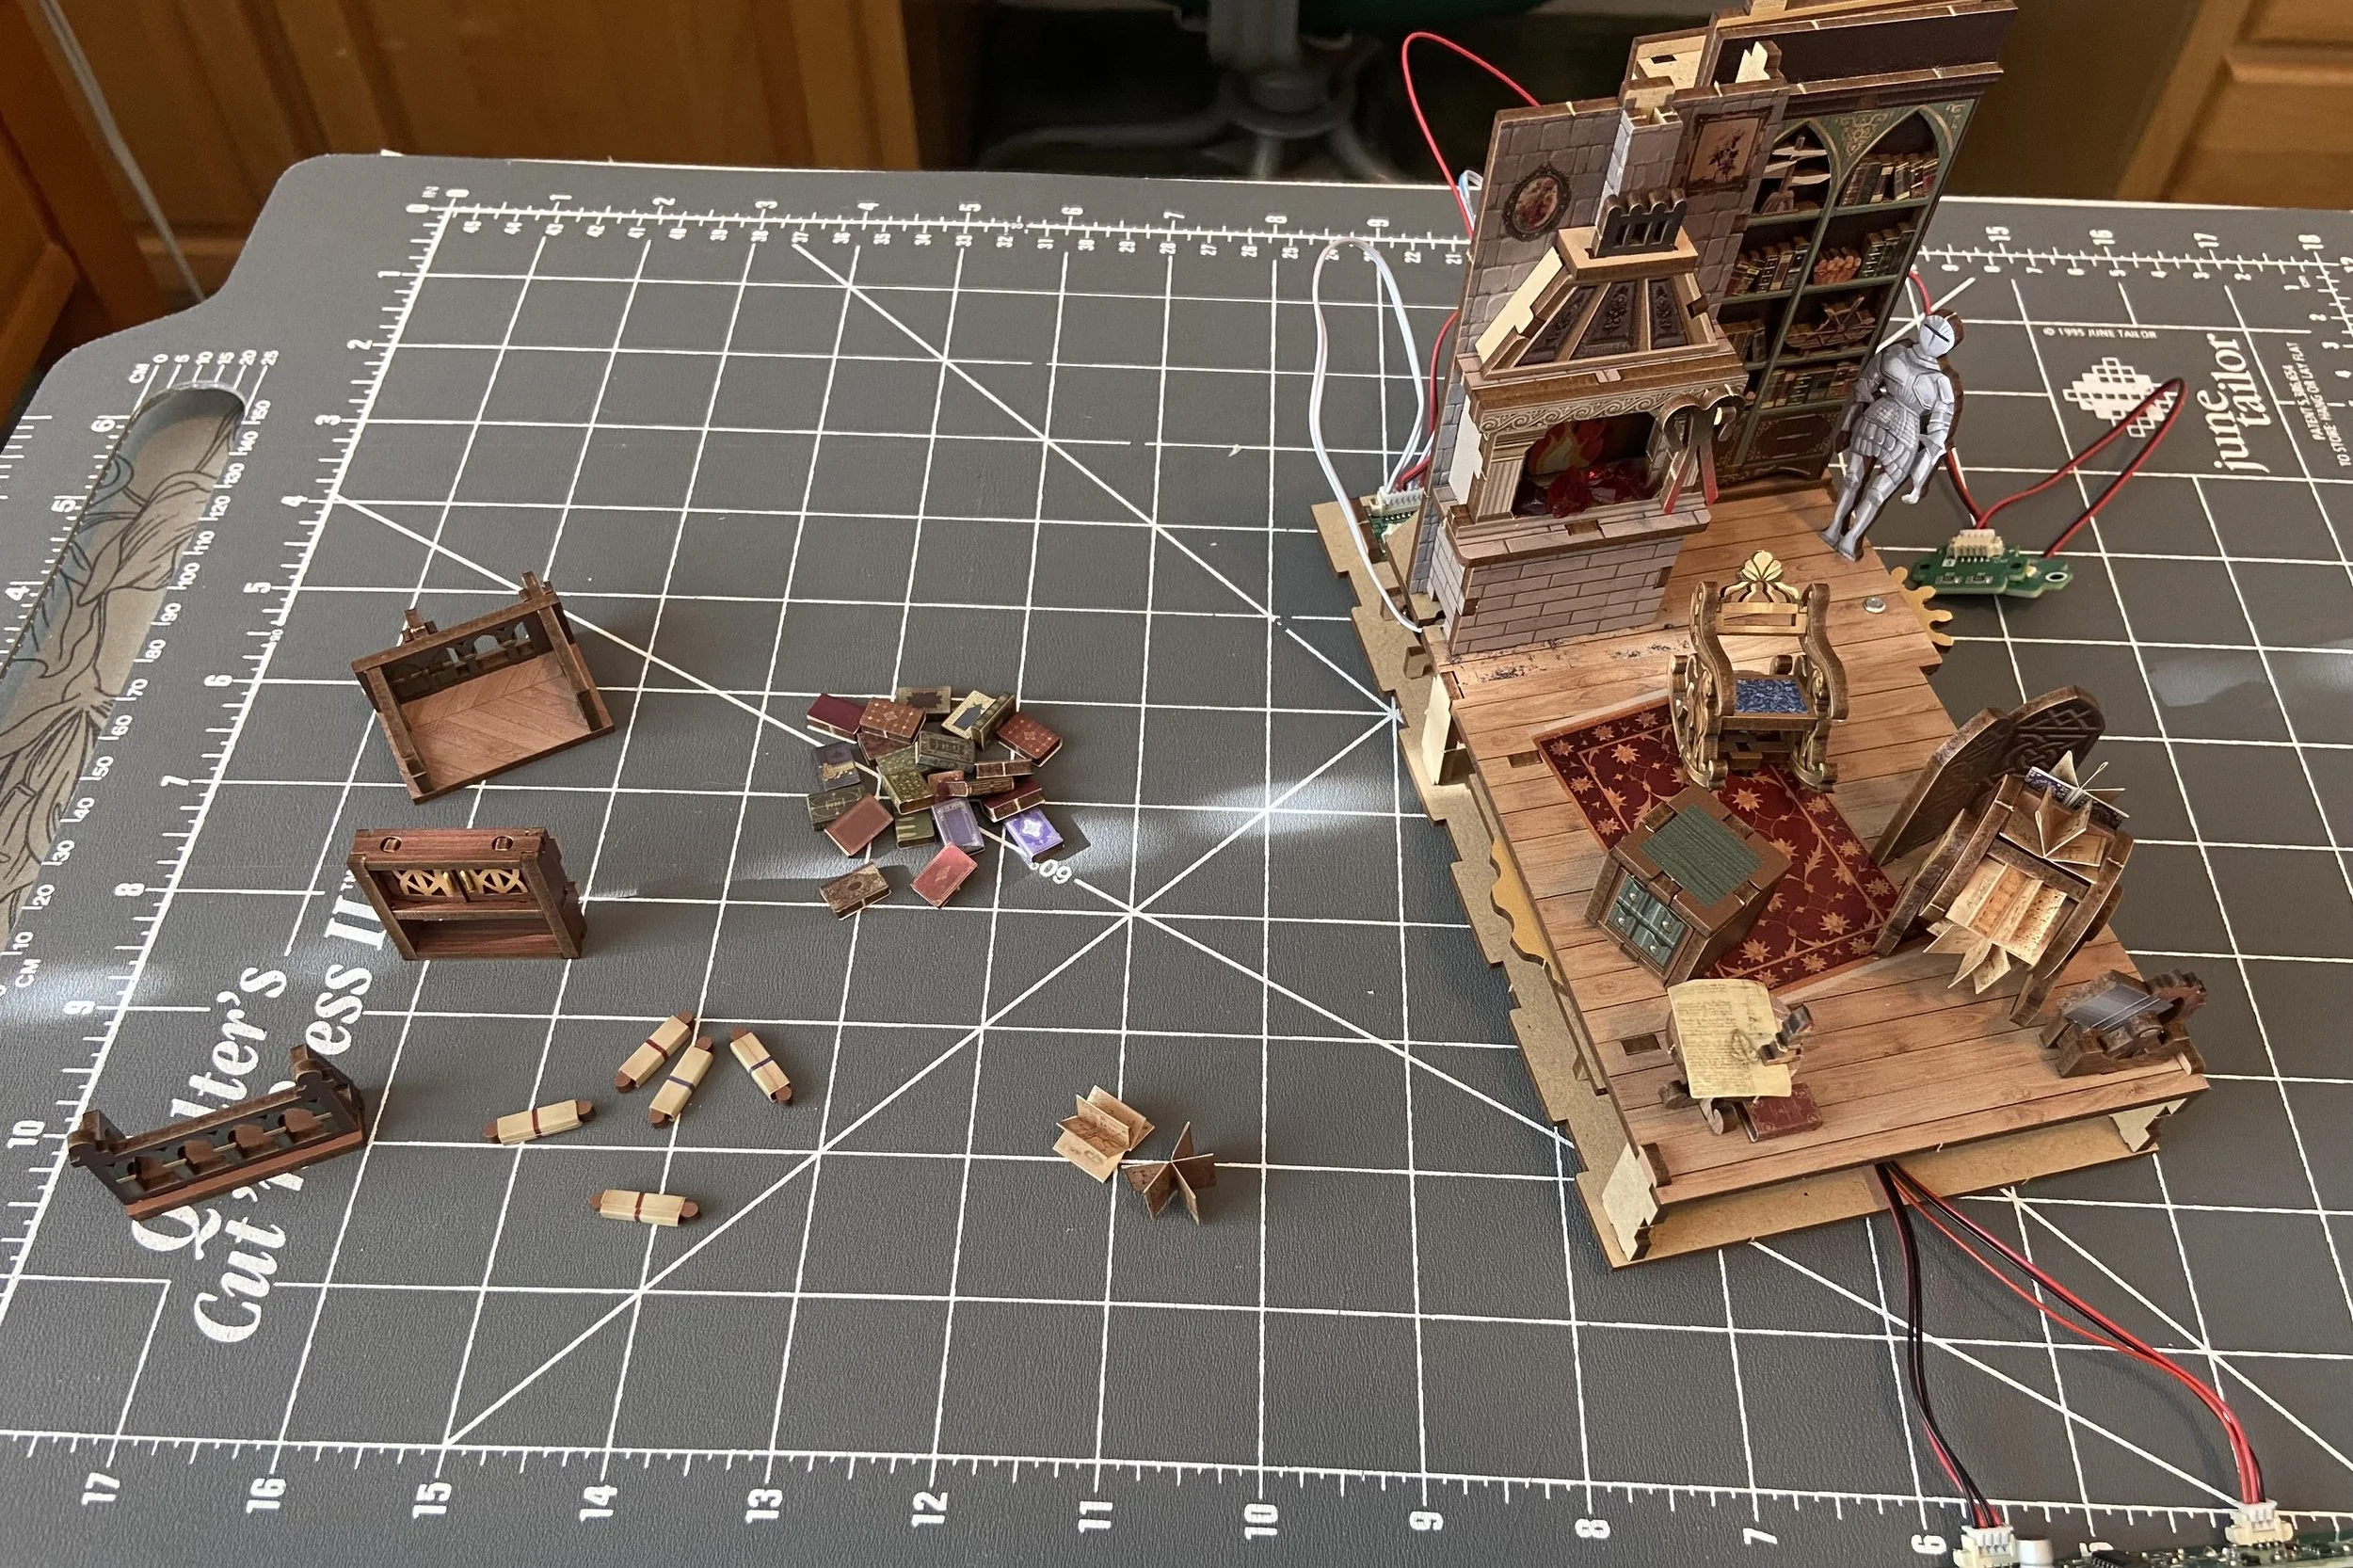
Often, these sorts of kits have a huge amount of smaller elements that need to be assembled and set aside before you can even start putting the nook together. Not so with this kit…I’d assemble a few smaller pieces and then attach them to larger elements. So I didn’t get the satisfaction of a huge spread of miniatures to admire, but that was okay. I stopped to enjoy my little spreads before I attached them to other things.
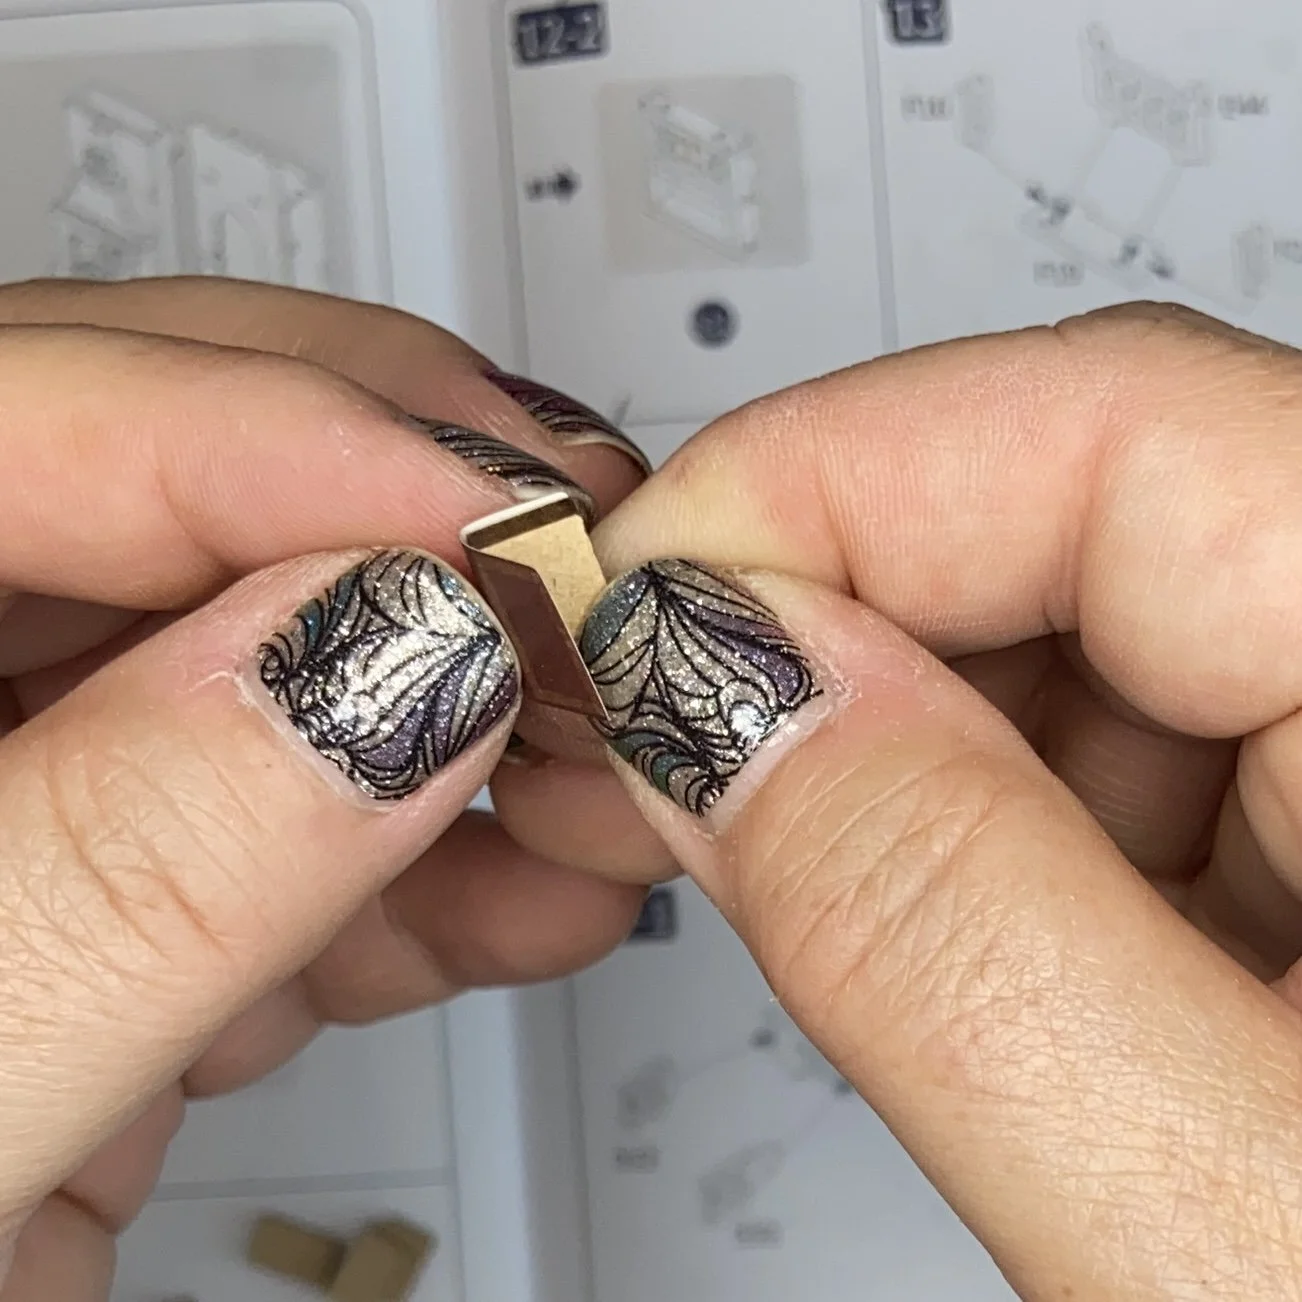
The kit was relatively complete. It had all the actual parts needed, plus plenty of spares. And it did have a tiny screwdriver. But no actual tools beyond that. Fortunately, my studio is well equipped with any number of useful things, including some that aren’t usually included in a book nook build. Like my sewing clips. They were the perfect thing to hold this scroll in place until the glue dried. Oh, and the kit did not include glue either, so I used my trusty bookmaker’s glue, applied with my precision applicator.
The only serious error I made (and I still don’t know what I did wrong) was in assembling the gear arrangement which would allow this box to swivel under the desk and then back into the room. The box would not clear the desk. I ended up pulling it off the gear system, cutting off its “stem” (the part of it that engaged with the gear), and just glueing it to the floor in a position of my choosing. The build was quite advanced at this point, so I just left the now-non-functional gearing in place, since I didn’t care to dismantle a bunch of my work to pull it out.
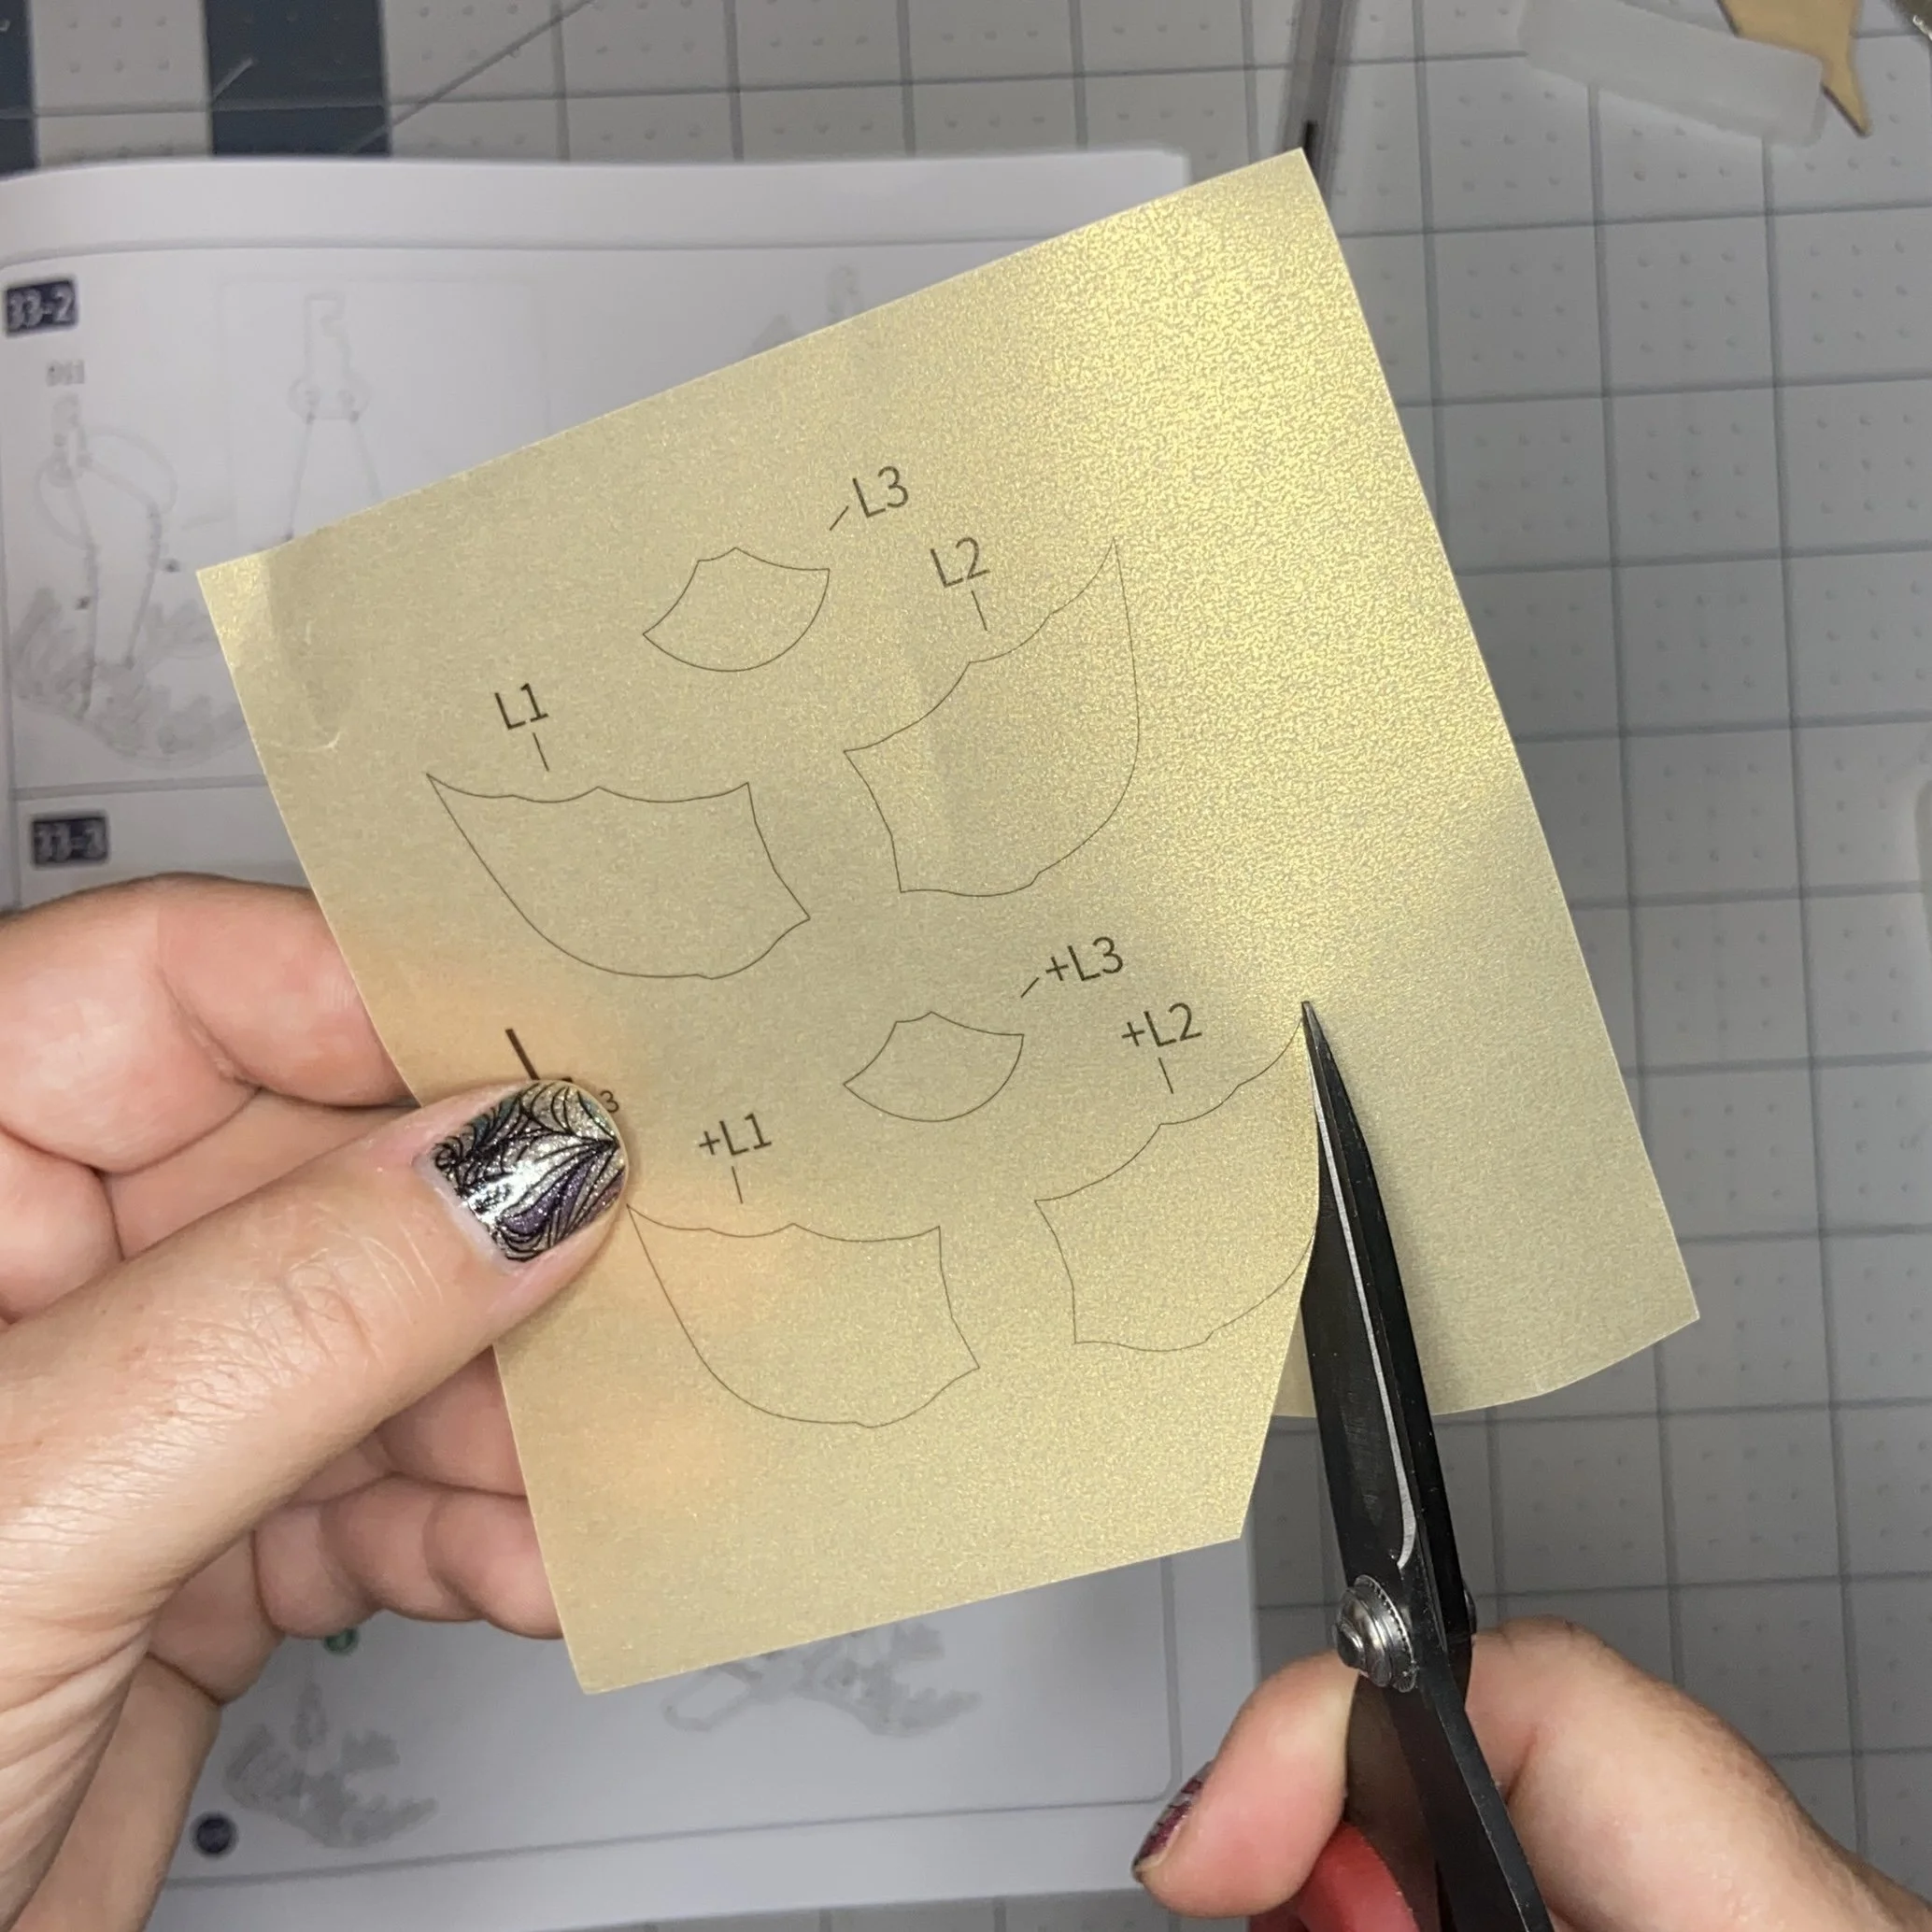
One of the final pieces that was inserted into the nook before the sides were closed up was a da Vincian glider, which was quite pretty. The wood pieces were assembled, then strung on some wire. Then some gold paper was cut out and glued to the wings and tail. I didn’t take a picture of this, but those sewing clips saved the day again, since the gold paper did not want to stay in place while the glue dried.
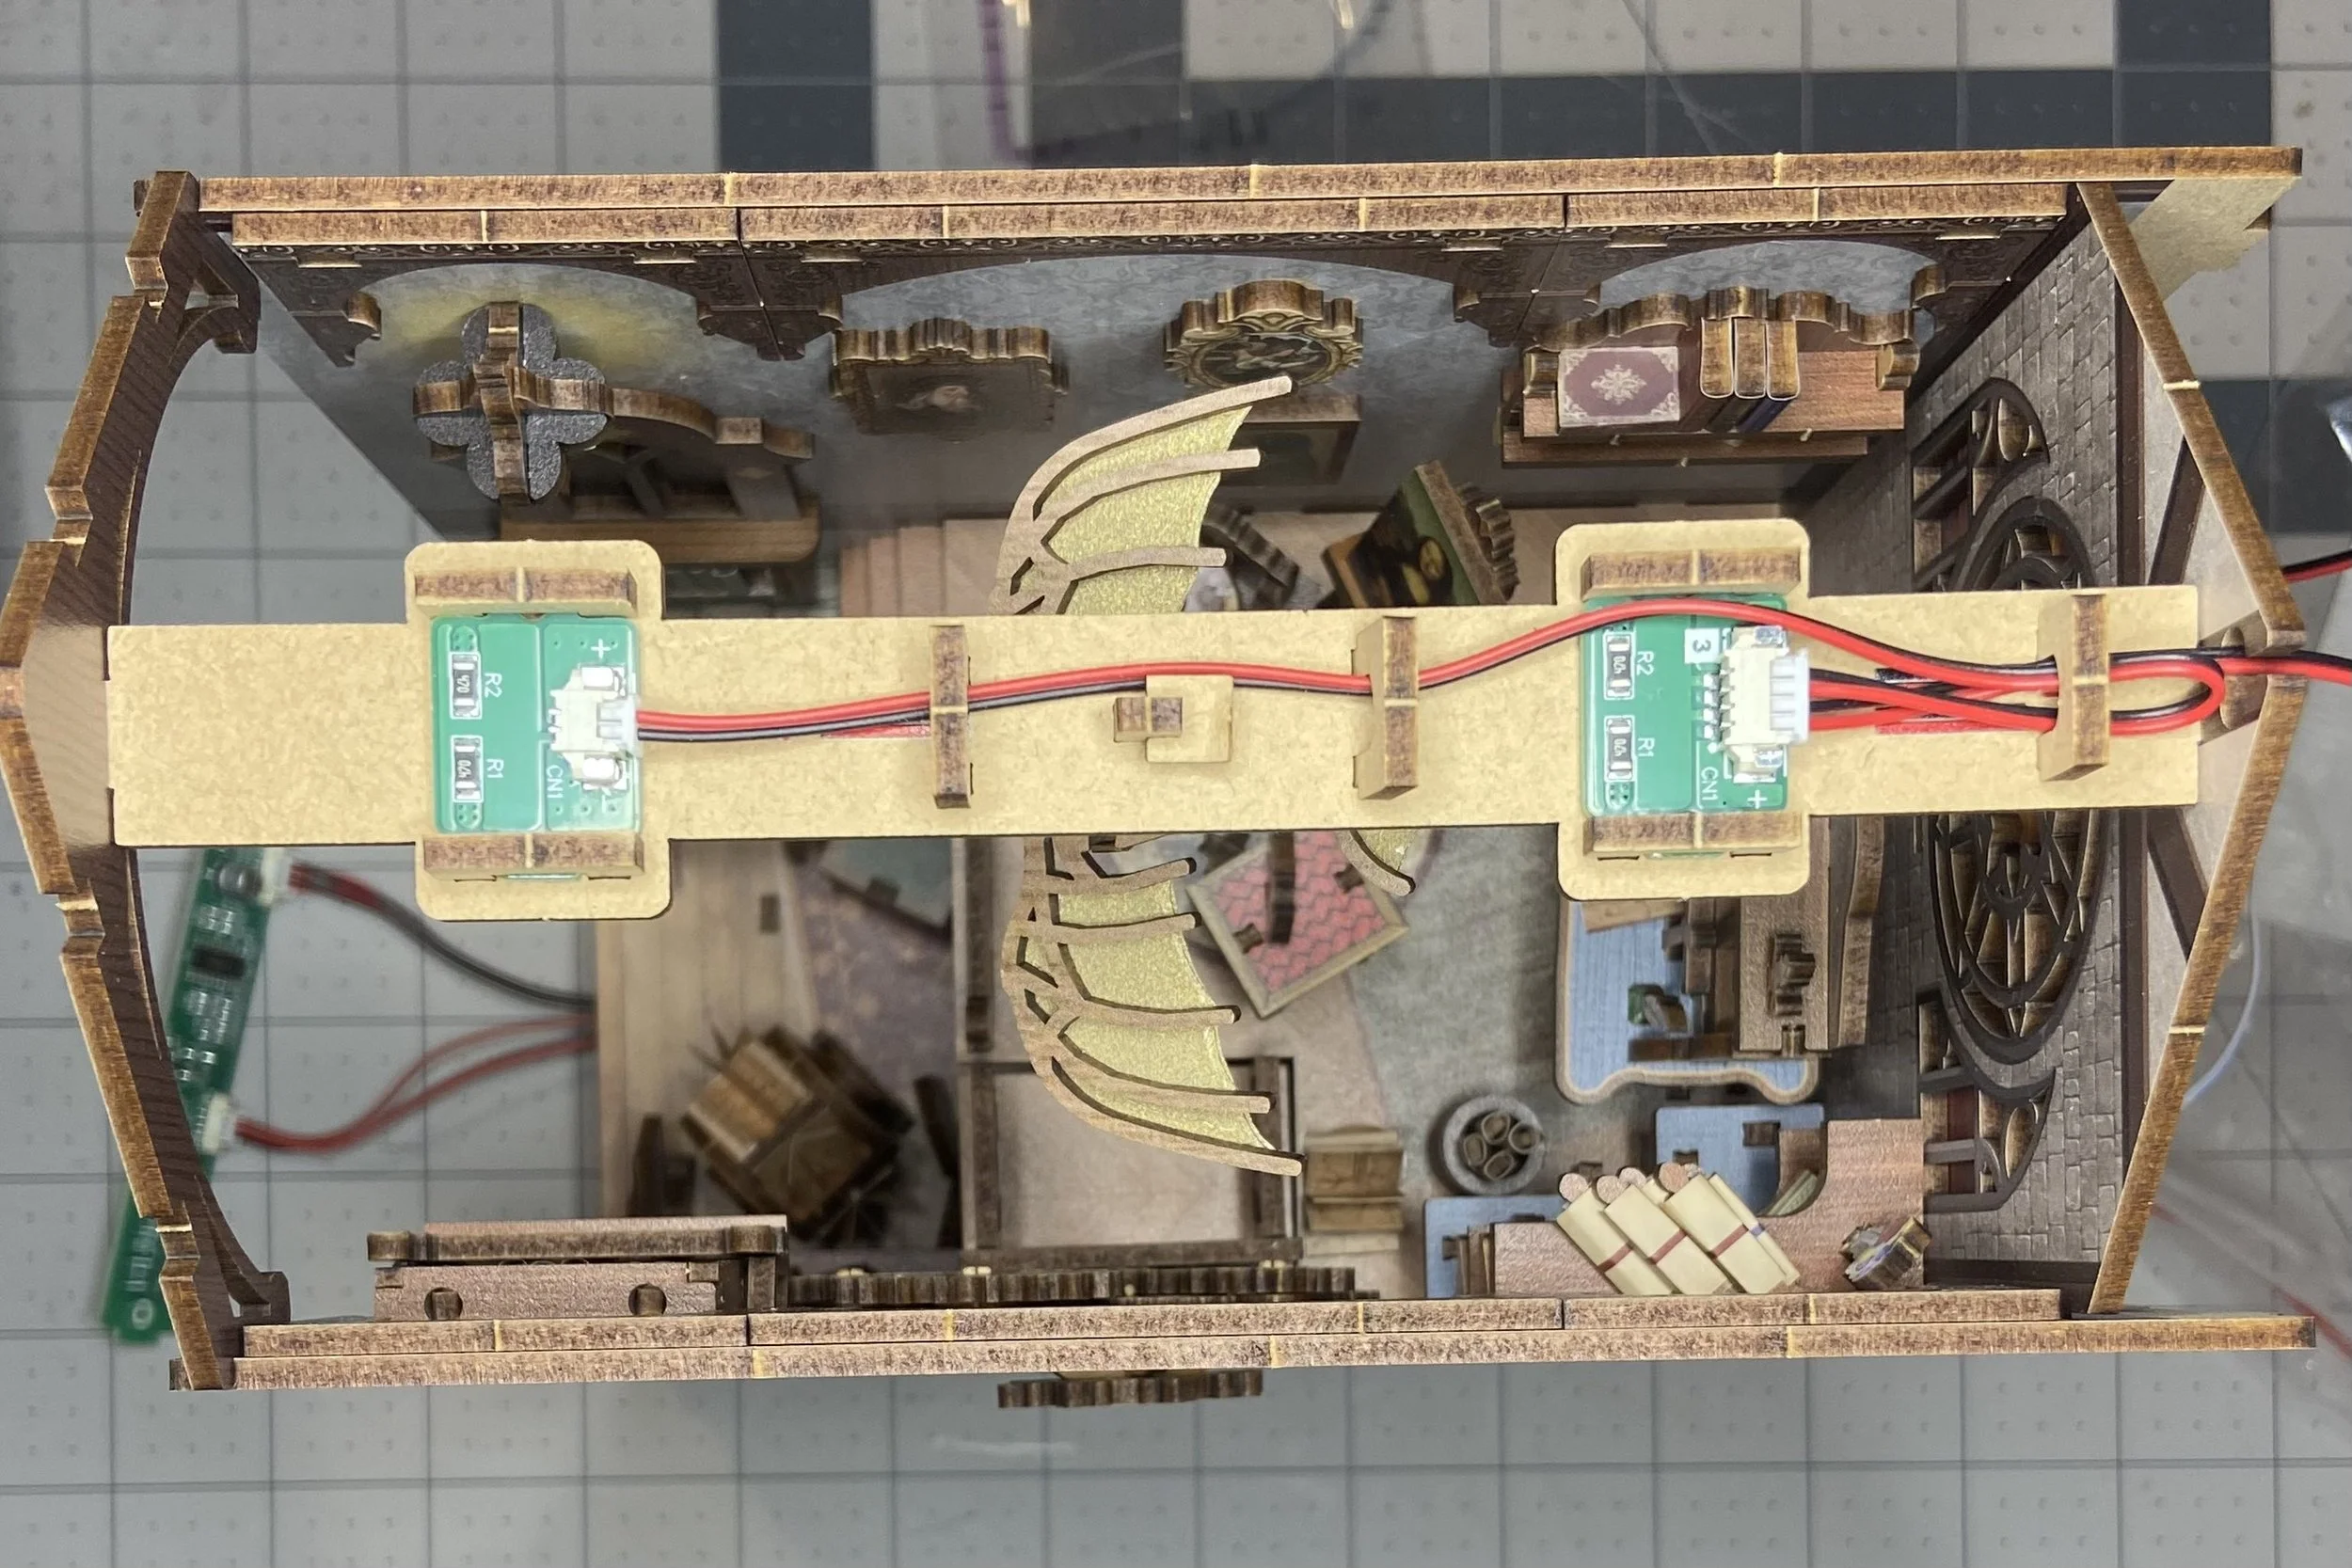
The wiring for this project was the easiest I’ve encountered yet. The instructions were very clear and it was quite obvious where the wires needed to travel so that the lights could be in the right place.
The outer walls and the roof went on easily (unlike with some other projects) and securely, and this kit also has a clear plastic cover on the front to keep out the dust. And done! It’s just beautiful…you can see a few of the pictures of the interior below, followed by a short YouTube video of the working parts.