Adventures In Norwegian Protests
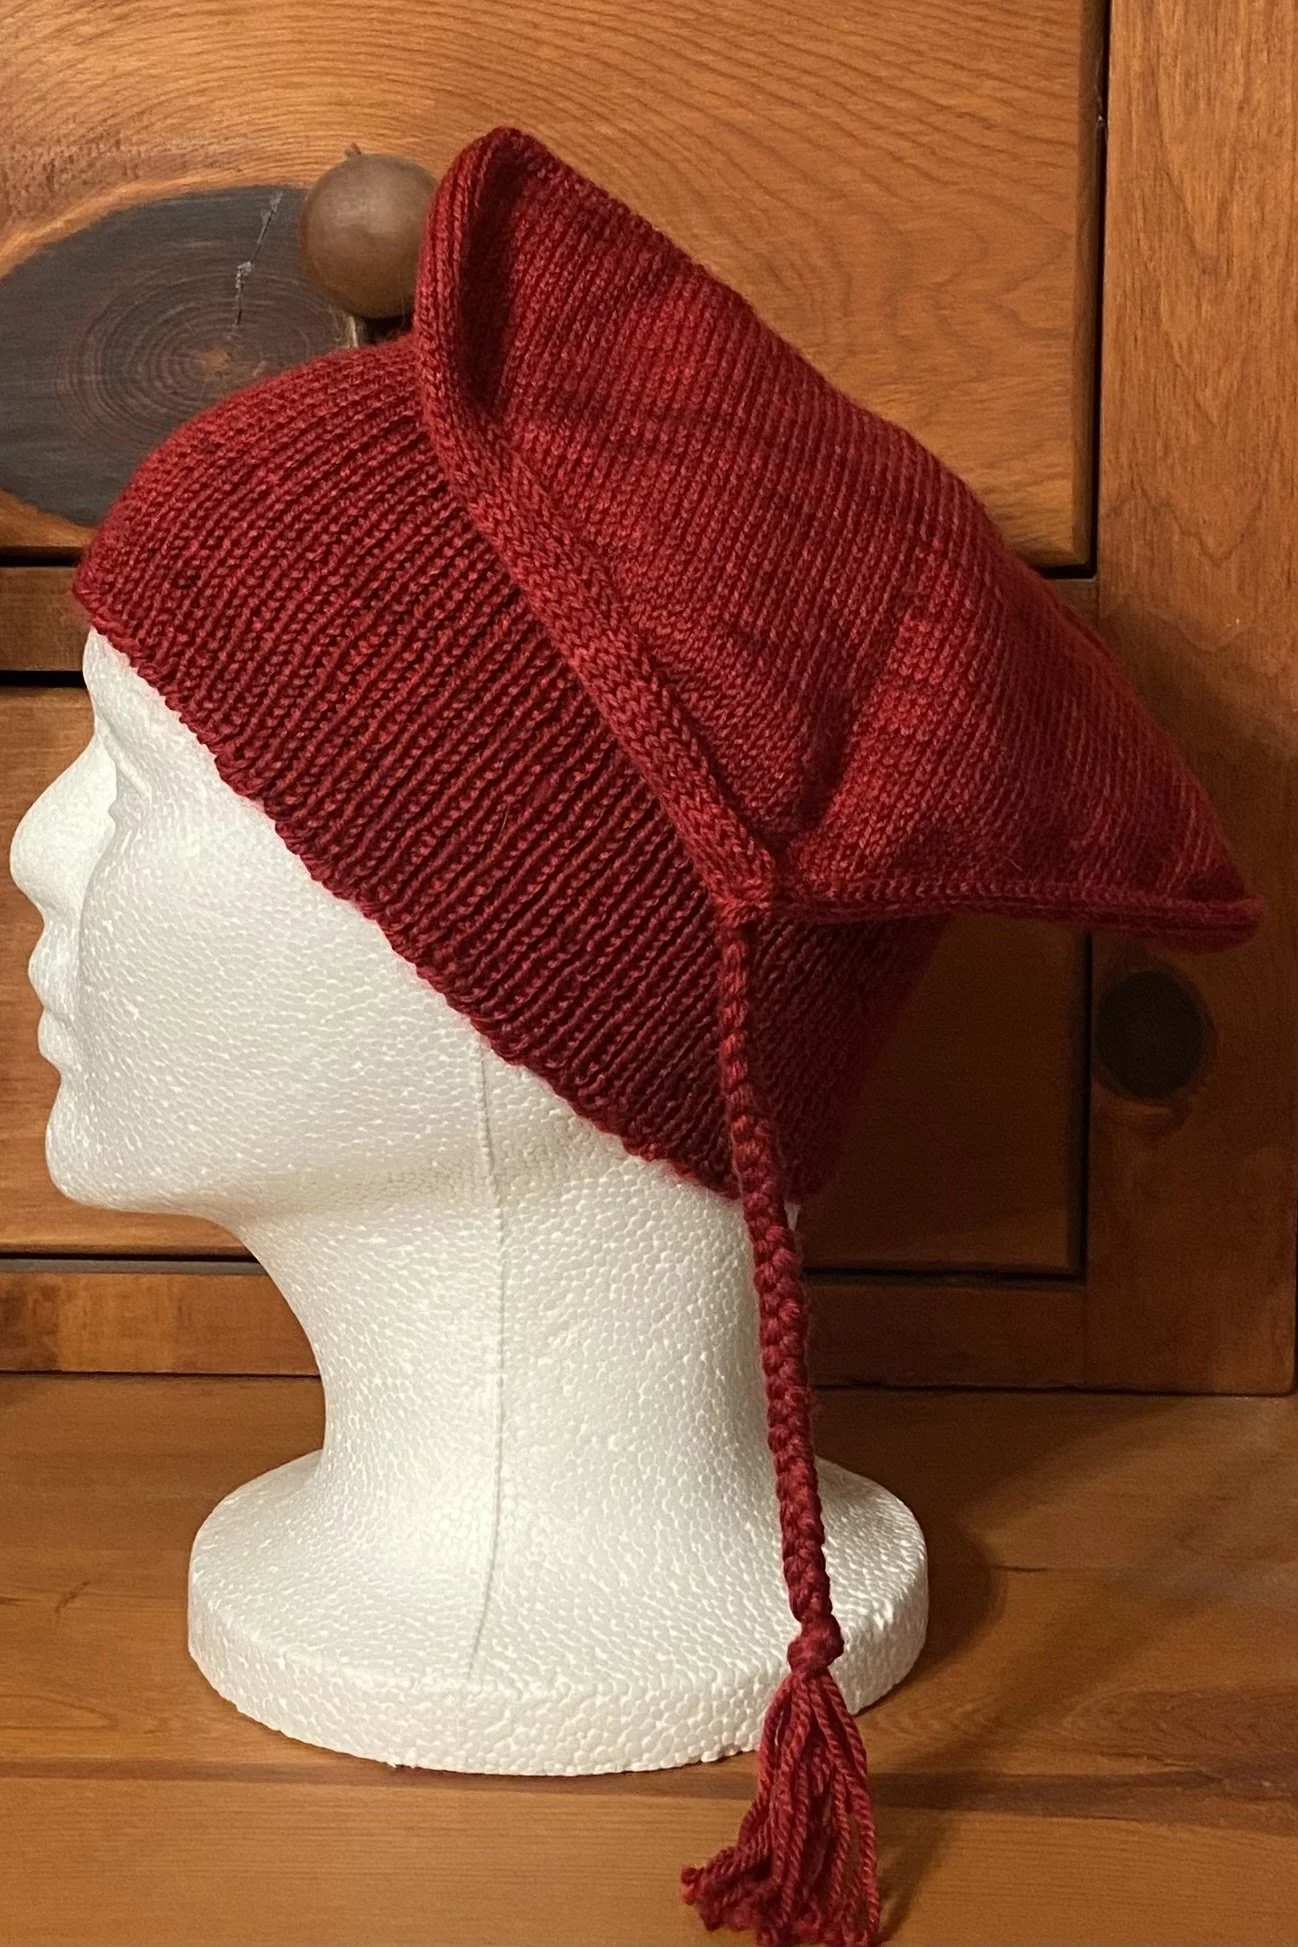
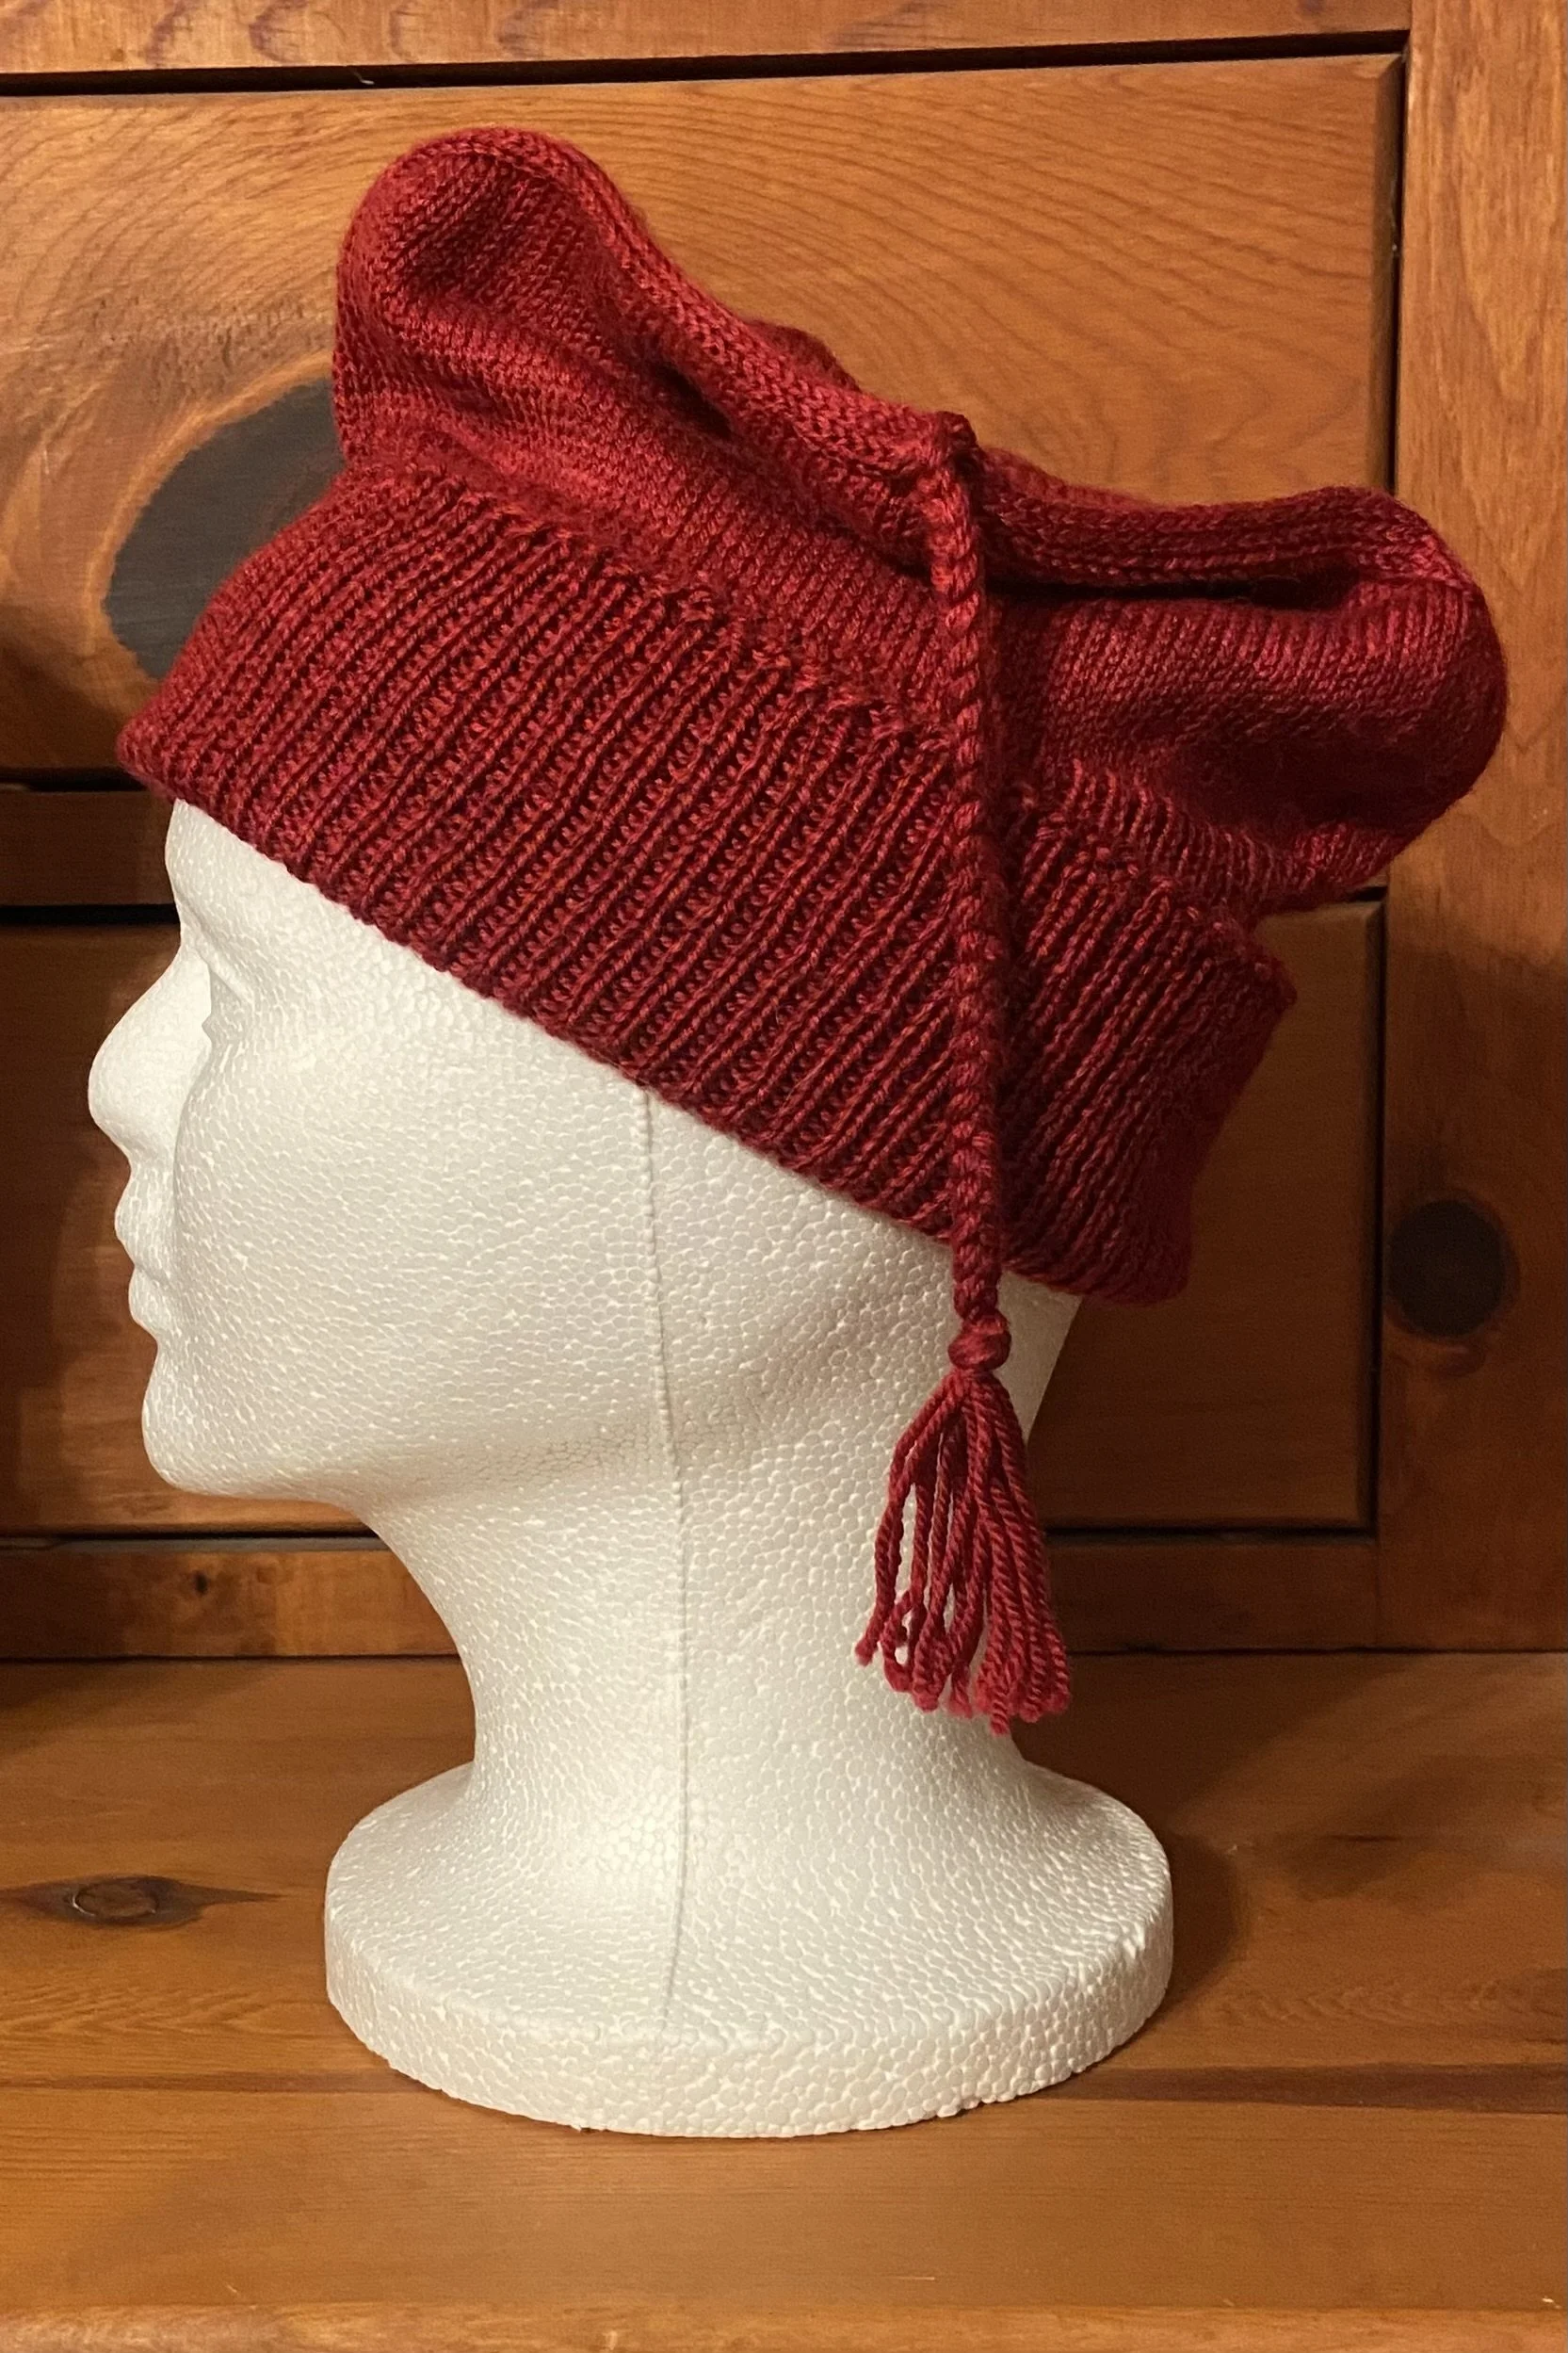
It’s been said that there is nothing new under the sun. I don’t know if I believe that, but I am quite interested in the cycles of history. In this article, I’m interested in how old protest symbols are renewed and repurposed for use today. Specifically, the Norwegian red toppluer or nisselue style hats, which were worn in the 1940’s to protest the Nazi occupation of the country. Naturally, the Nazis quickly outlawed the hats.
I have purposefully avoided discussion of politics and religion in this blog (although death and taxes are still on the table), so I will only say that the revival of these hats came about as a form of protest against the ICE presence in Minnesota this winter, and resulted in a nationwide shortage of red yarn as knitters answered the call.
The pattern I am using is called Melt the ICE and is available on Ravelry, which gives a brief description of the designer’s purpose and where the proceeds of the pattern sales will be directed. I did opt to make this hat in red for my own reasons, and was able to scrounge a skein of Fiber Optic’s Kashmir yarn in Bordello Red out of the stash. It appears that that color way is no longer available, but this looks like an excellent substitute. Stash knitting…always a personal triumph!
I liked the specific shape of the top of the hat and the little braided tassel. I was much less fond of the body of the hat, which specified many inches of 1x1 ribbing. The only thing worse than lots of 2x2 ribbing is lots of 1x1 ribbing. The switching back and forth from knit to purl on EVERY STITCH is quite tedious and slow, and also looks a little sloppy. At least my 1x1 ribbing looks sloppy. The only way I’ve found to get around that is to do my 1x1 ribbing with a twisted knit stitch, as with my Copycat CC Beanie, and I’m now sorry I didn’t do that.
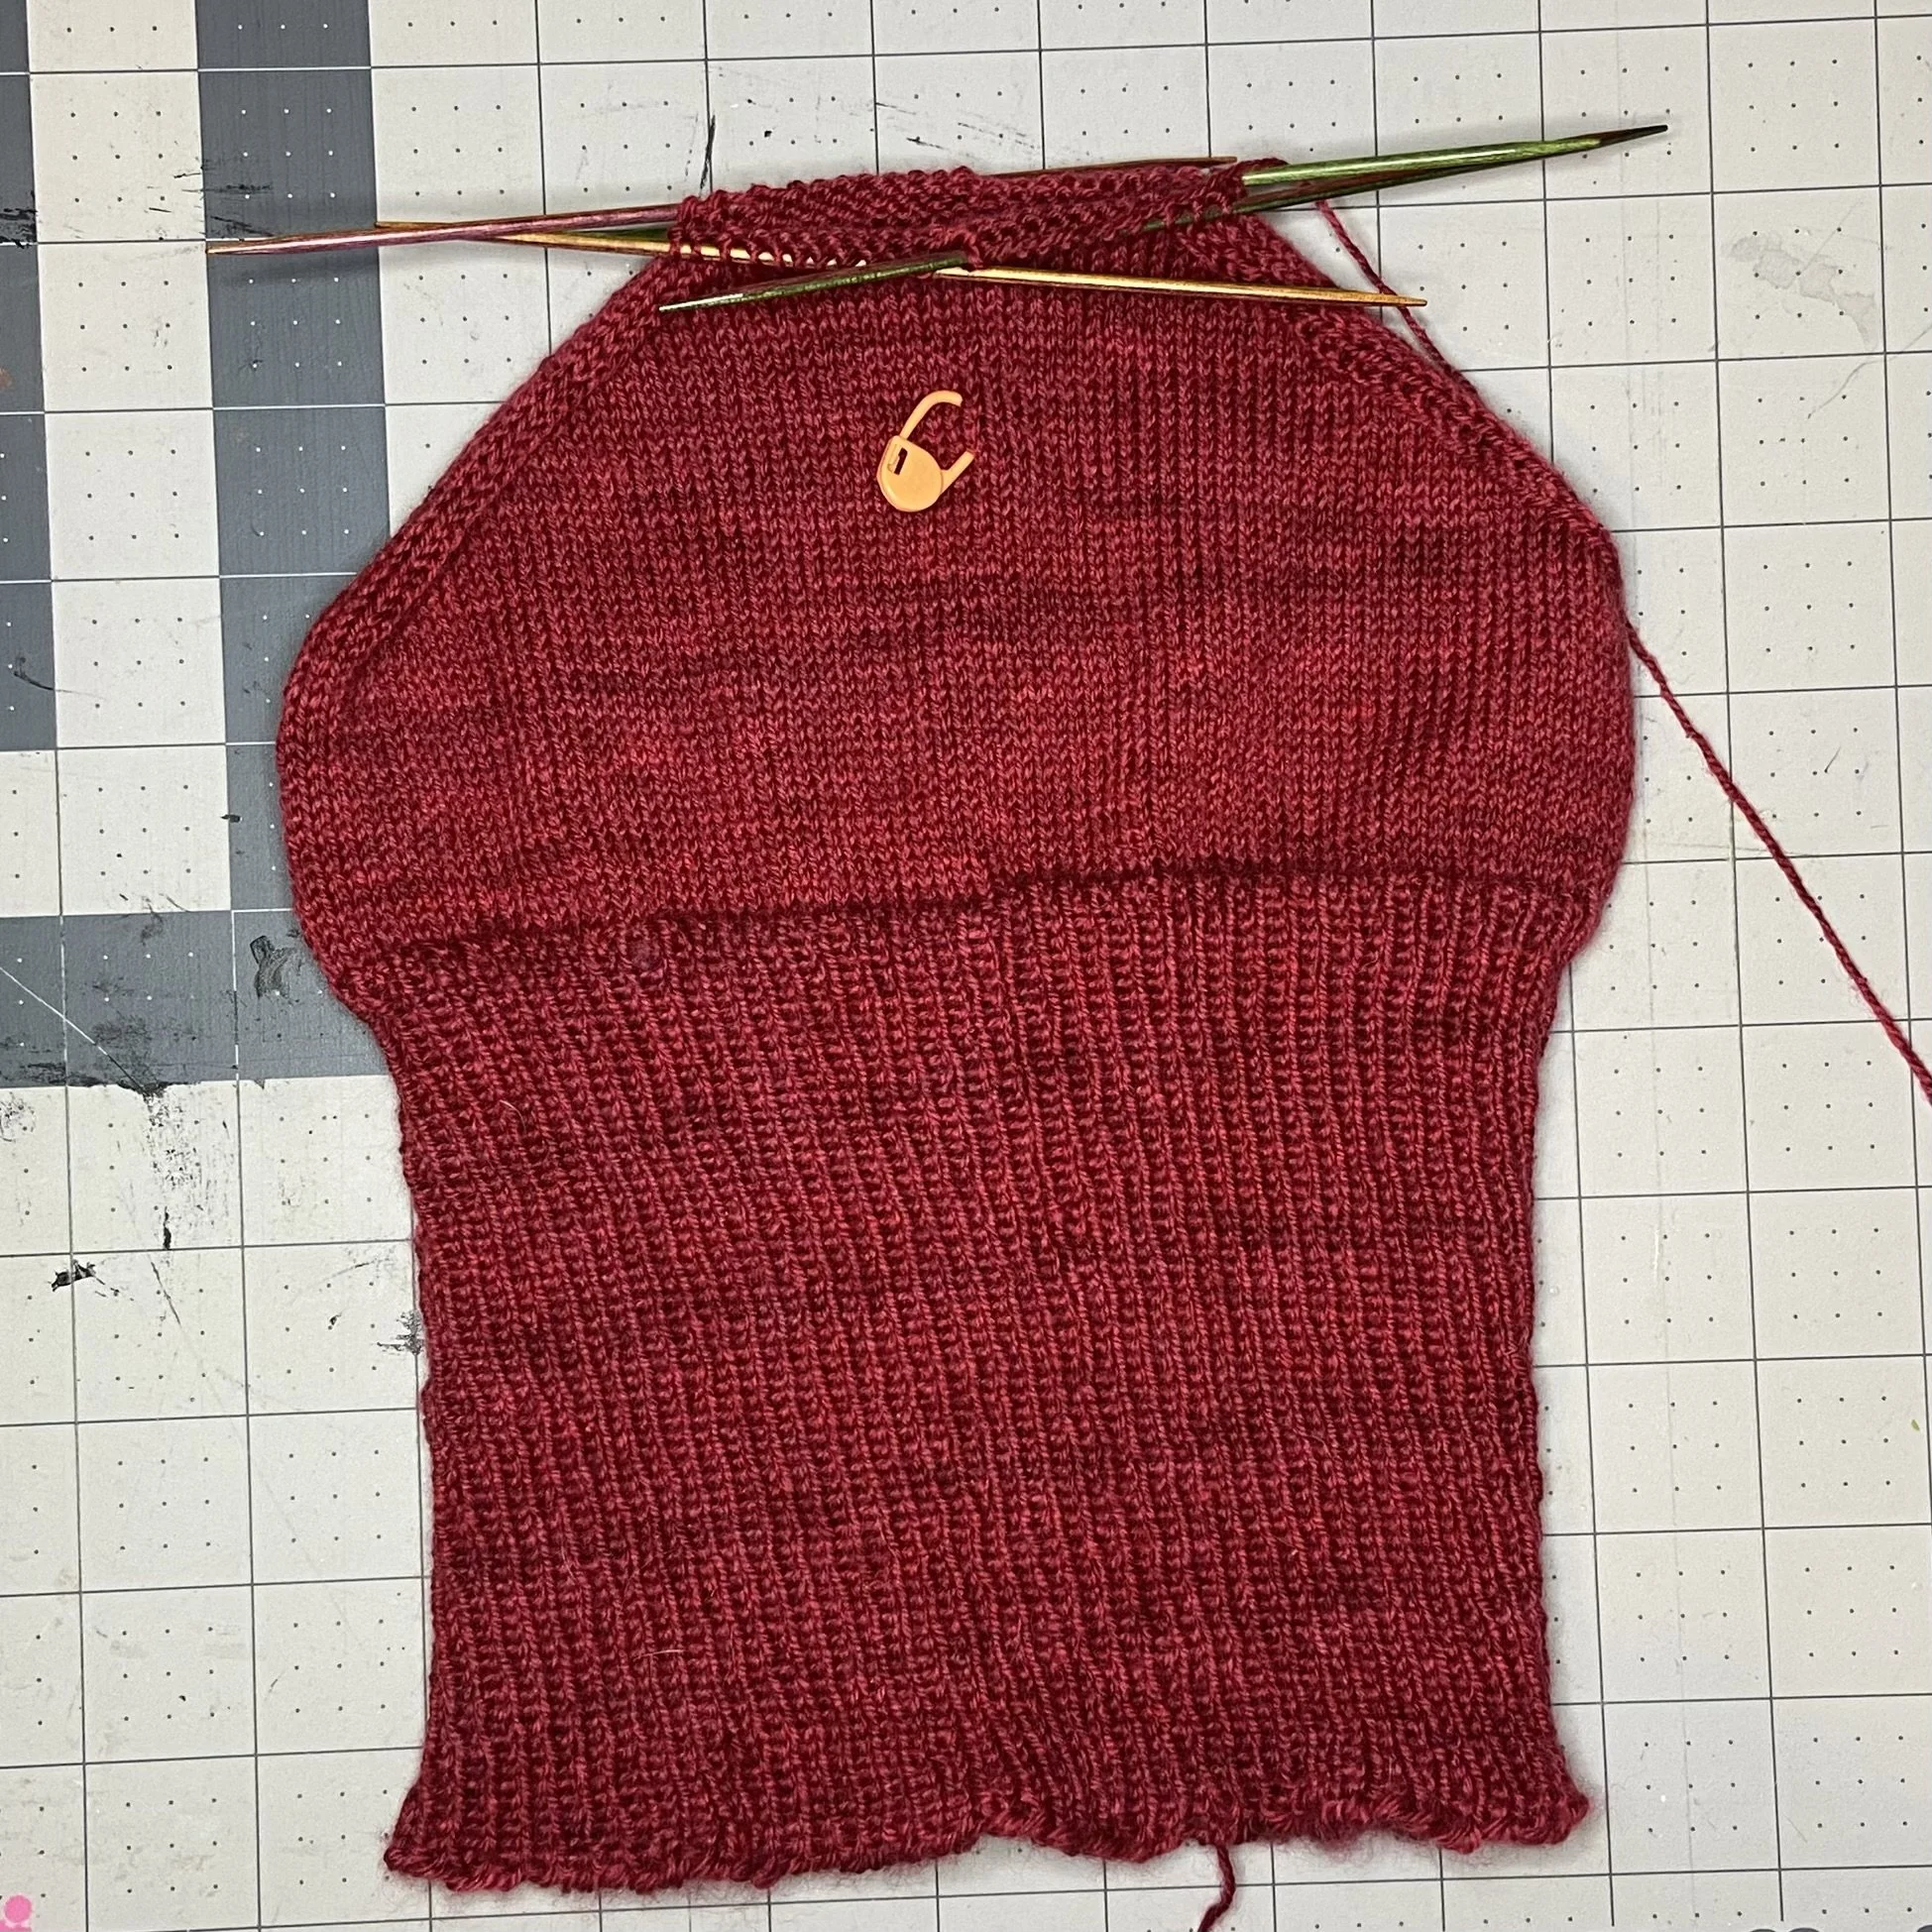
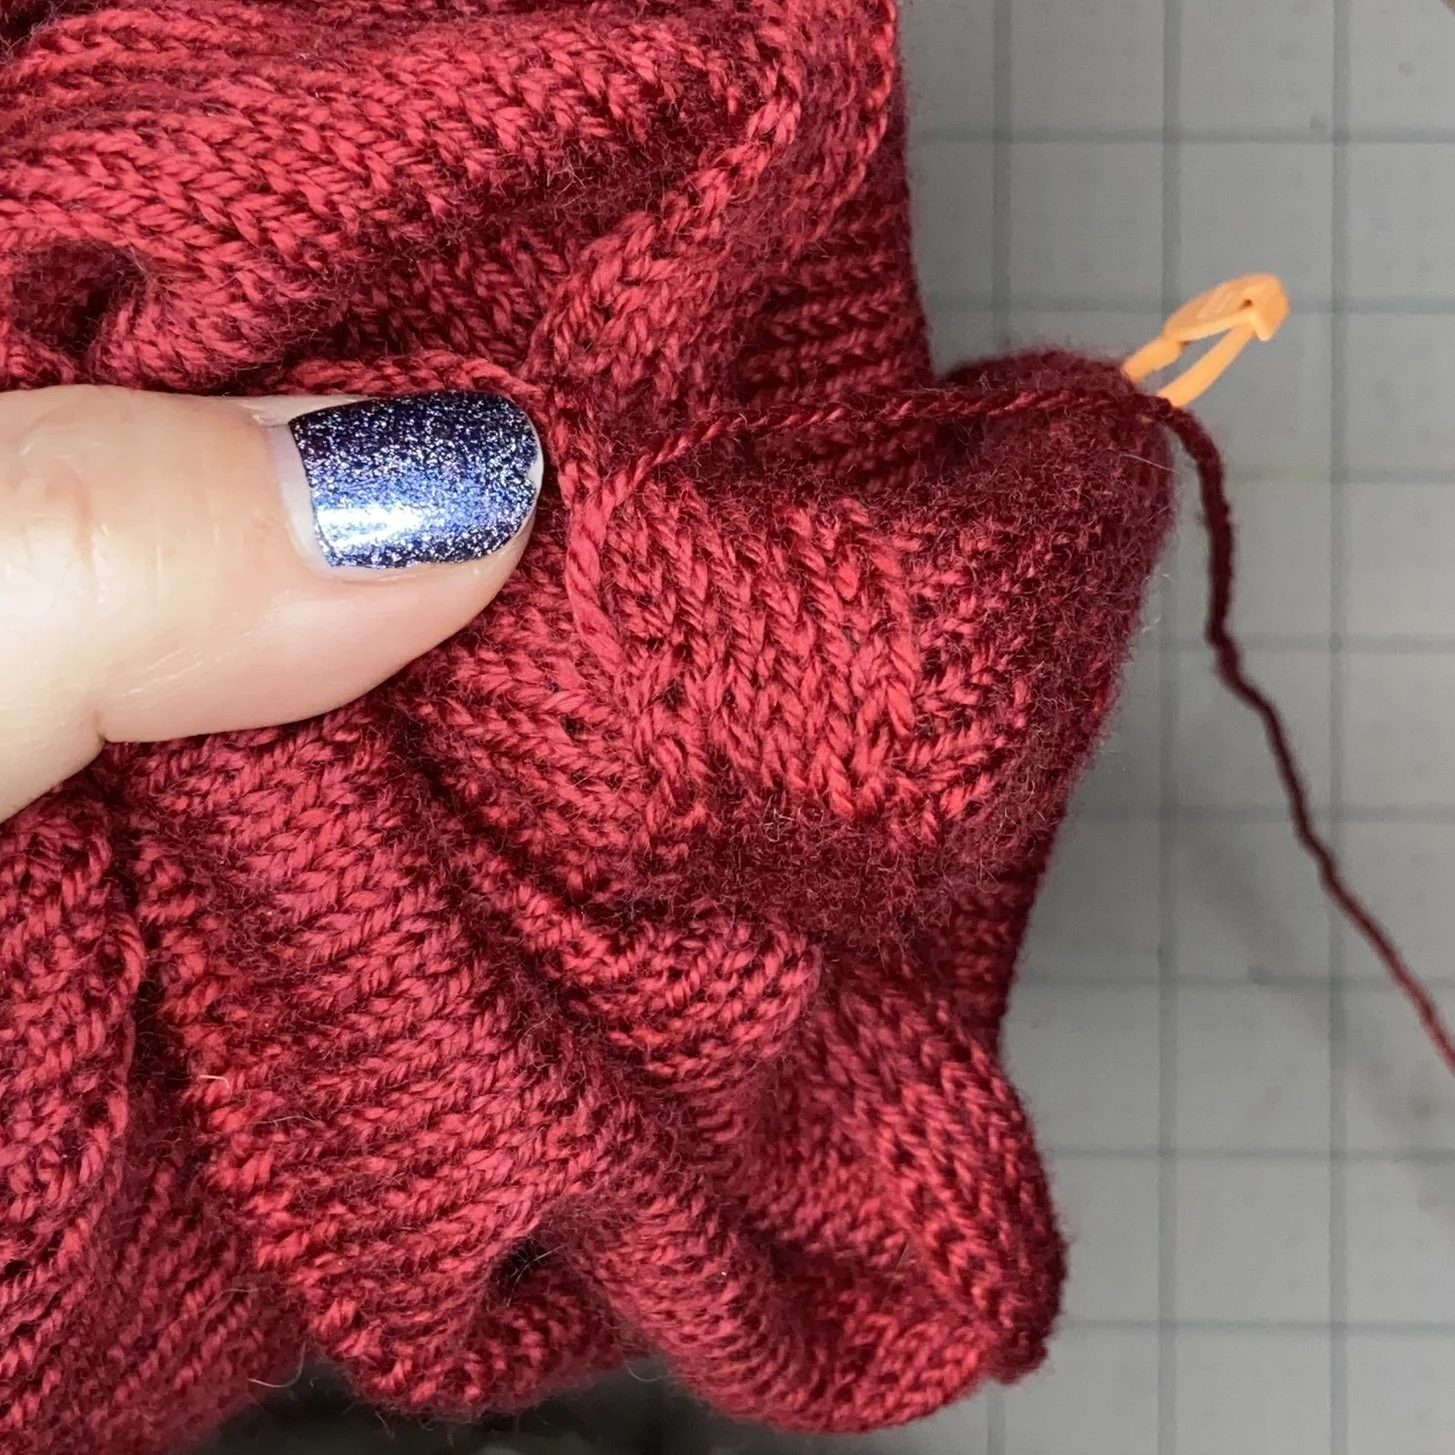
I did briefly consider working the body according to my own basic knit hat pattern for fingering weight yarn, but in the end, I followed the pattern as written, only using my own pattern to estimate how many stitches to cast on (156, as it turned out). So, it was a million miles of 1x1 ribbing in the round, followed by a couple inches of stockinette stitch, and then I did the top. What makes this hat visibly different from most American stocking caps is the placement of the decreases. They are centered over two points on the hat, front and back, so that there’s a sort of ridge-line, if you will.
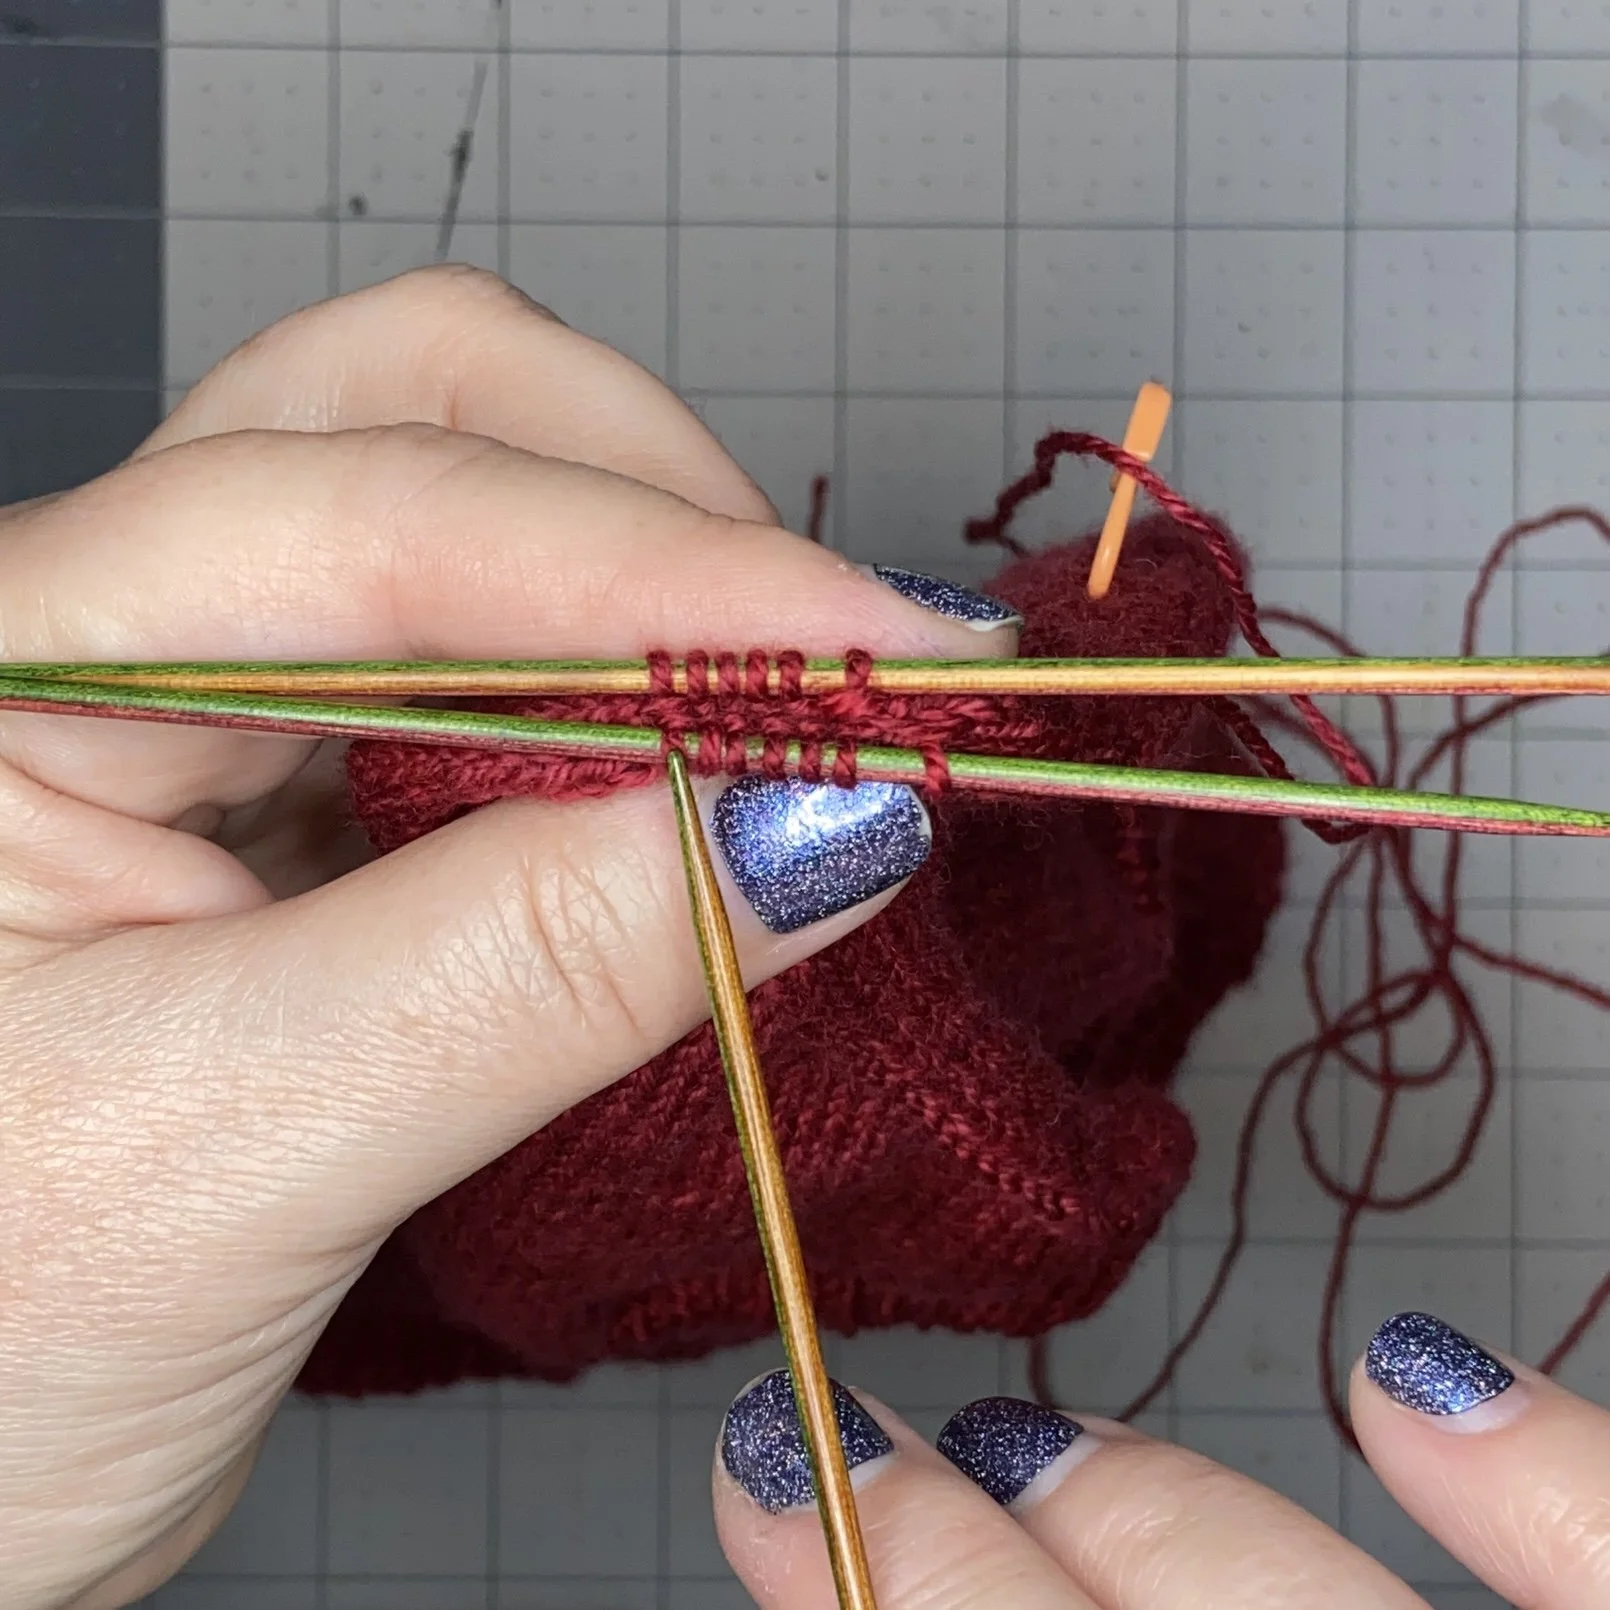
As I got to the end of the decreases and was ready to close the top of the hat, I realized that I’d missed a decrease somewhere and had one extra stitch. I opted to Kitchener graft the top closed, and just folded that extra stitch into the graft. No one can tell by looking at it, and you won’t tell on me, right?
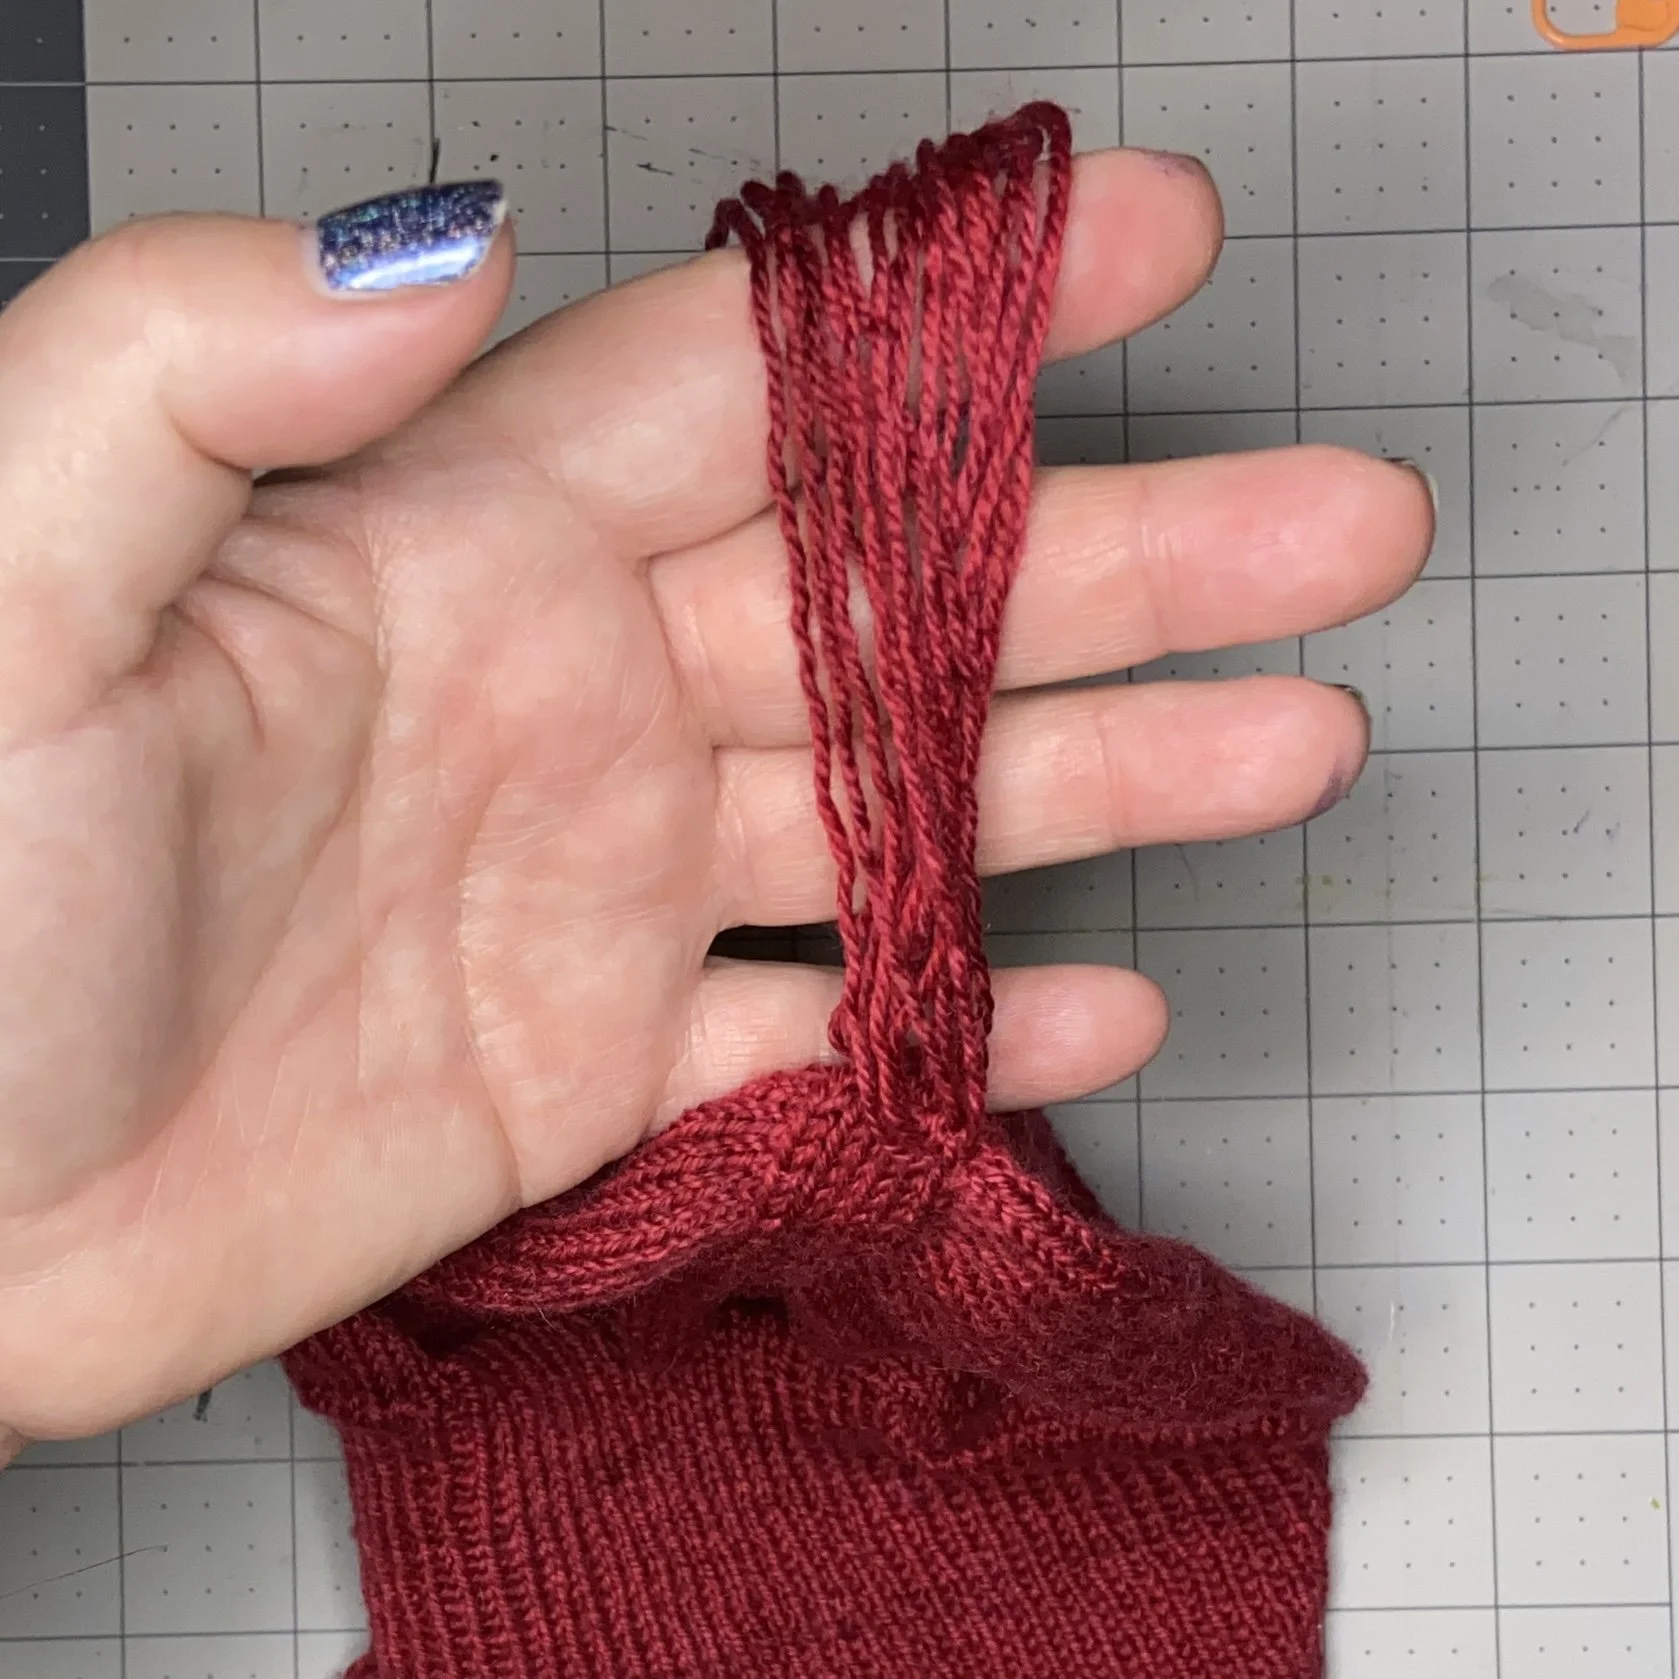
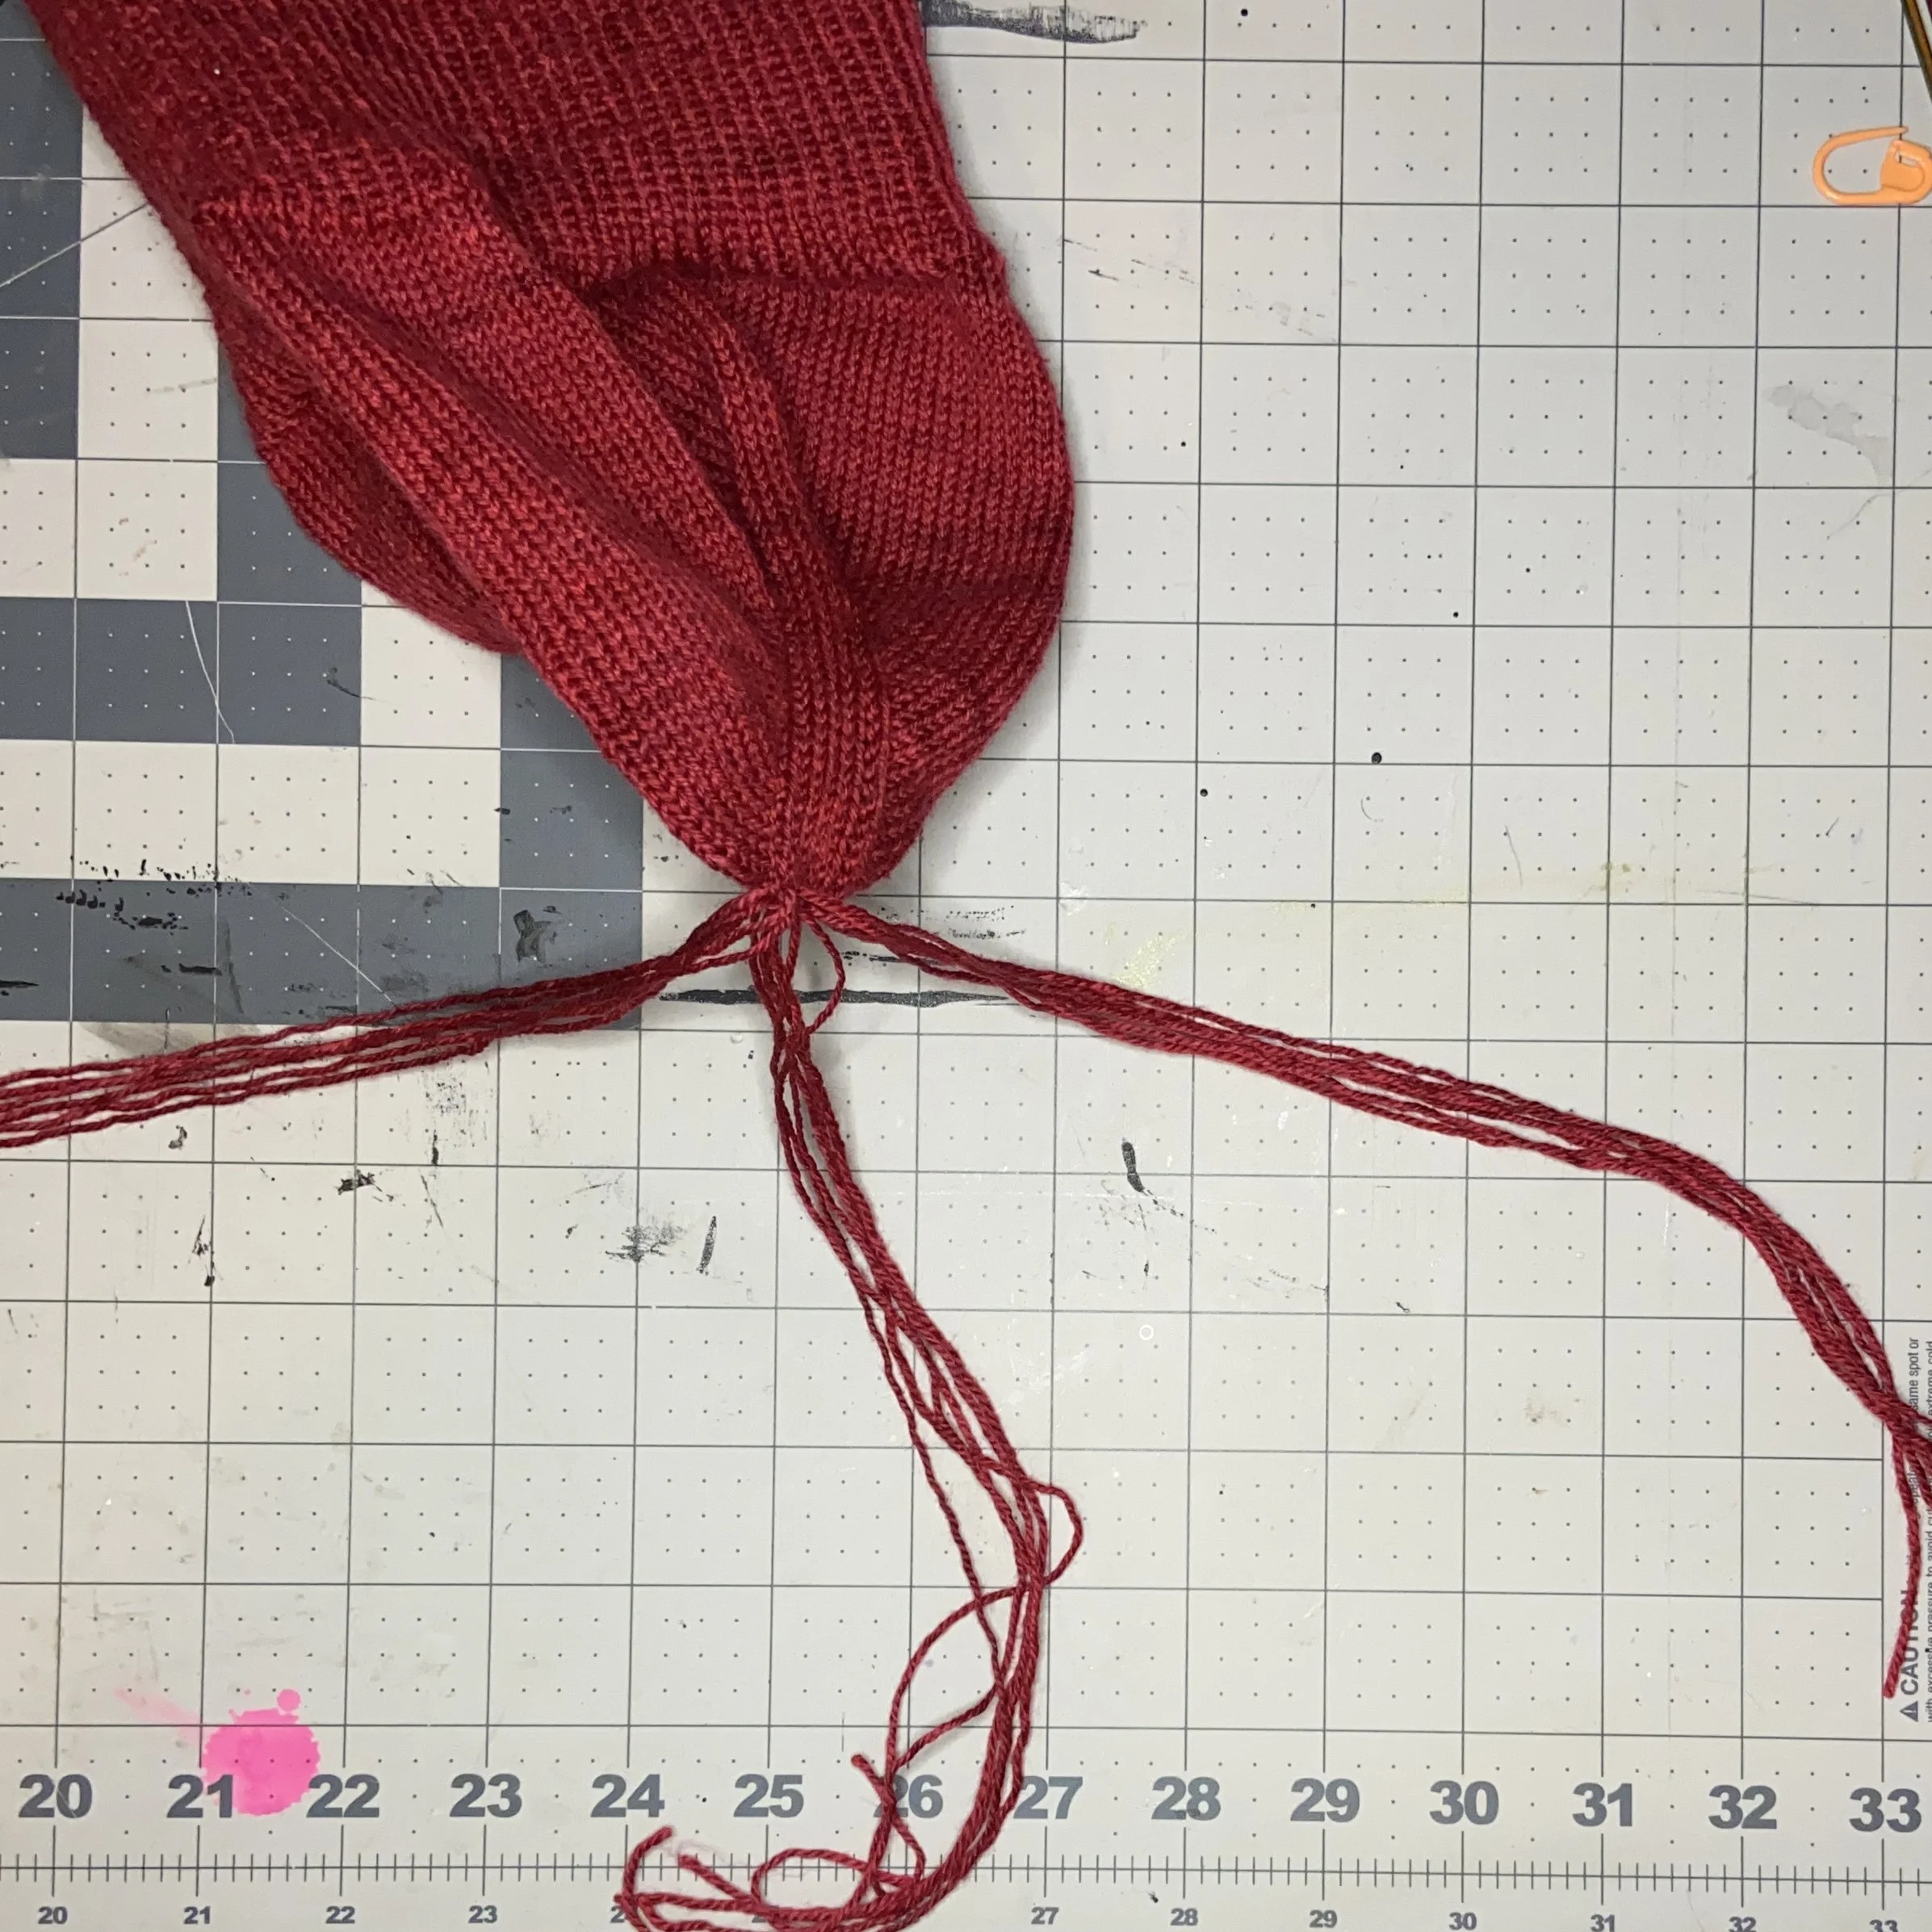
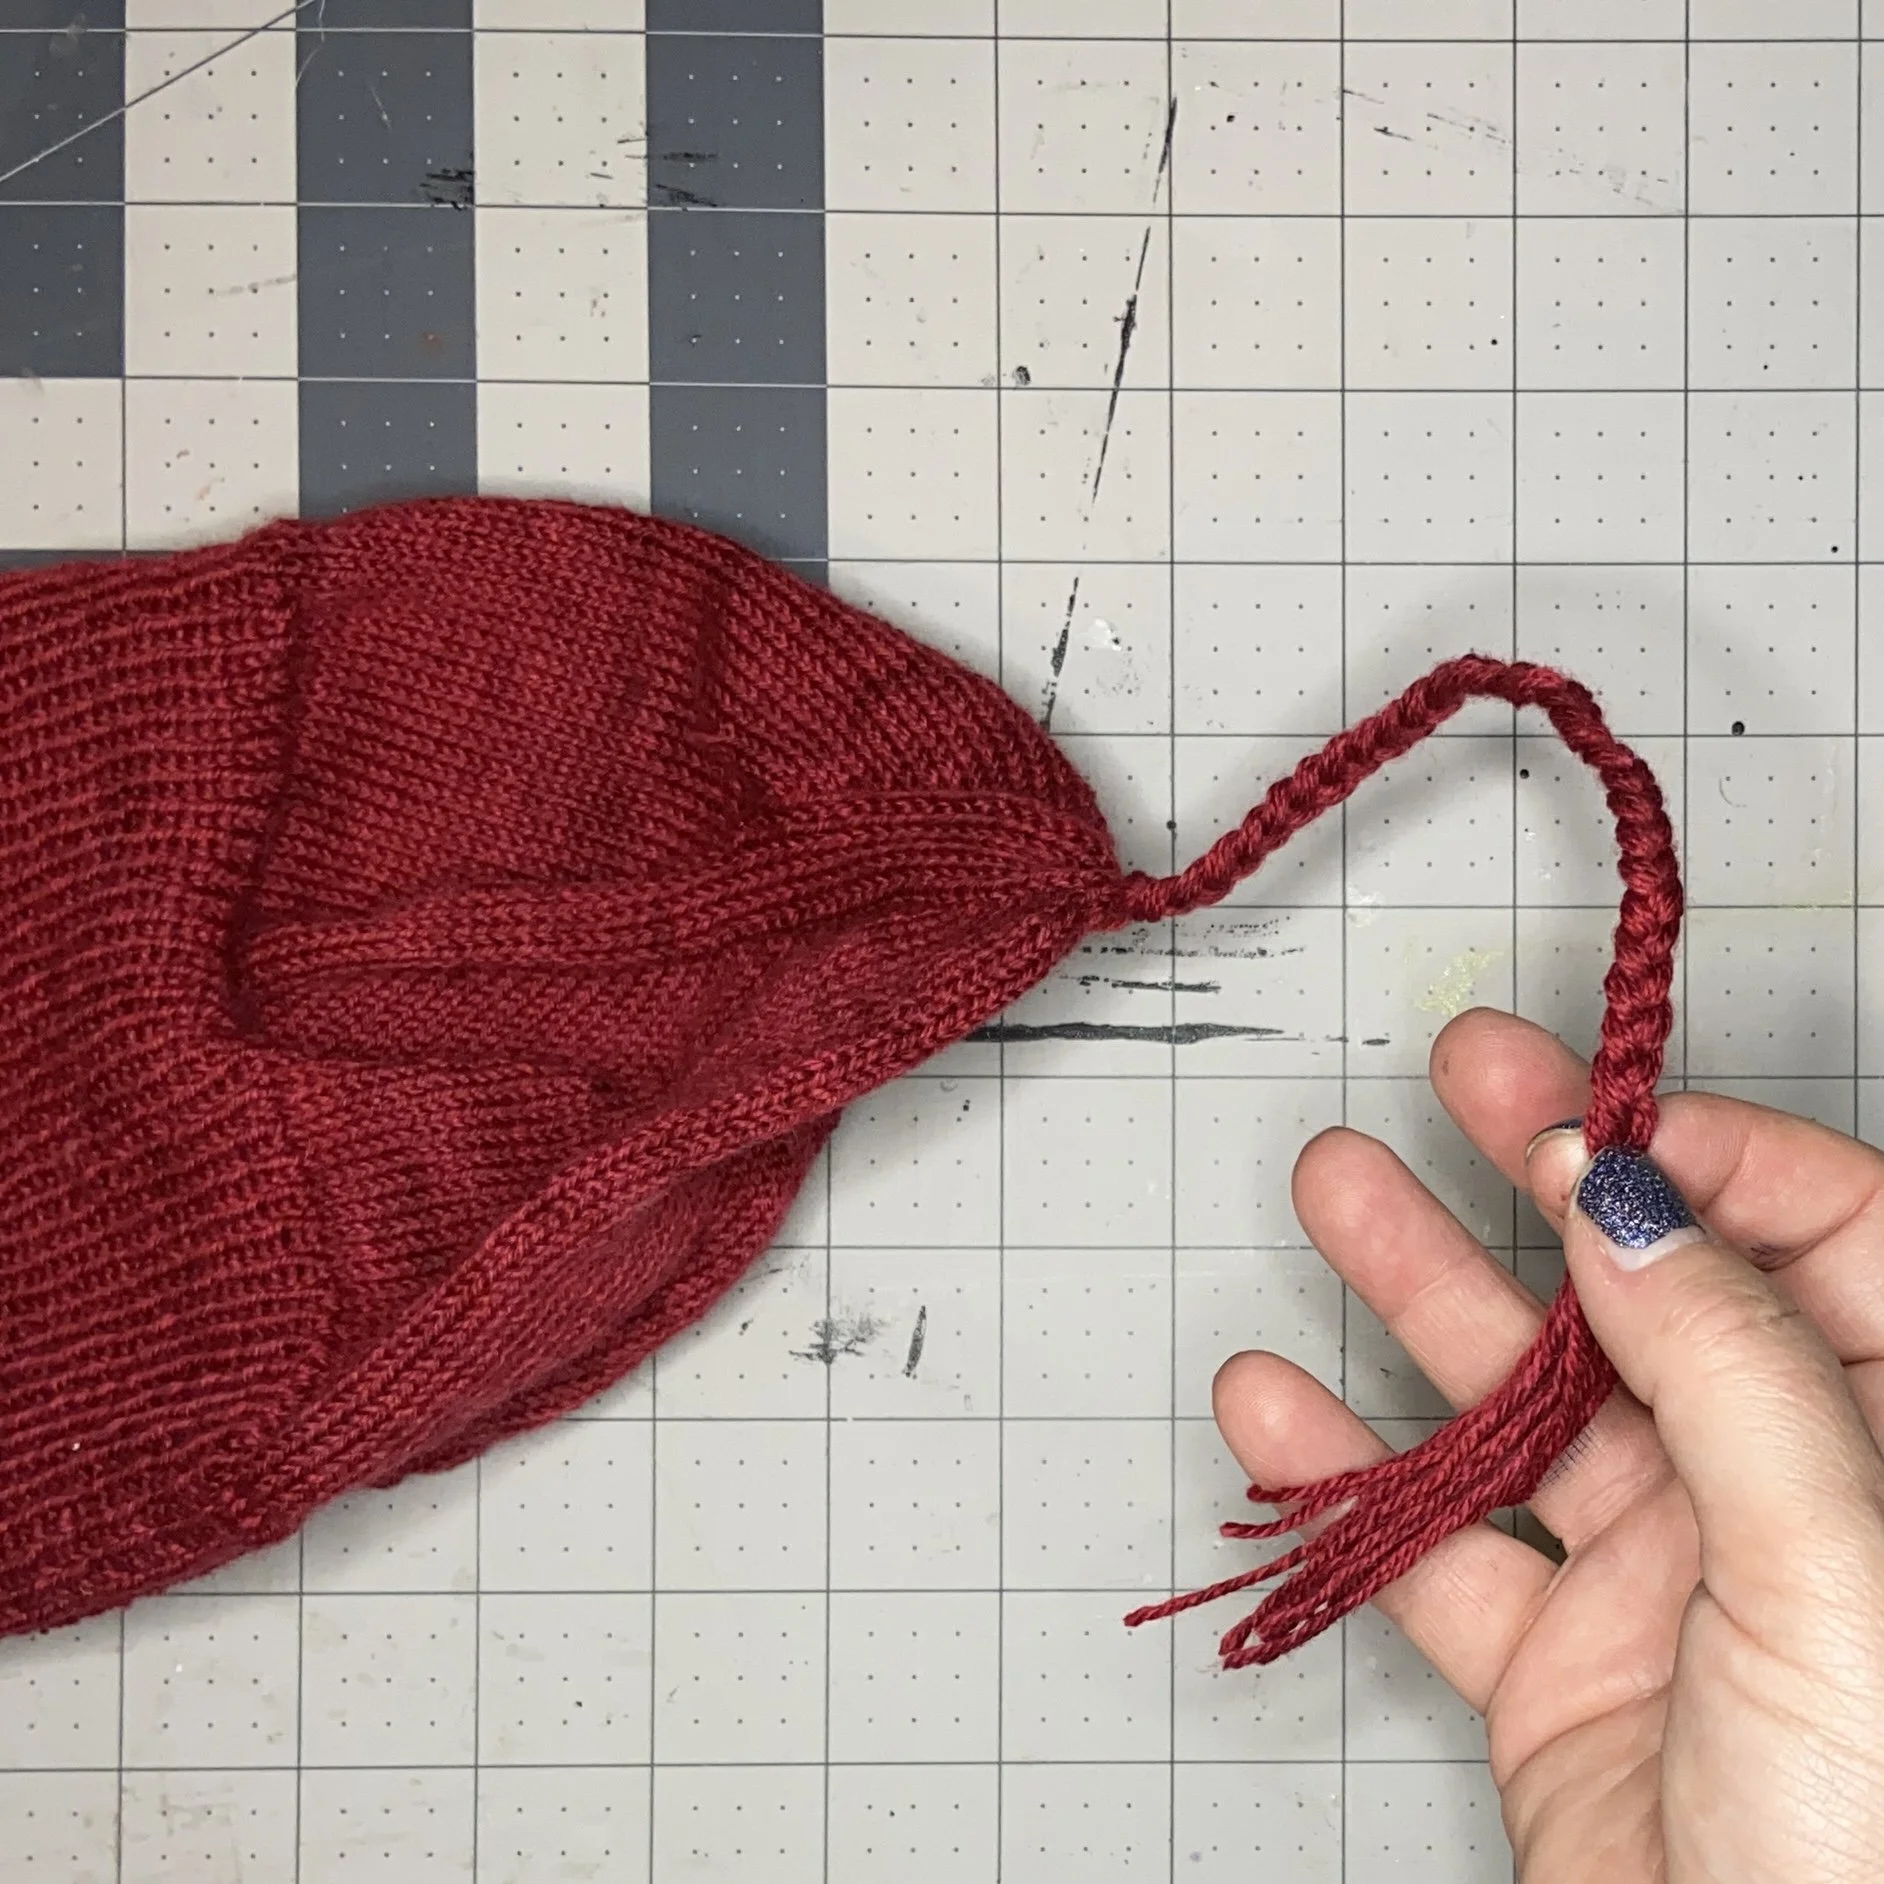
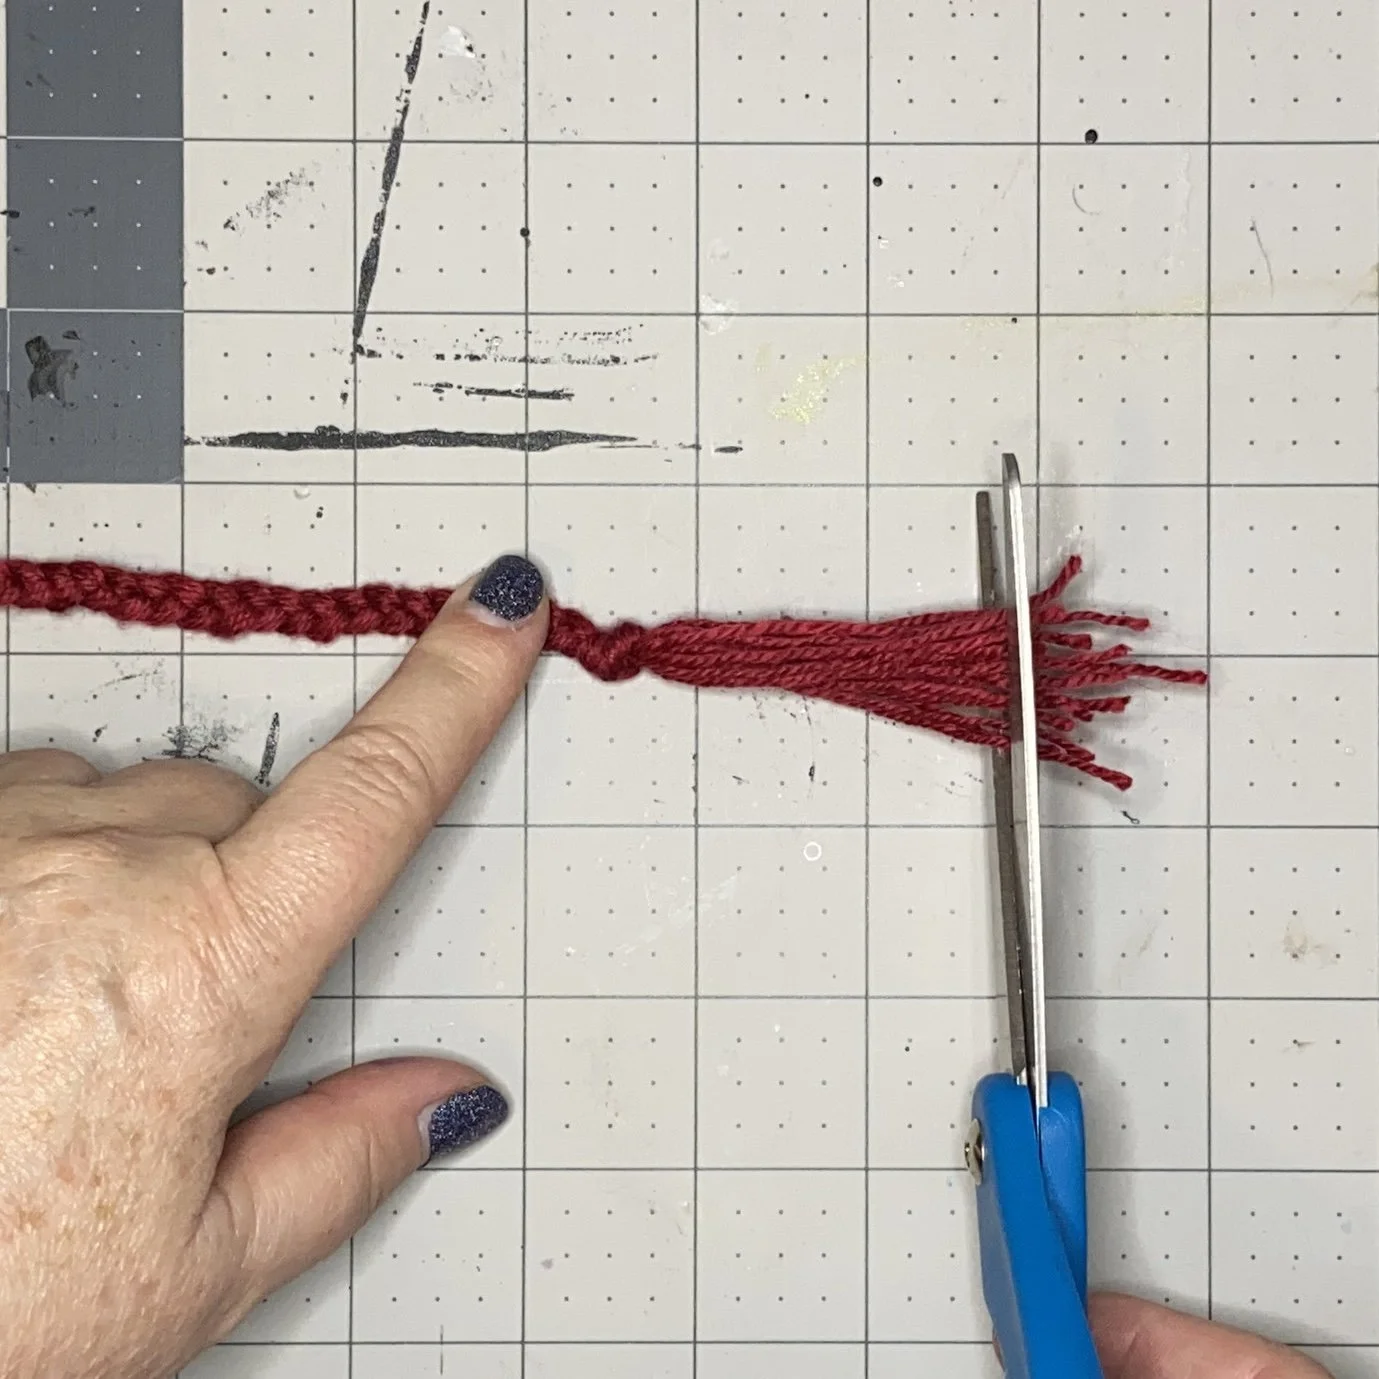
Once the top of the hat is closed, the knitter is directed to cut a bunch of 22” lengths of yarn, then thread them through the point of the hat, so that each strand is held in the center, with both ends protruding out the top. Then, the strands are gathered up into three bunches and braided together. The braid is knotted at the bottom, with the strand ends forming a sort of tassel.
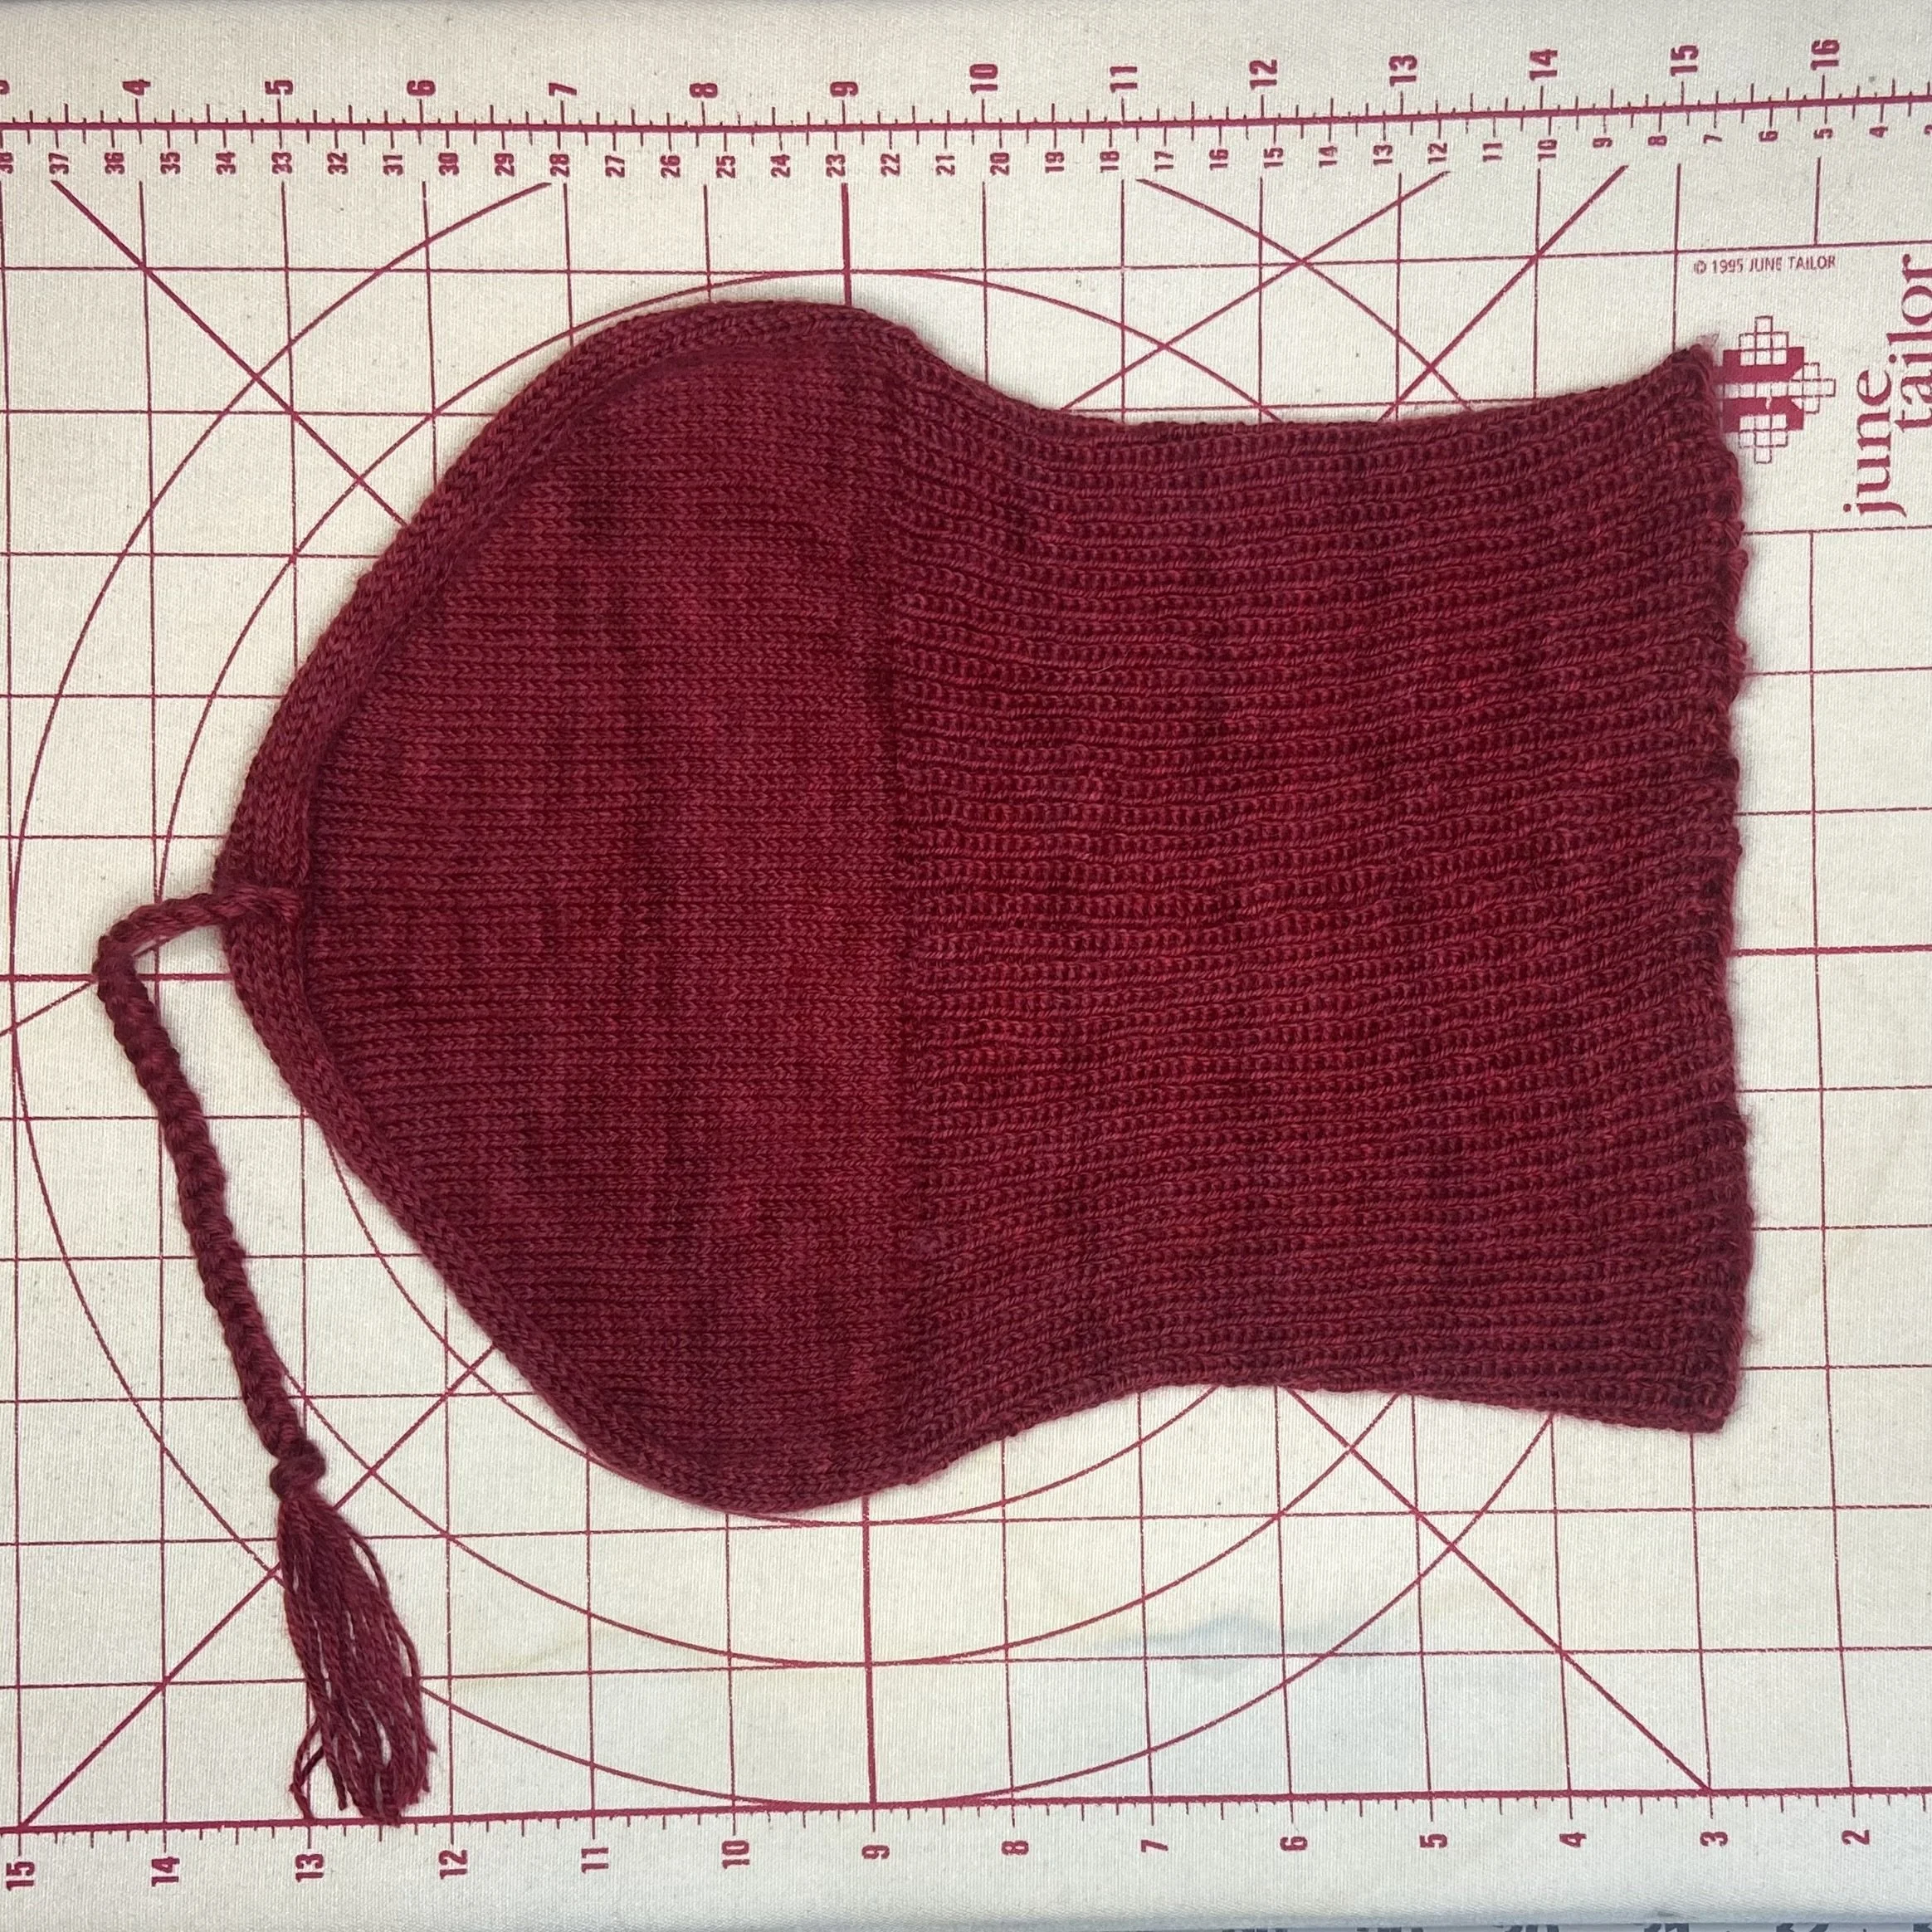
I couldn’t block my hat on the usual styrofoam ball because the top is ridge-shaped, not round. So I just laid it flat to dry, and a day later, turned it over to let the other side dry. Et voila! A very cute hat in red.