Adventures In New Year Nookery
As an Amazon associate, I may earn a small commission if you navigate to Amazon from my site and buy something. This will not result in an extra cost to you.
Welcome to 2026! I know it’s somewhat traditional to mark the start of the new year by making resolutions which will last for approximately a week. But I’ve chosen instead to celebrate by building the first book nook of the year.
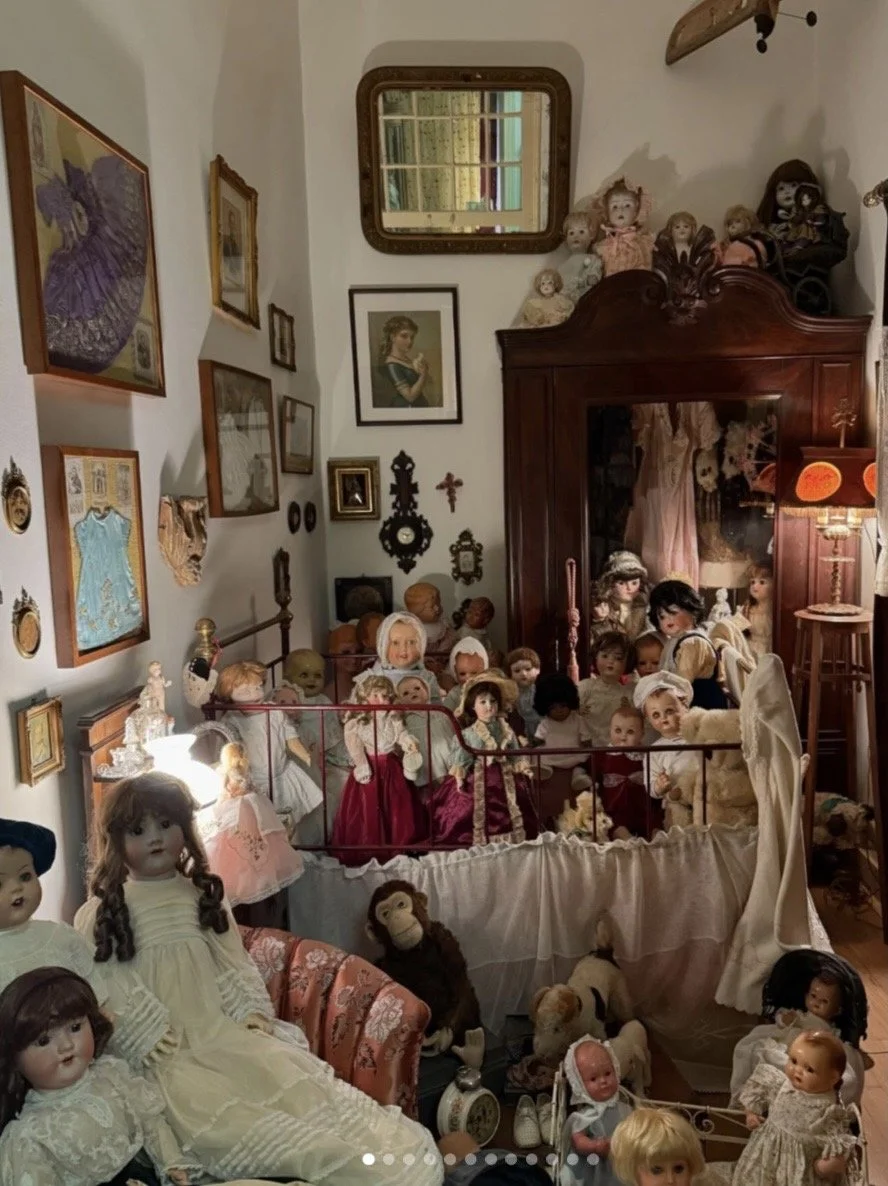
It occurred to me the other day that I’m in danger of becoming like one of those doll ladies. You know the ones…they keep an entire room to house their collection of creepy dolls. And any guest who spends a night in their house has to worry about the dolls coming to life in the night and stabbing someone in their sleep. No? Just me? Okay, whatever. My point is, I now have enough book nooks in my house that I can’t look at a bookshelf without seeing one. Is this a concern? Maybe a minor concern. Do I plan to stop building book nooks? Heck no! The question of what to do with all of these after I die will be a problem for my heirs.
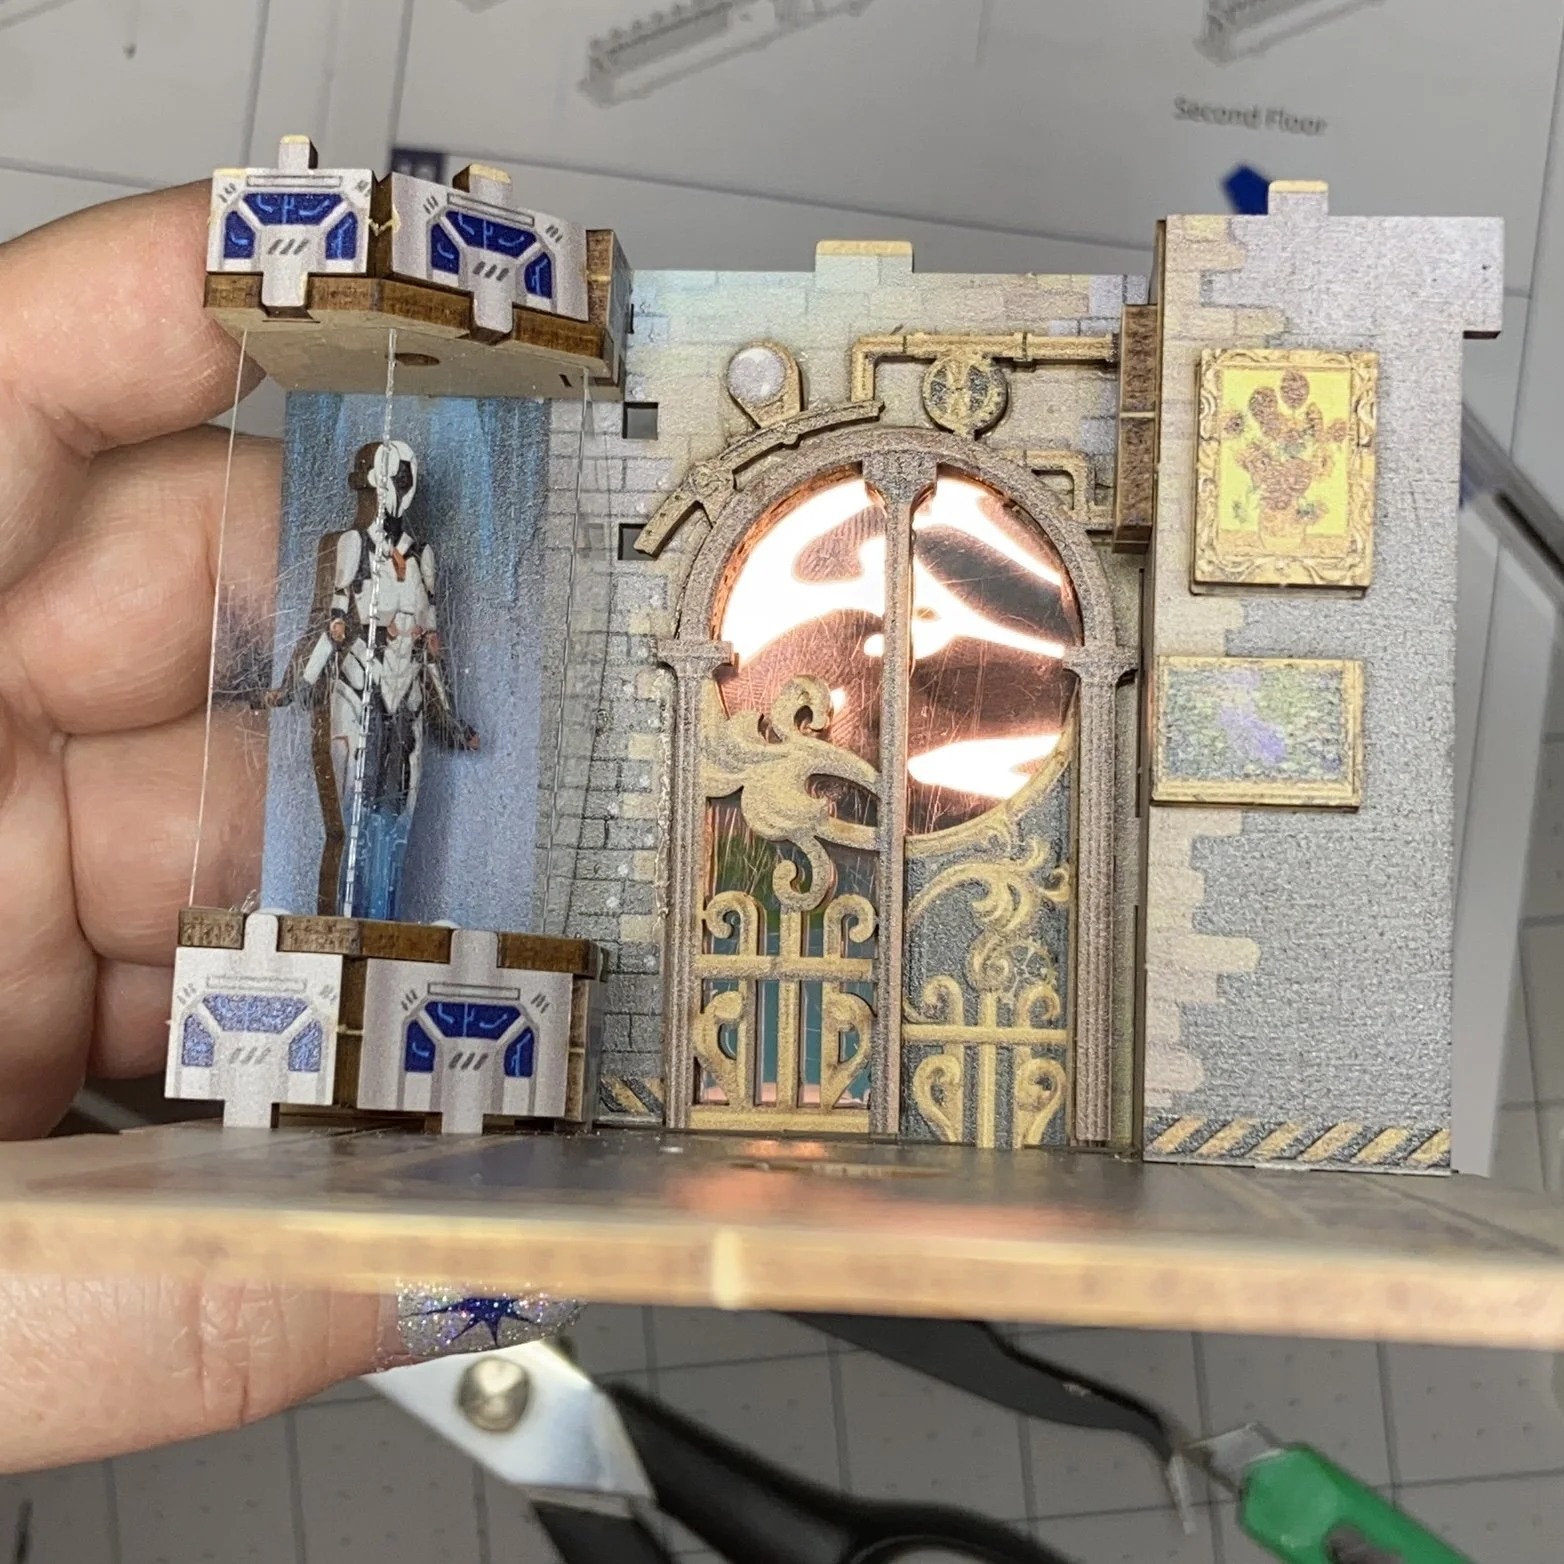
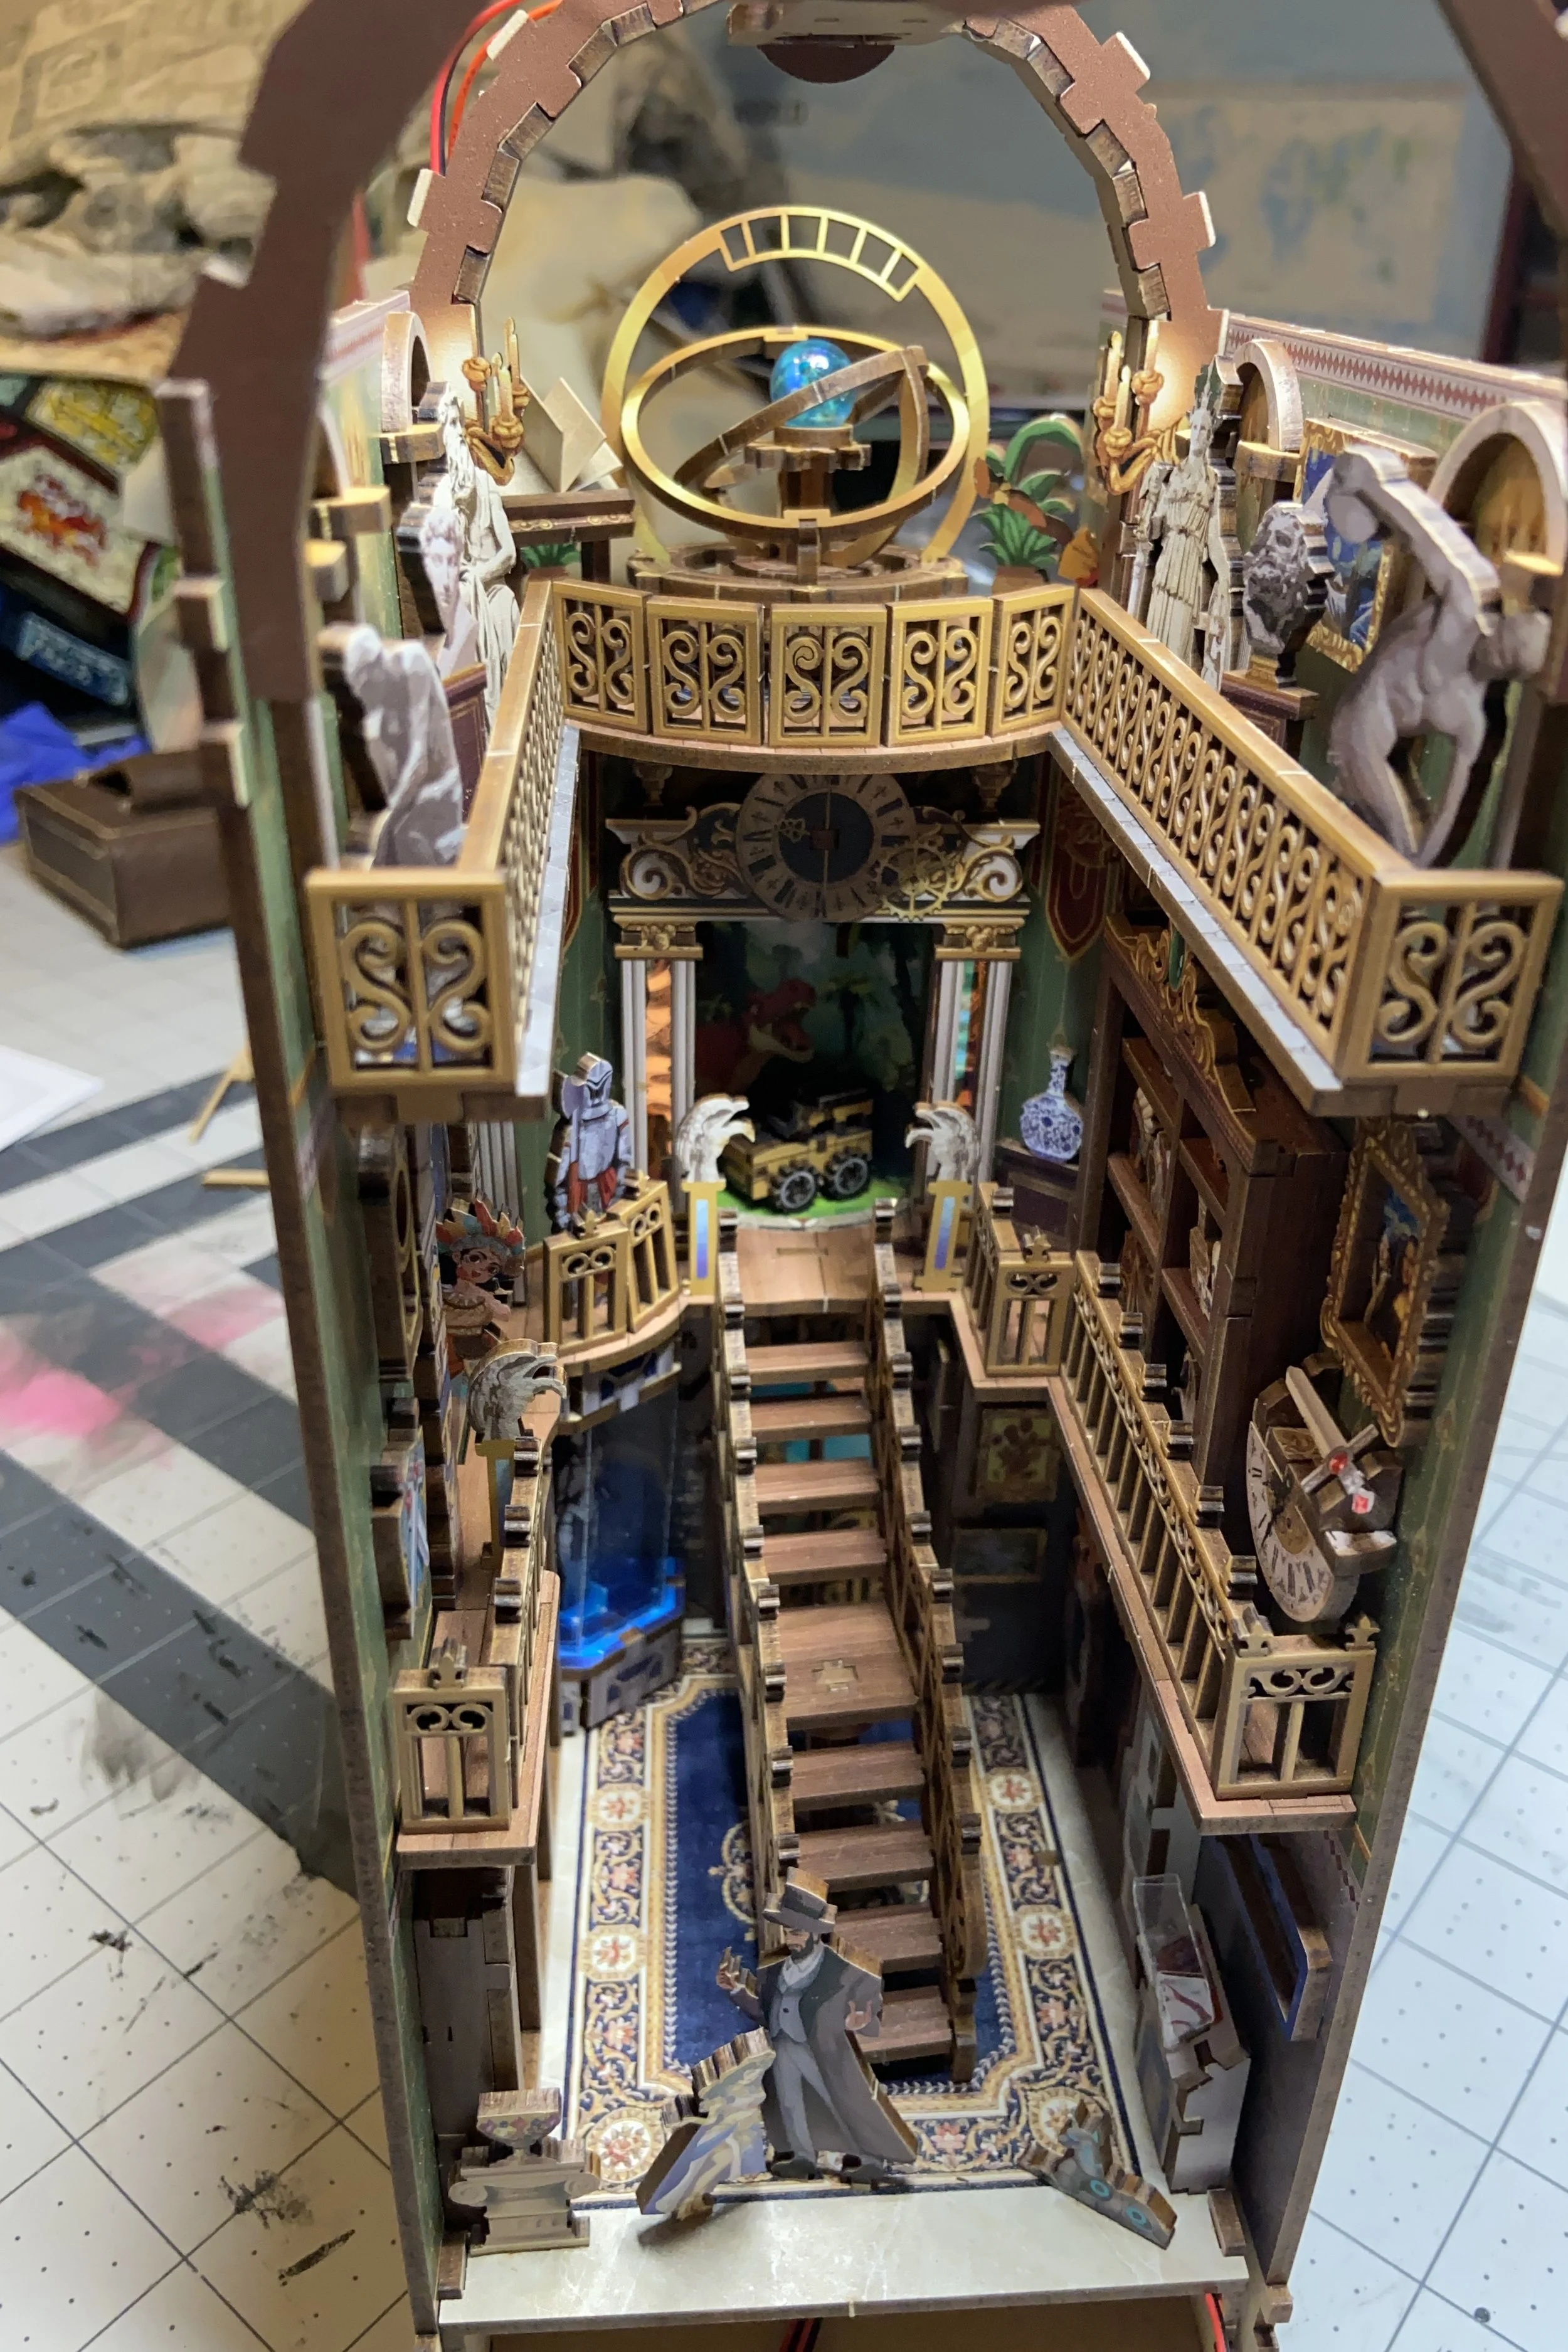
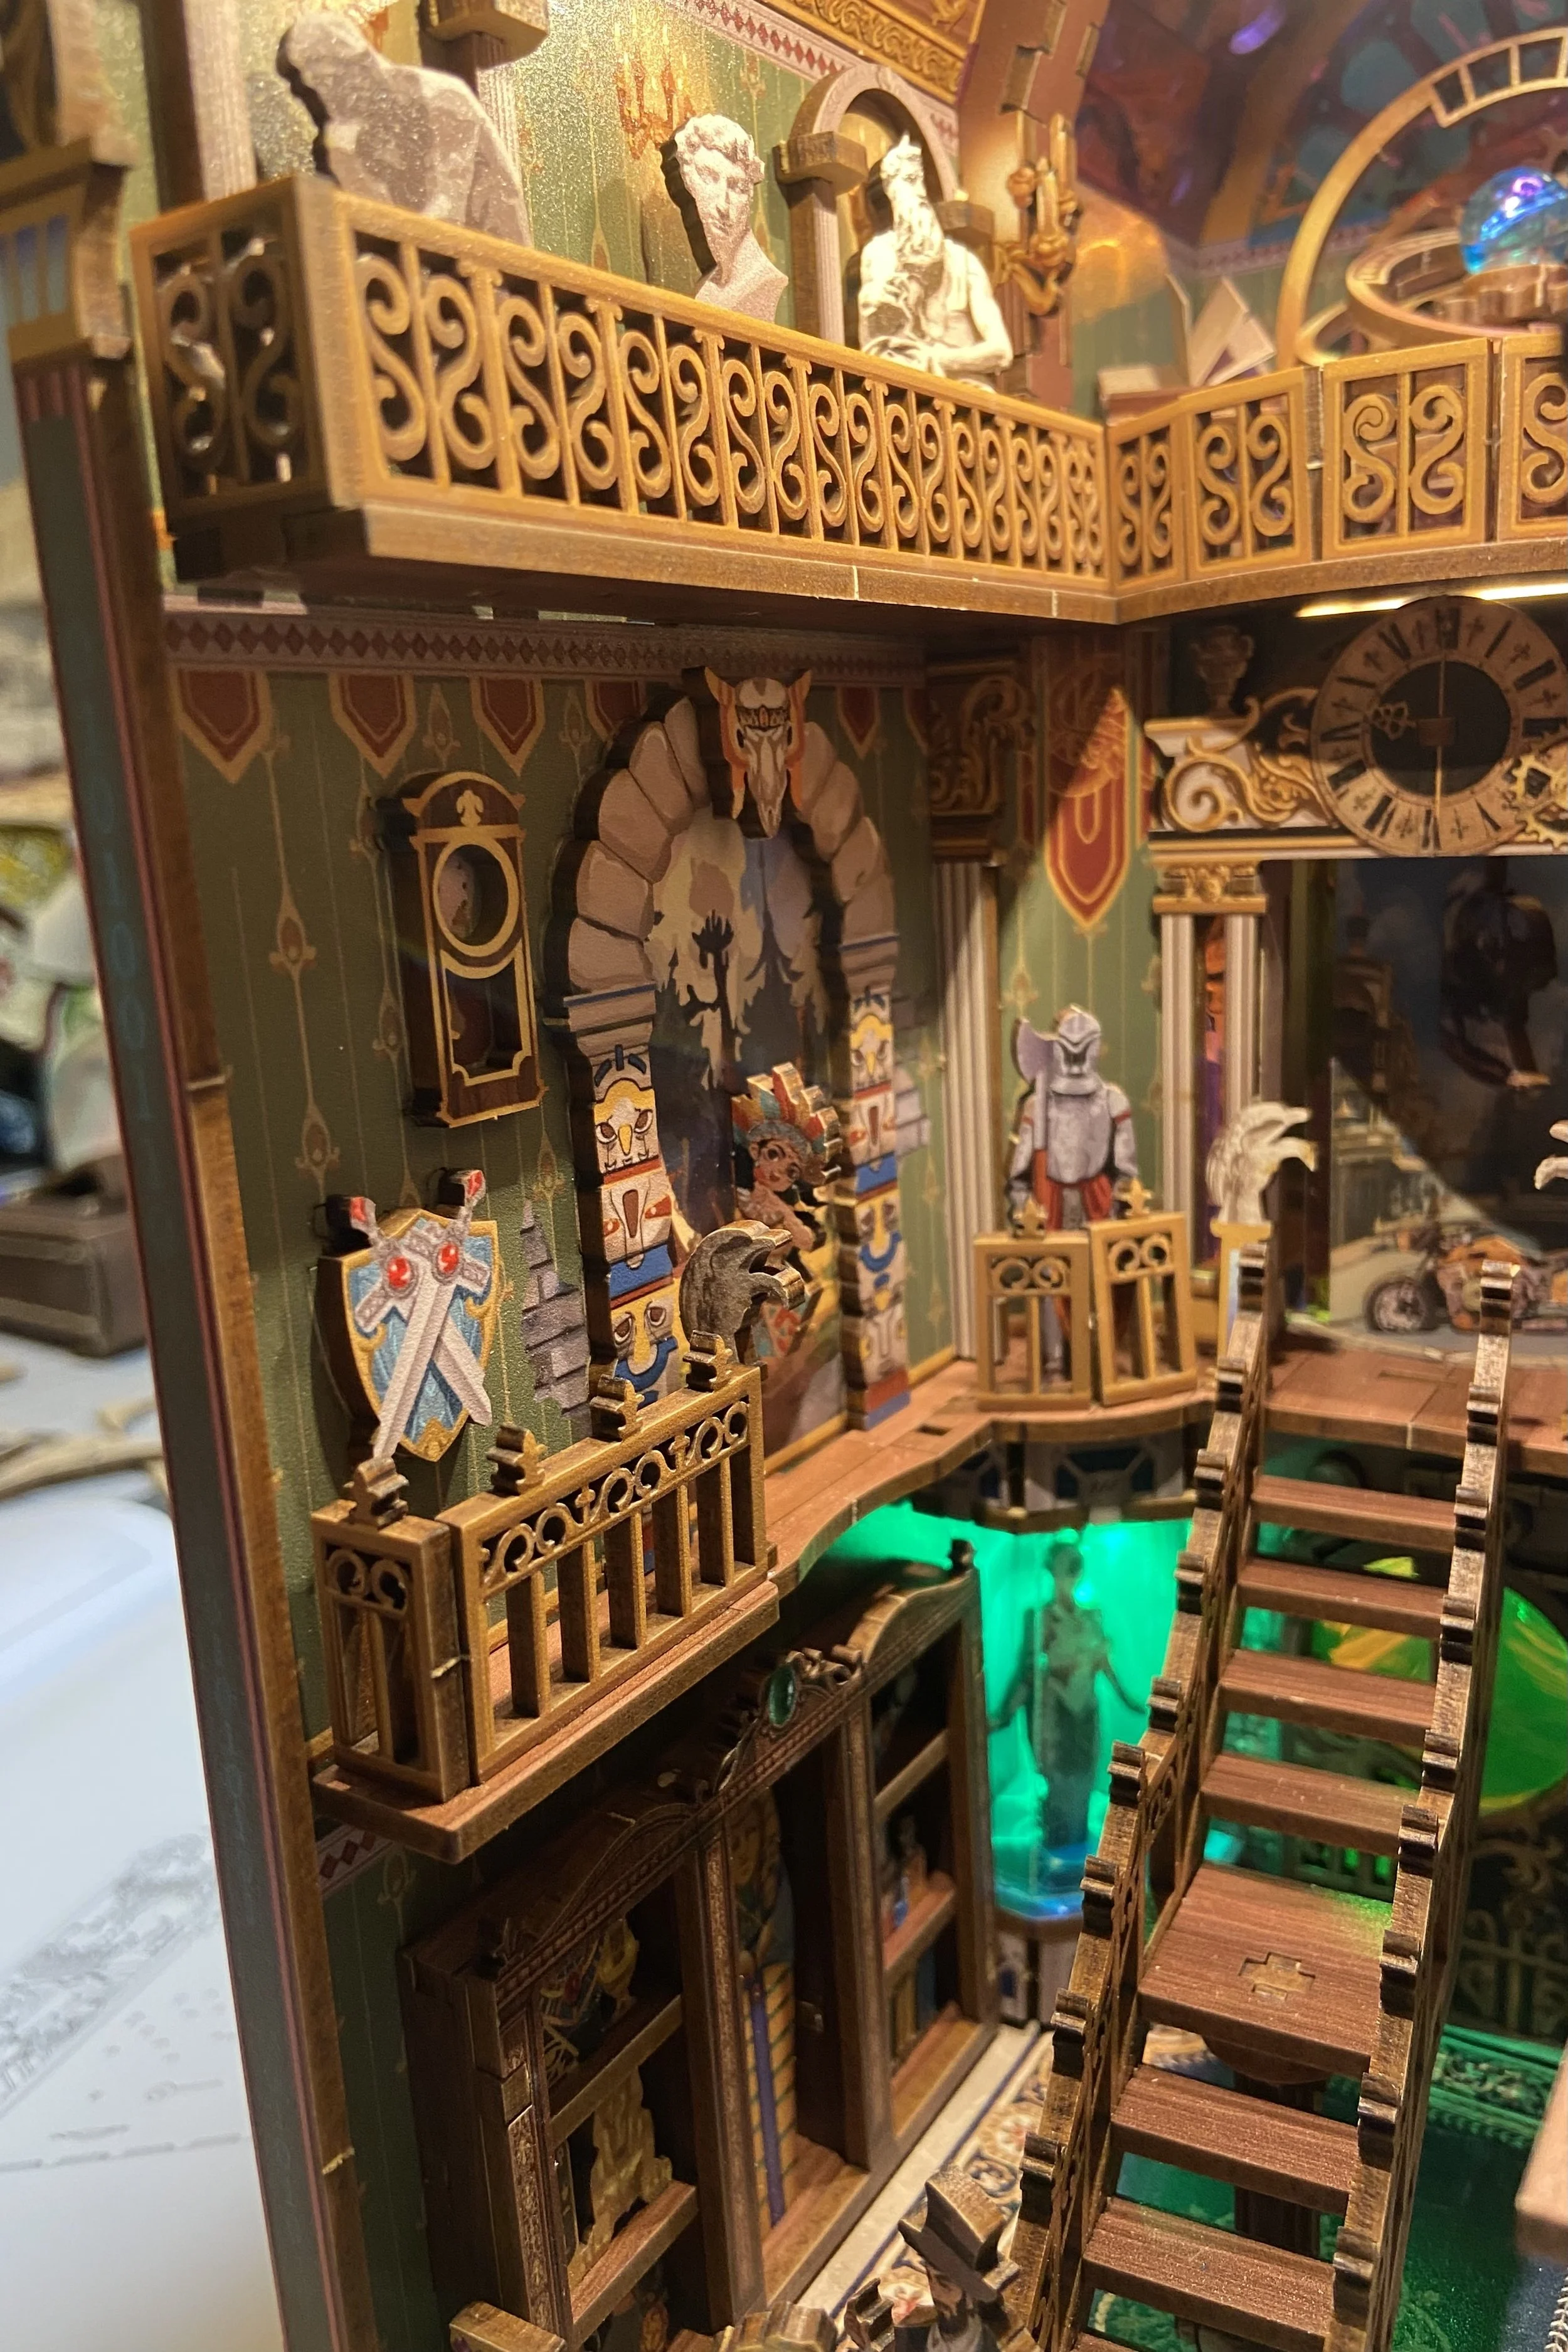
The first book nook of 2026 is called Spacetime Museum and is made by Tonecheer, who are now my go-to company for book nooks. Their kits are really well made. And almost always, any mistakes are completely my fault. This one is gorgeous and eclectic, with some futuristic elements but also the feel of an old-school museum, complete with classic paintings and statuary. It’s really pretty!
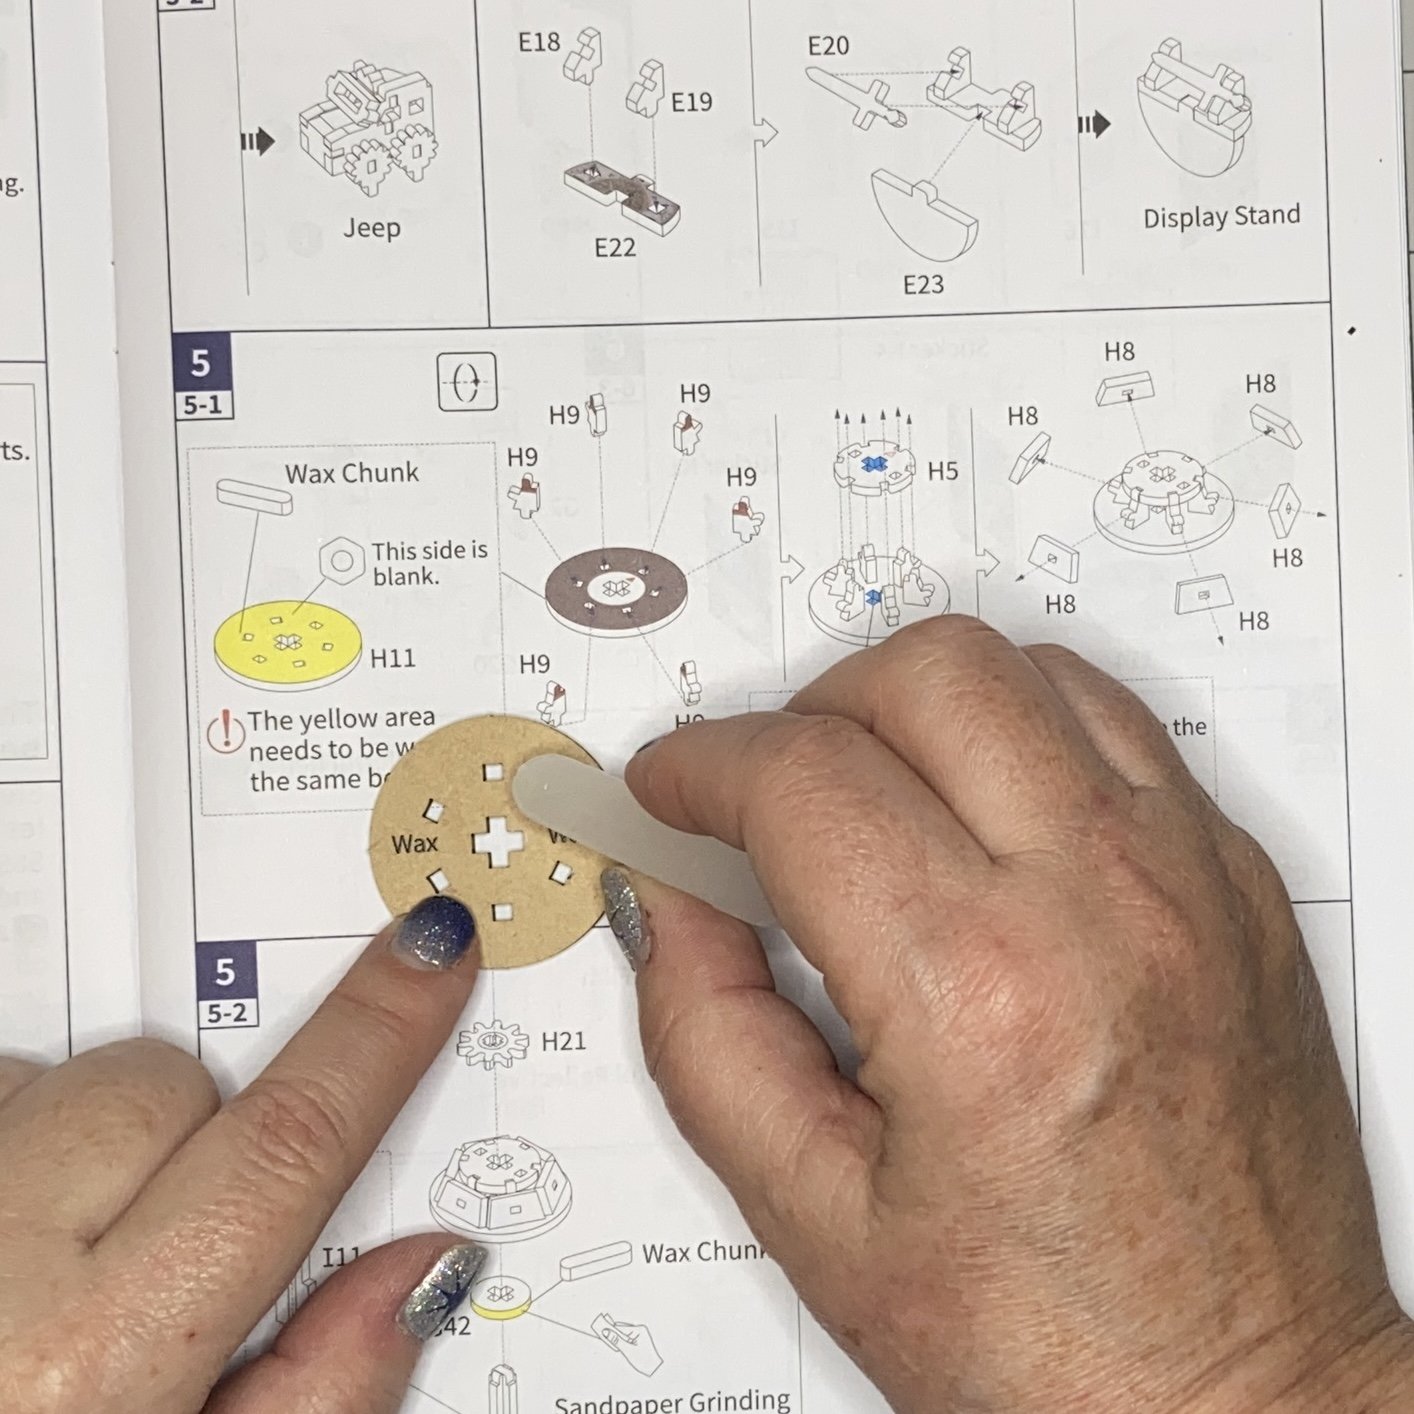
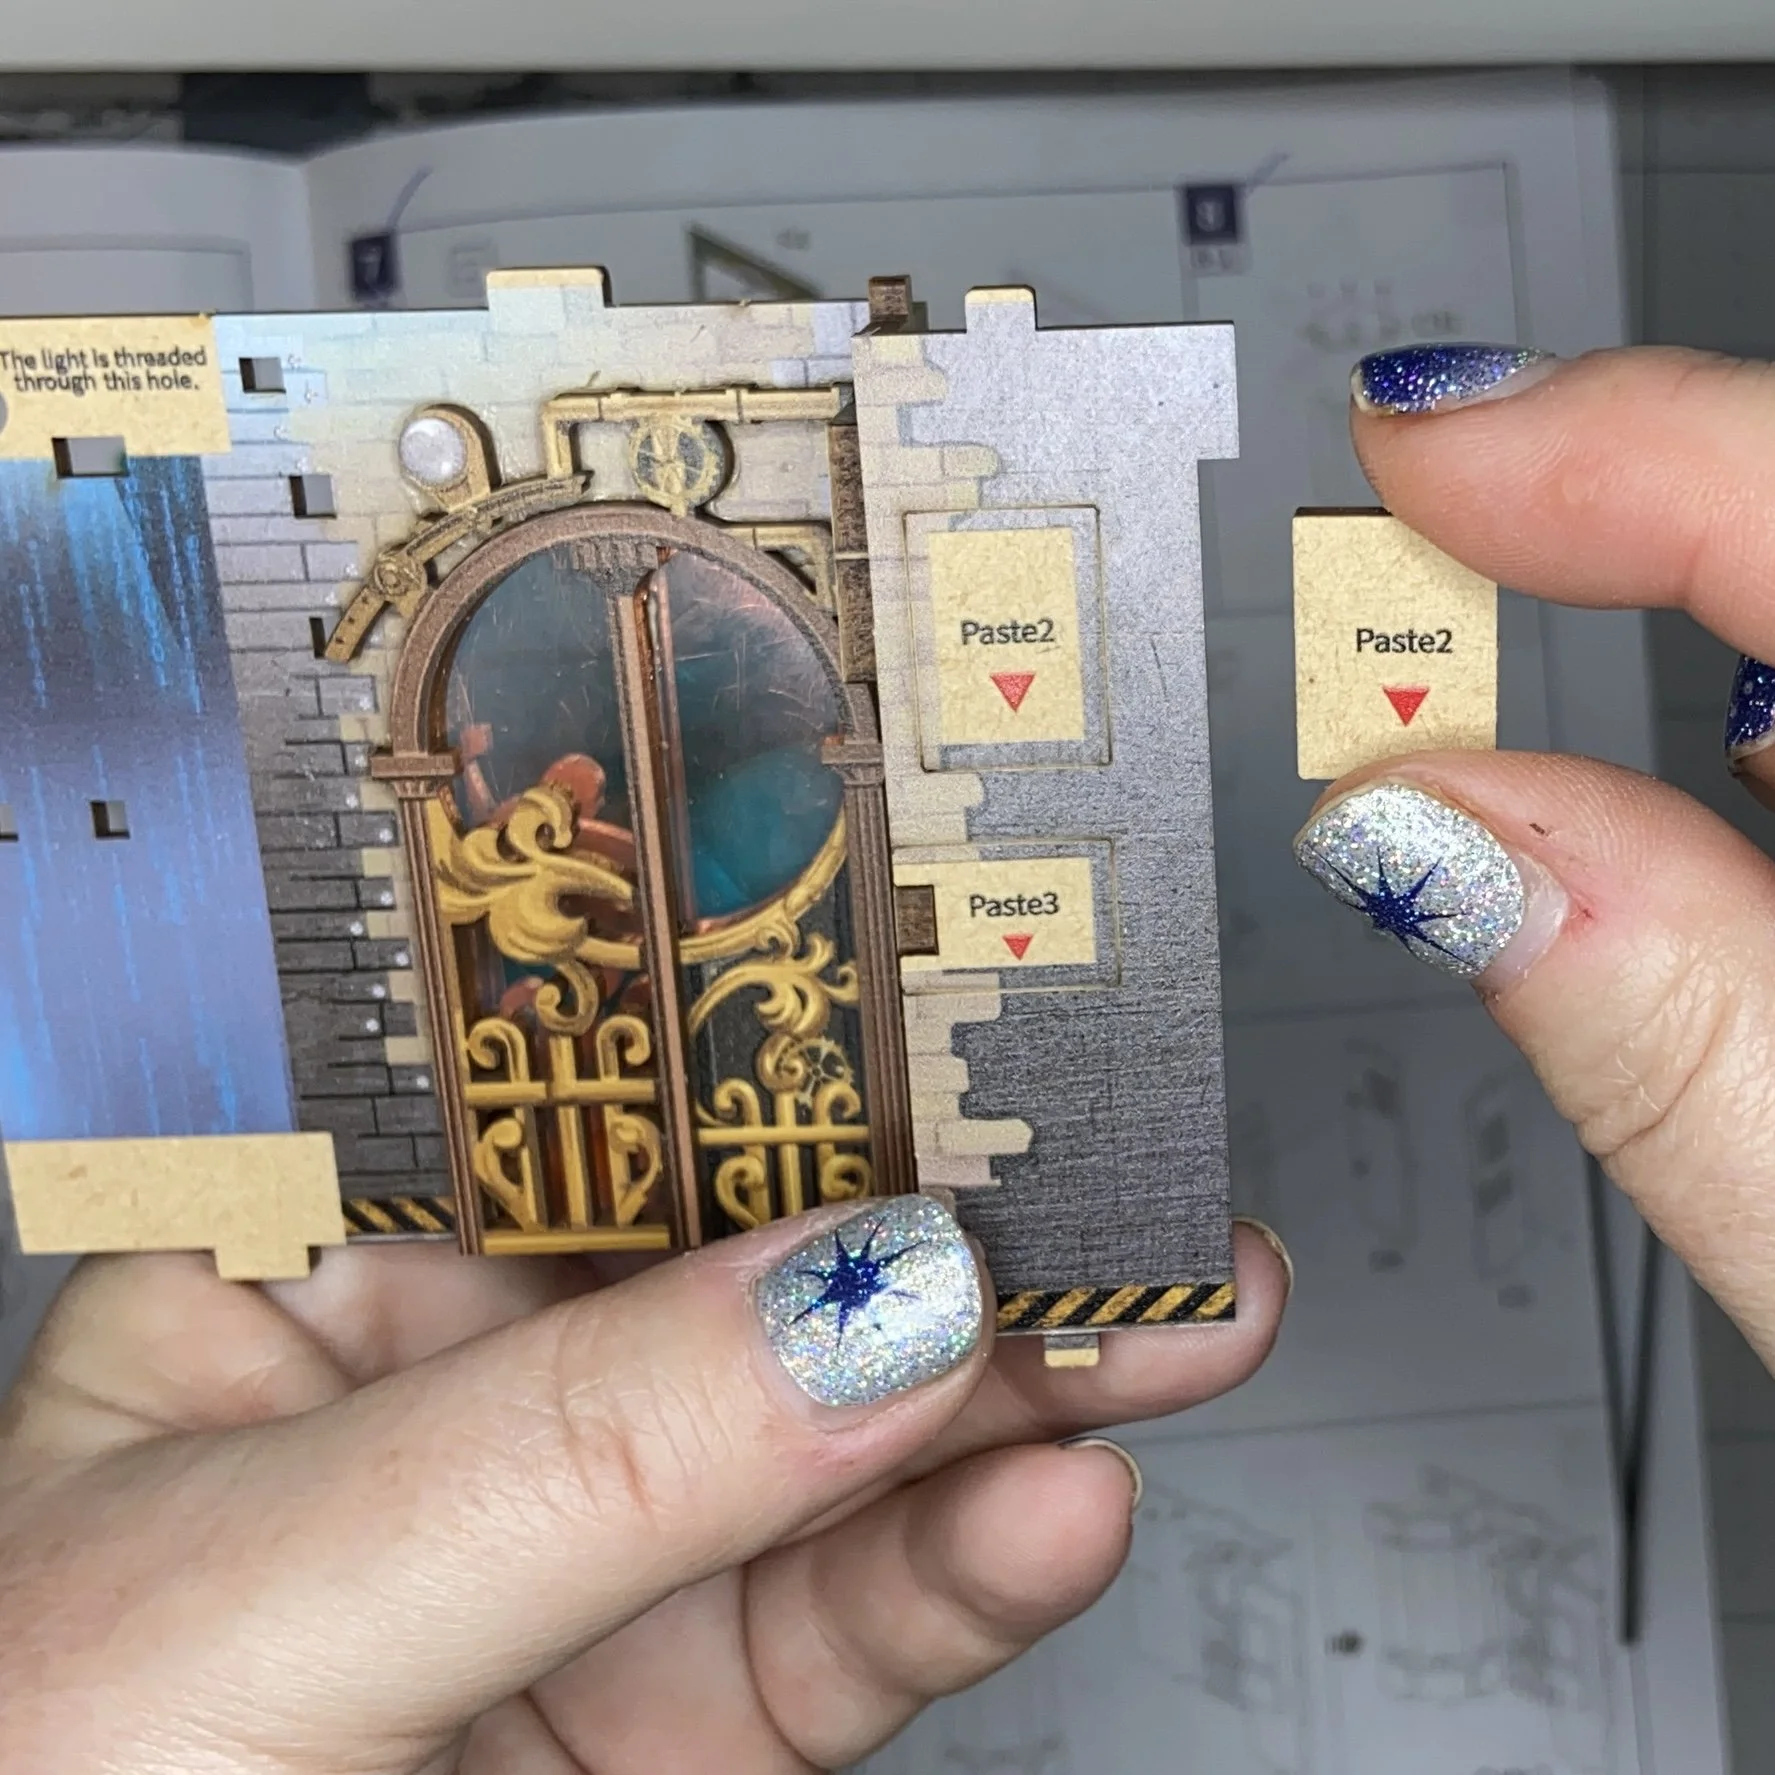
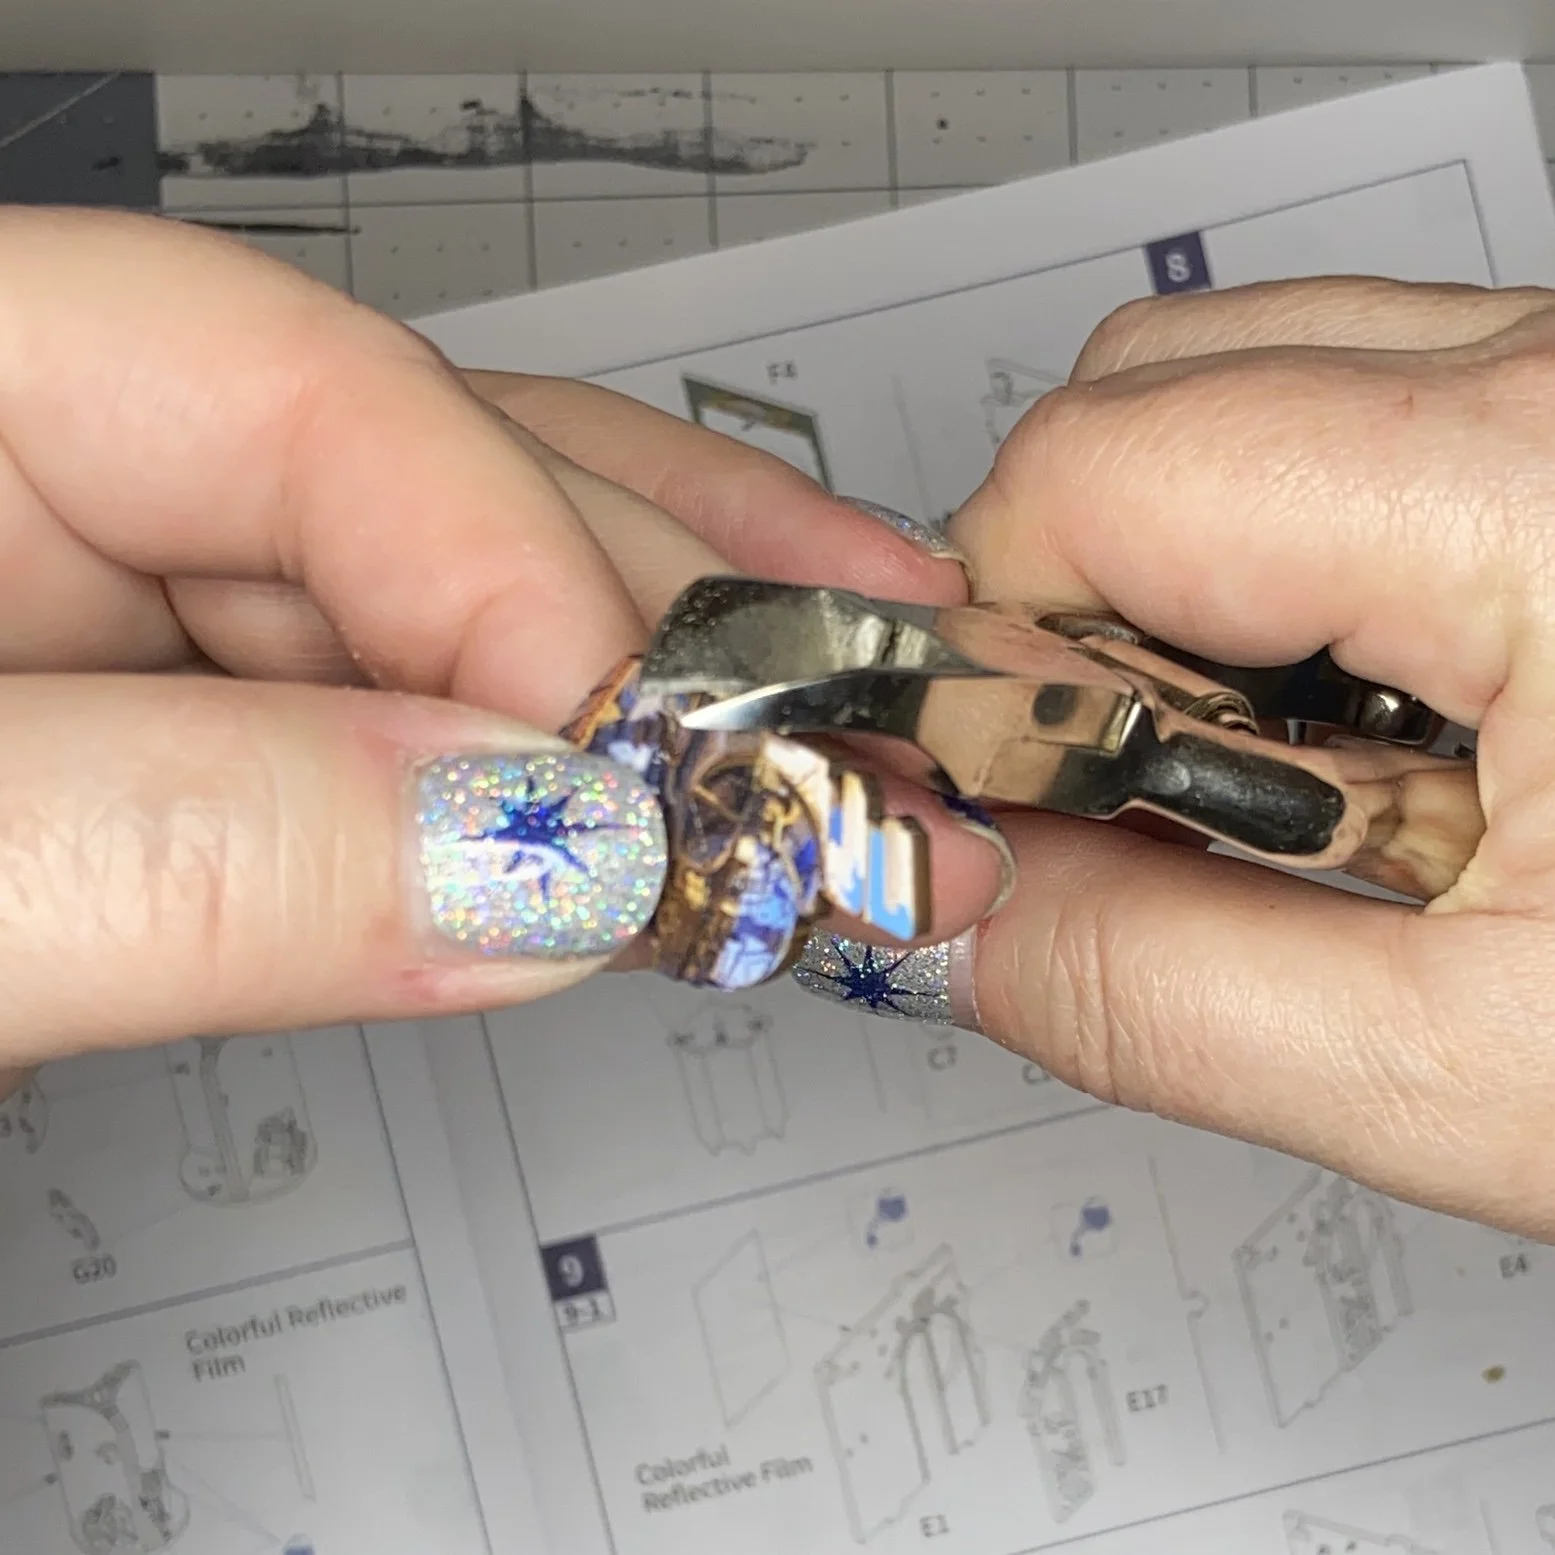
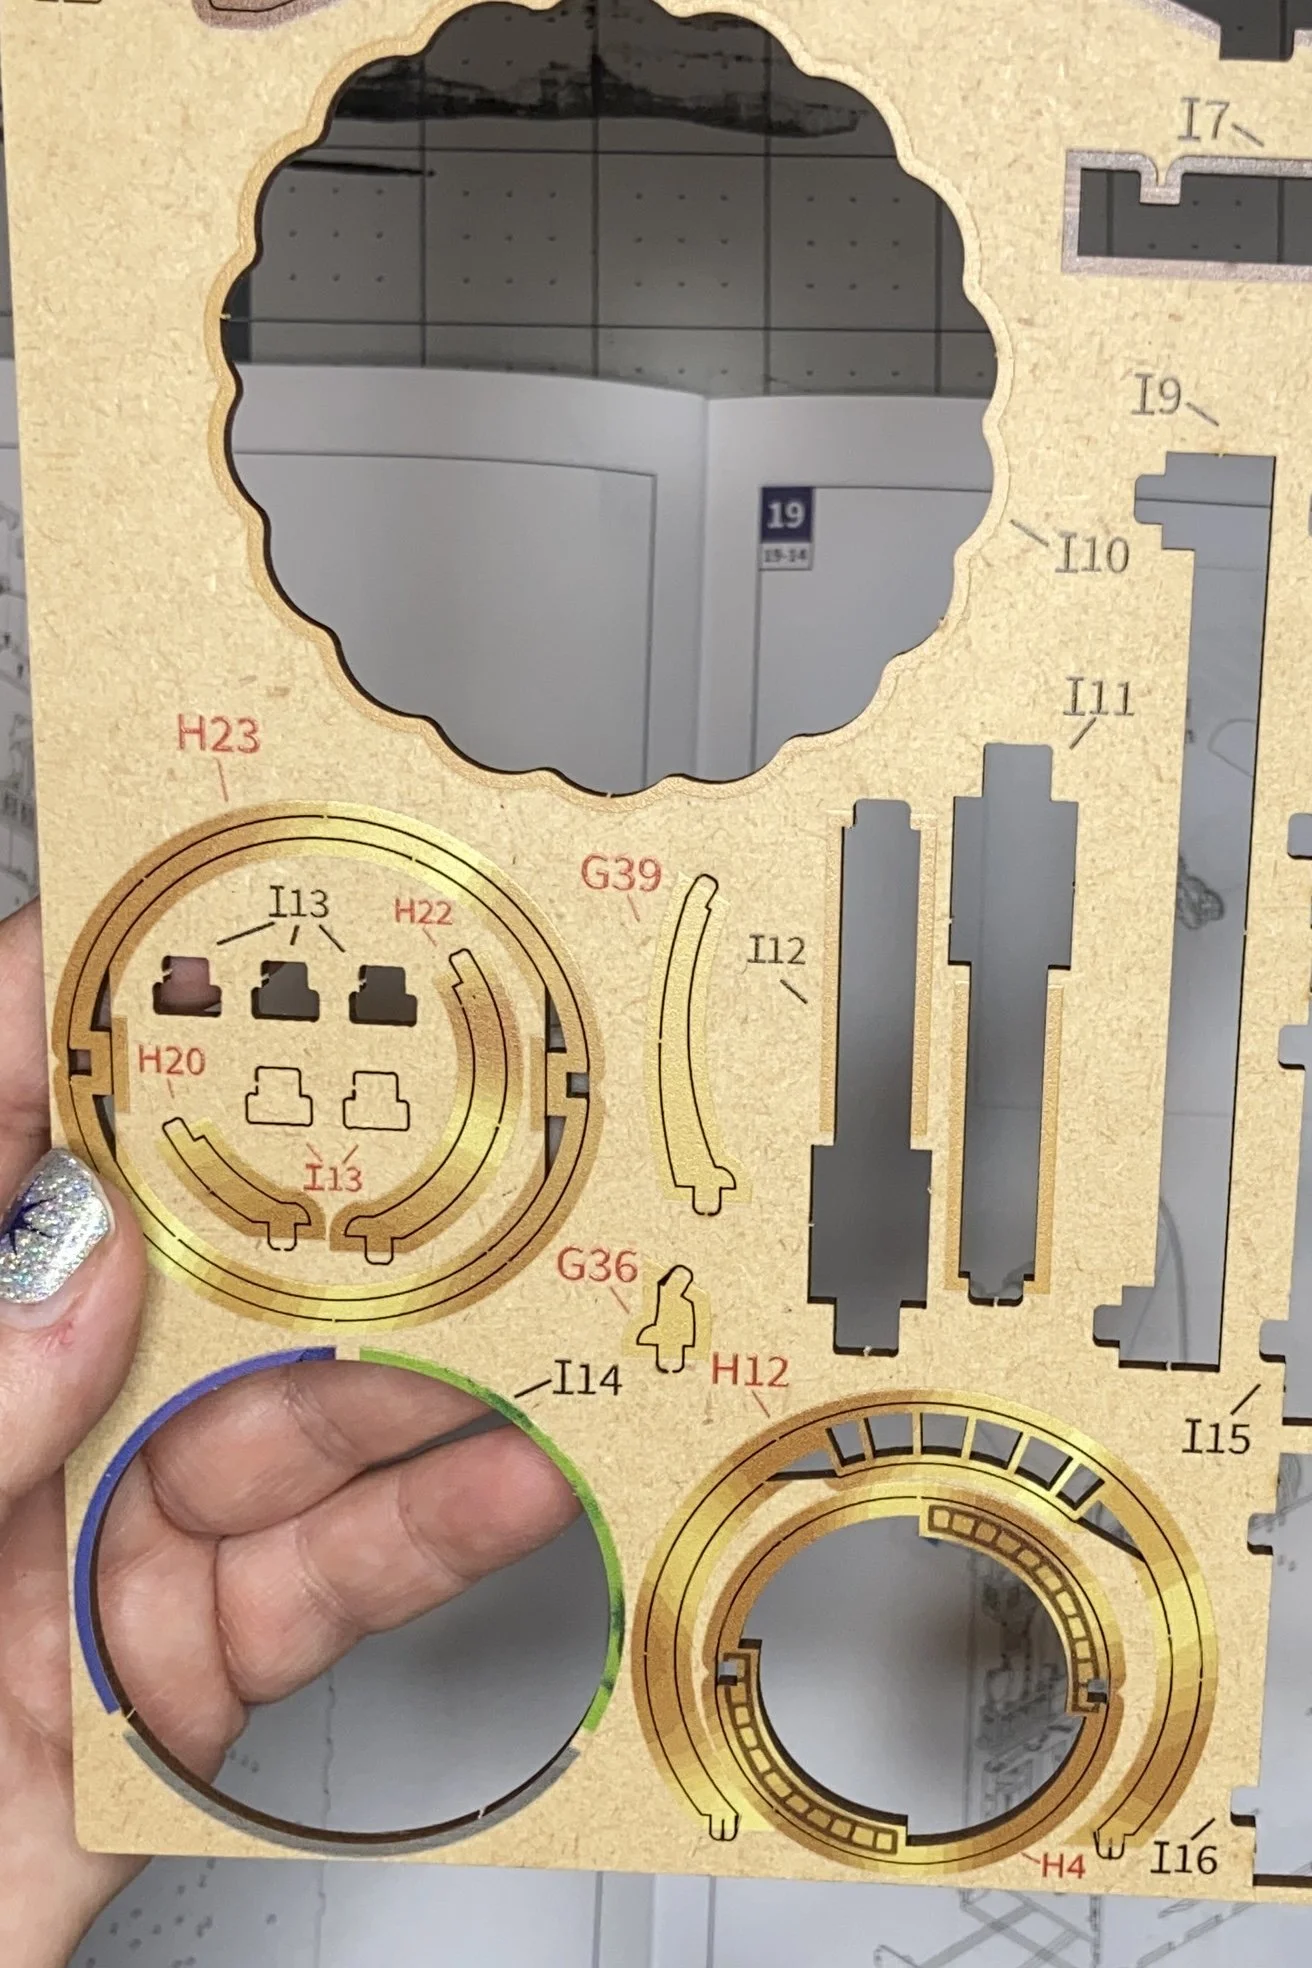
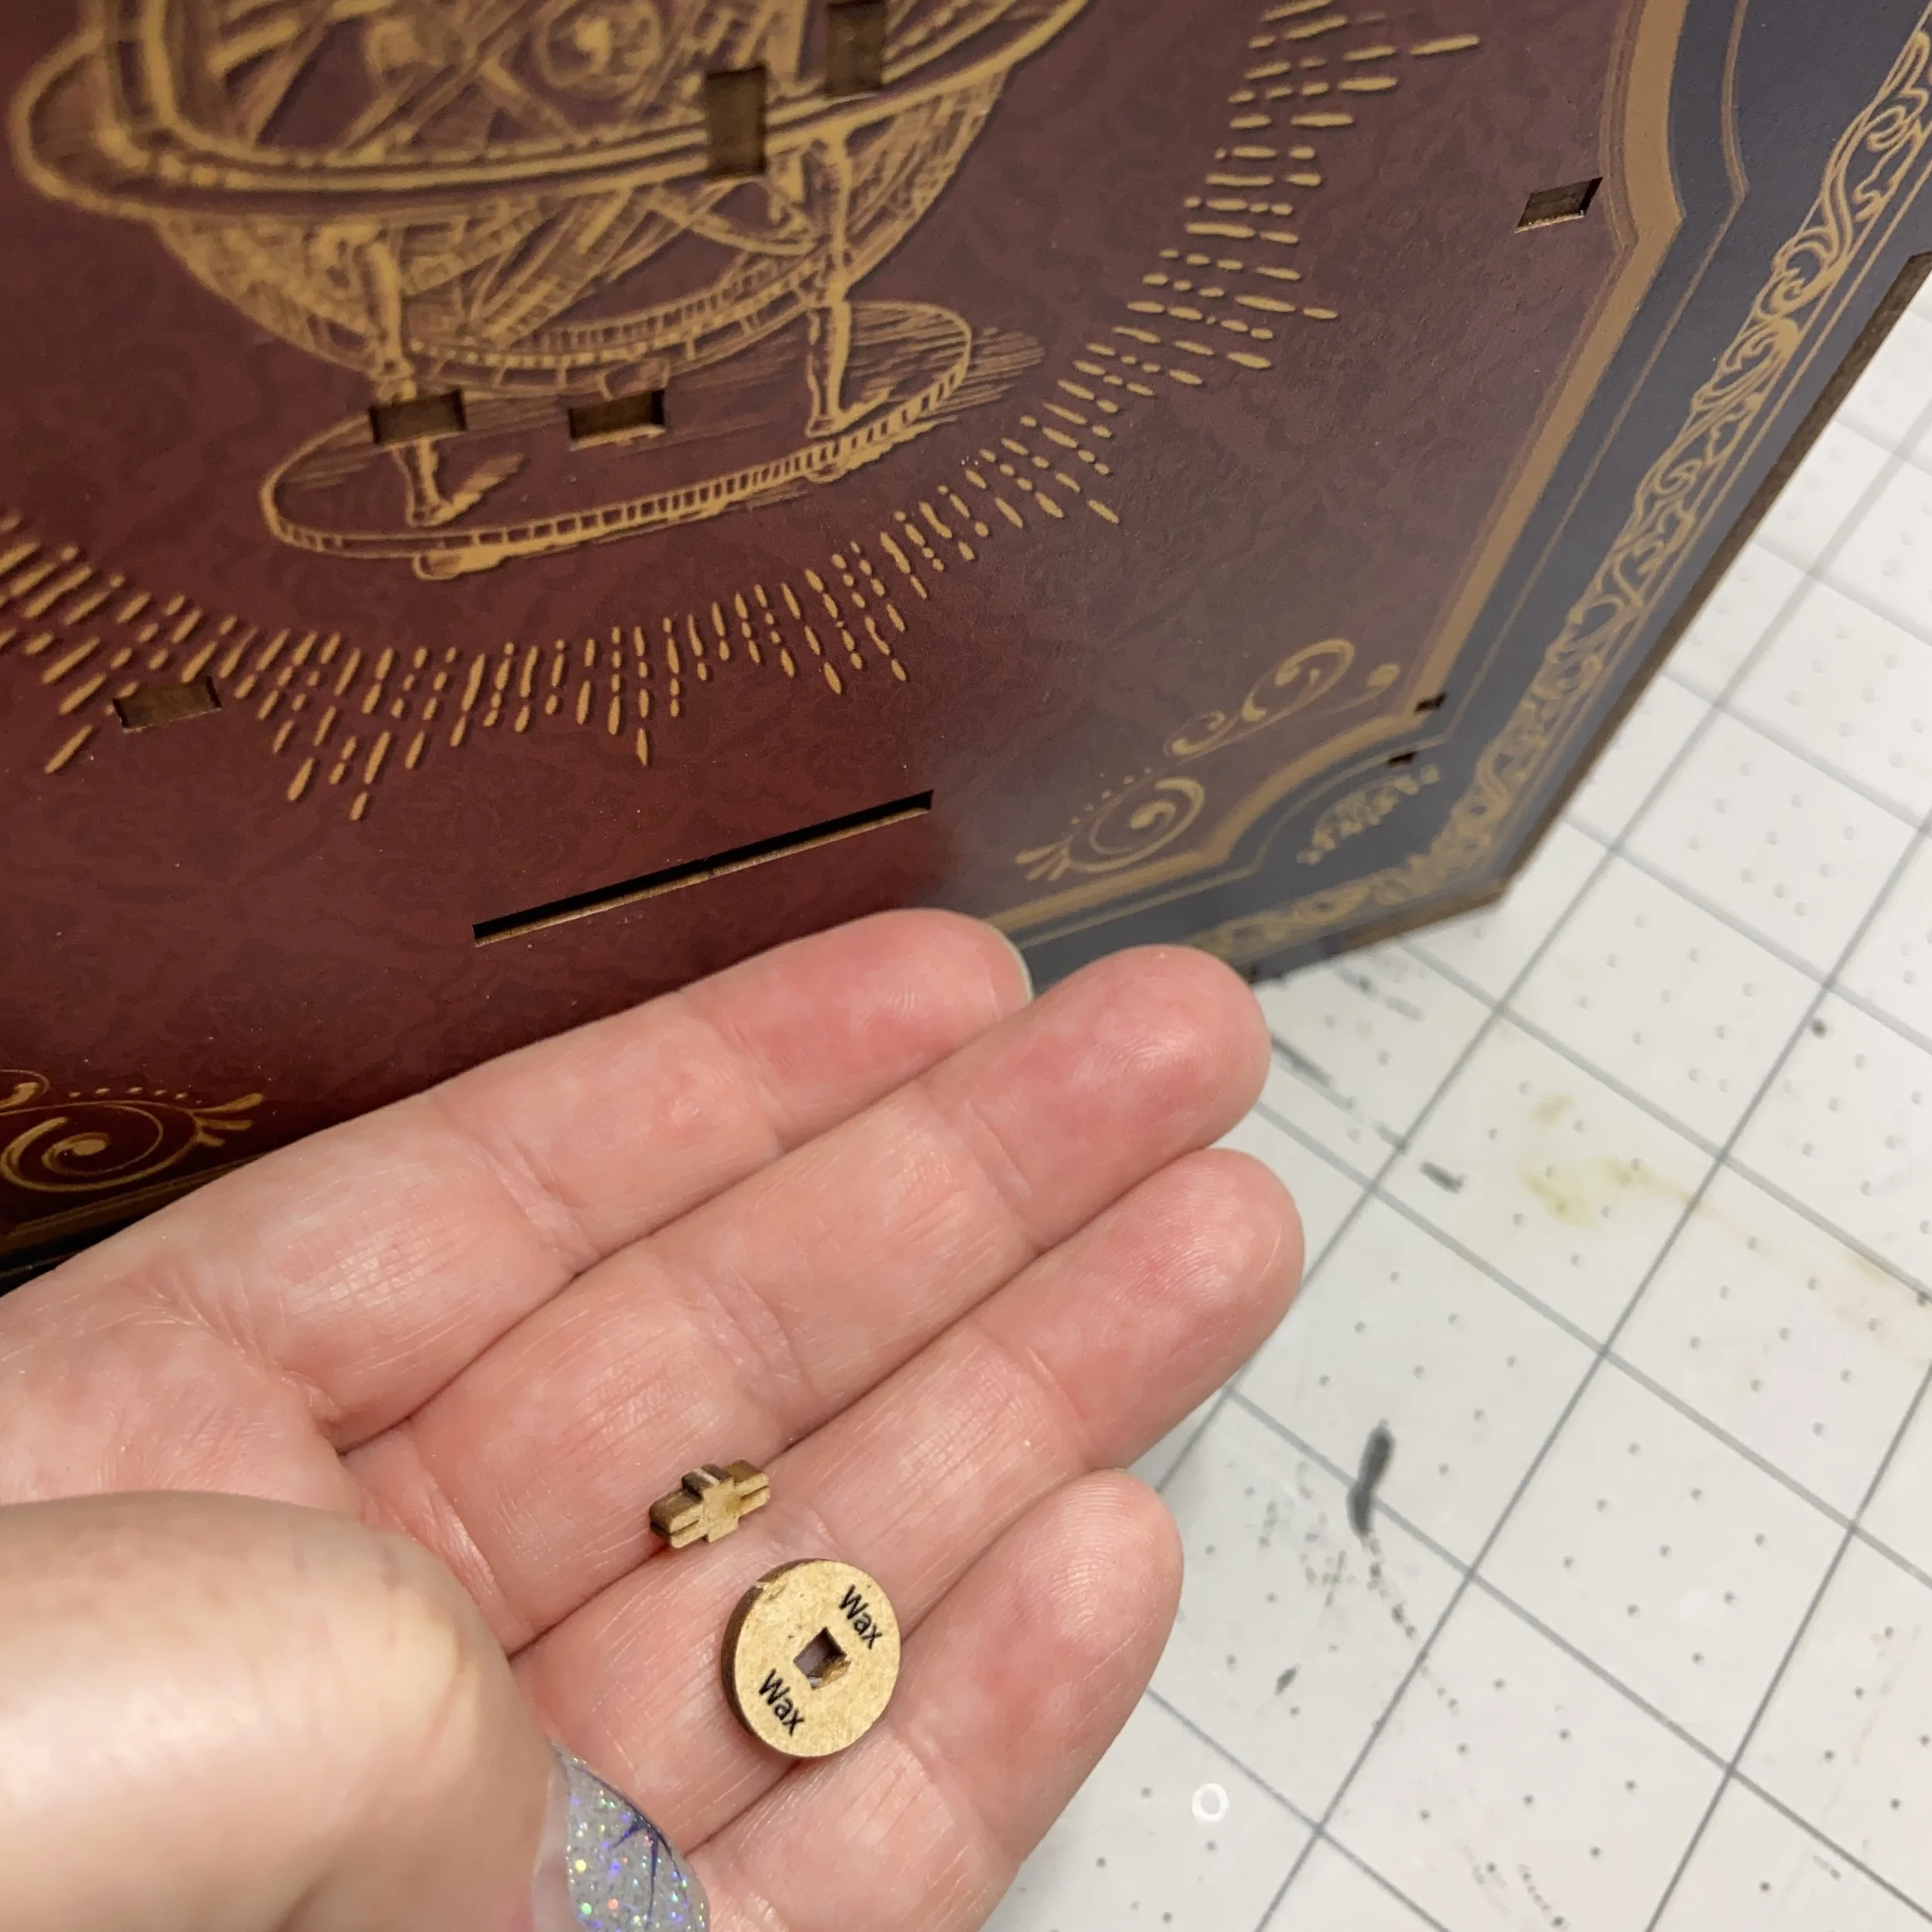
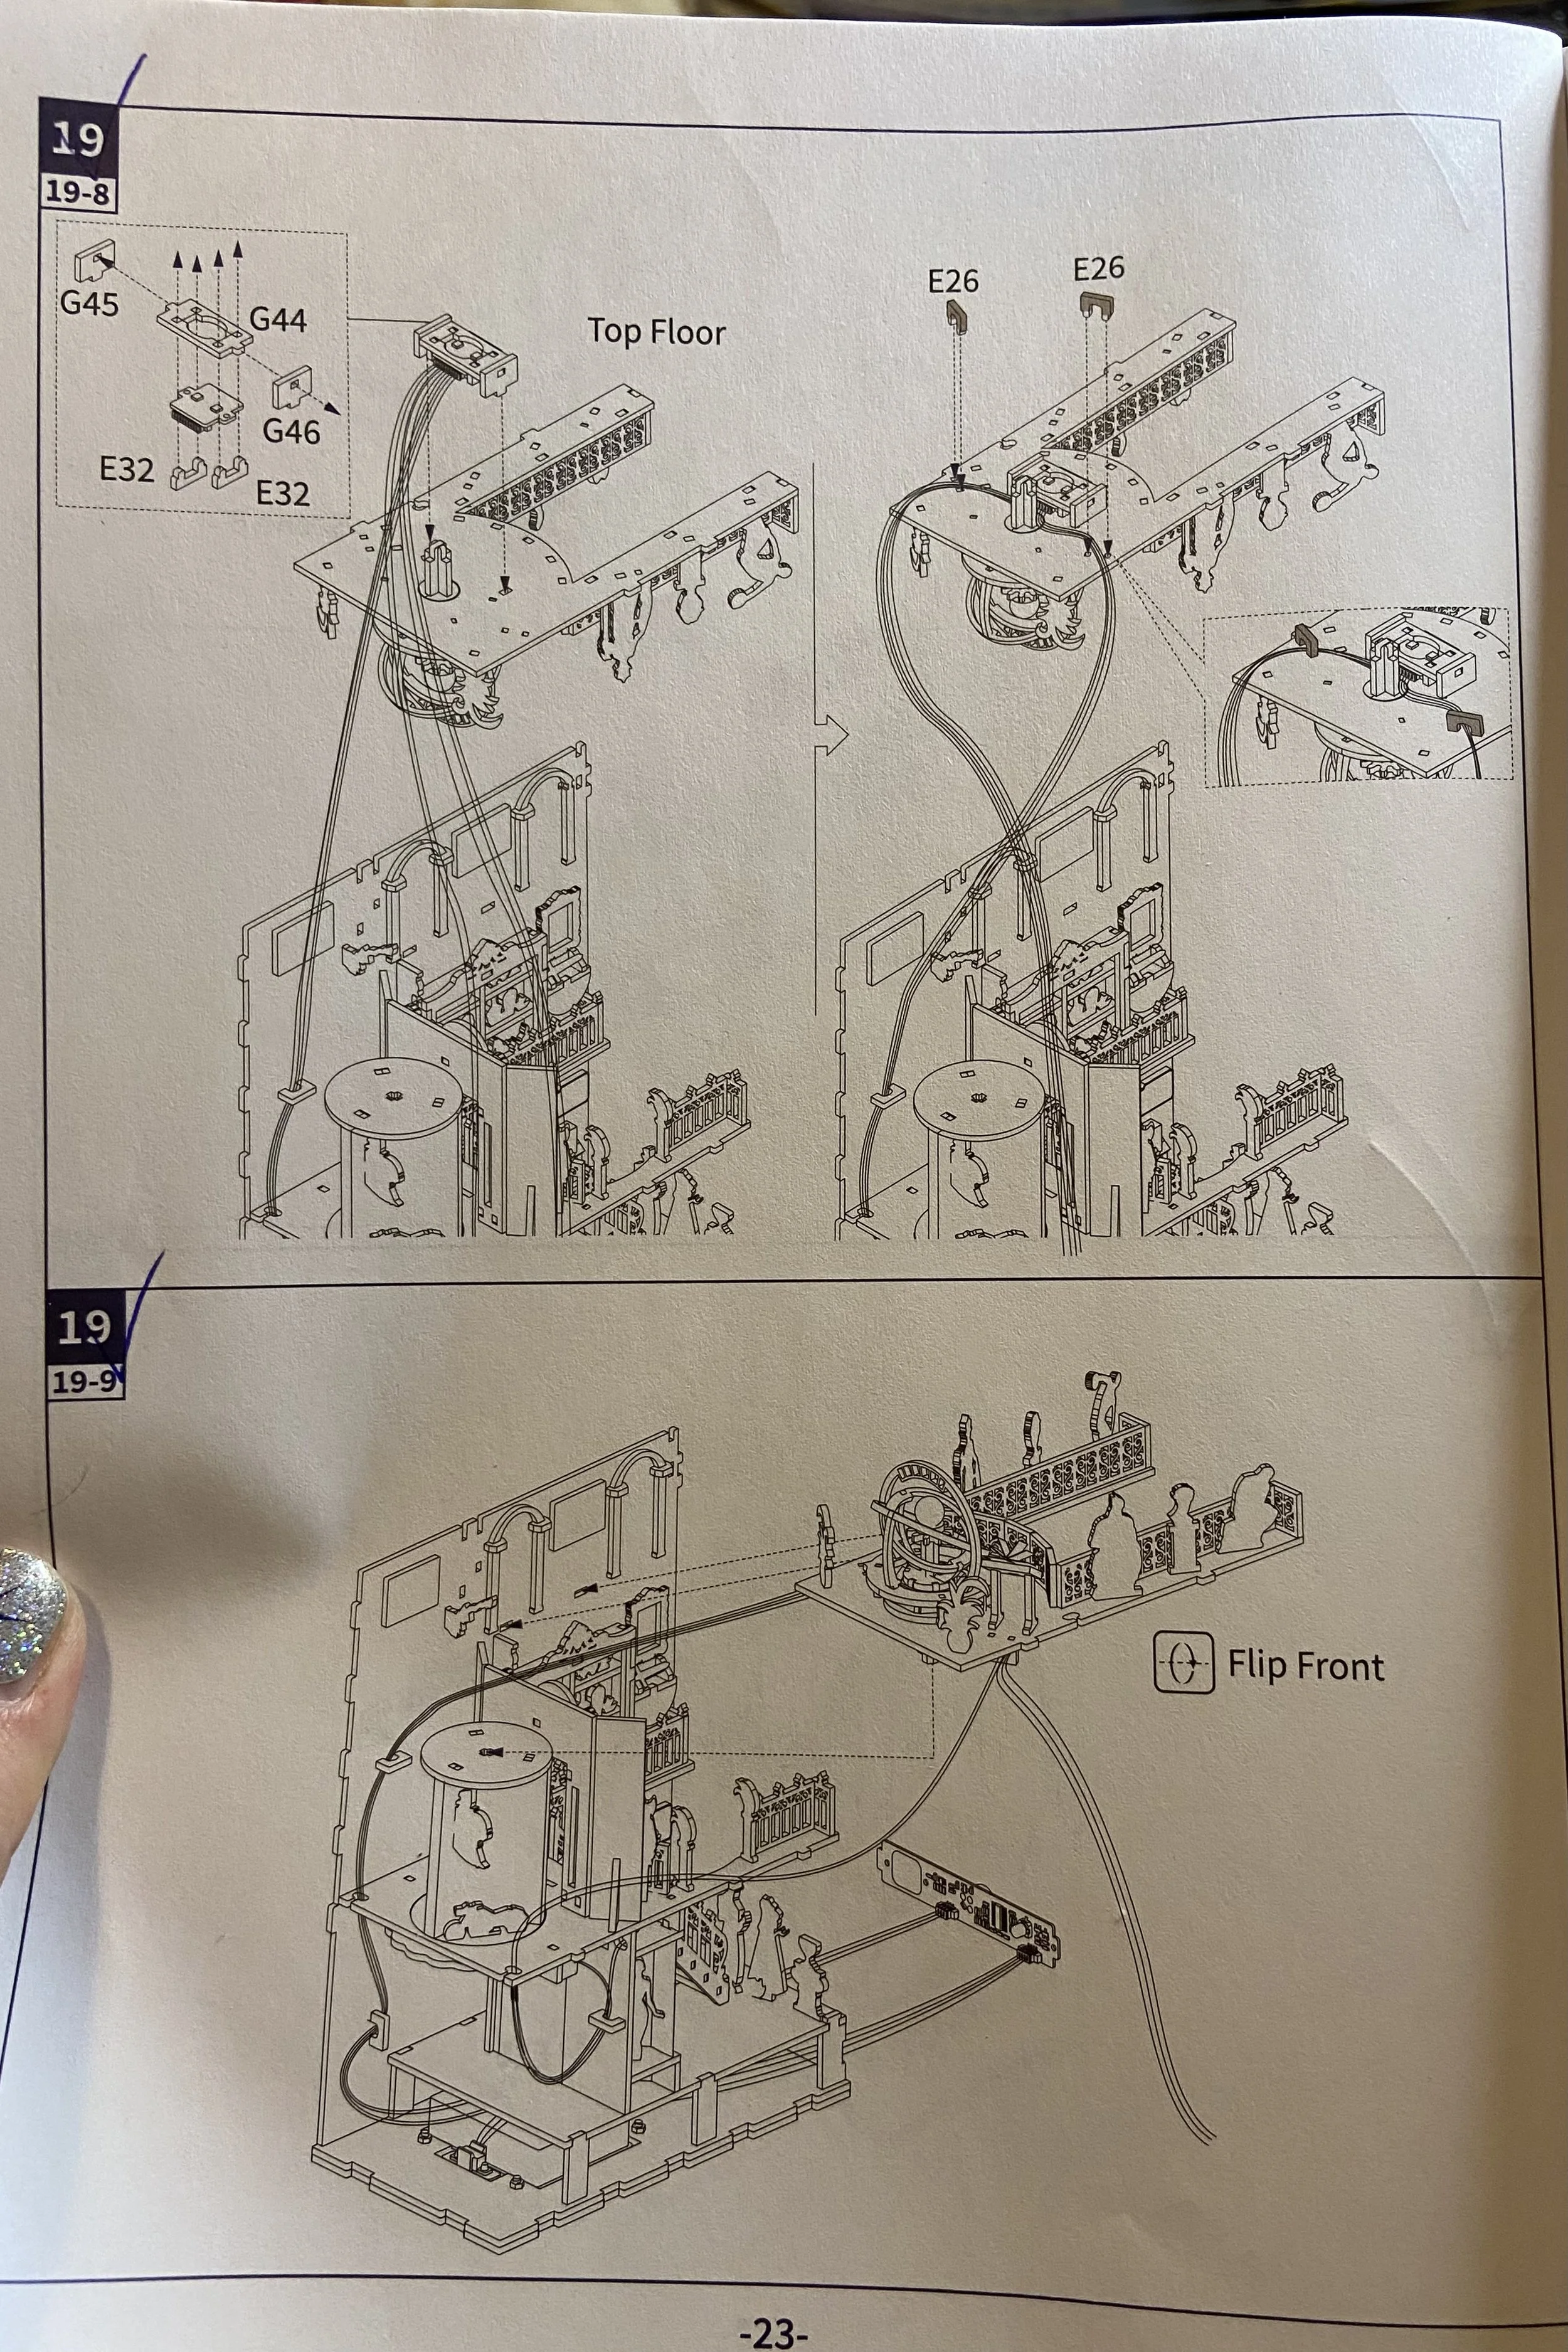
As usual with Tonecheer, their directions were (mostly) clear. For example in the first photo below, you can see that one side of the piece needs to be waxed (to help it slide, as it’s a moving part), with the directions showing the area for waxing as well as which side of the piece to wax. In the second picture, you can see that the ornamental piece that is to be glued onto a wall is labeled both on the piece and the wall. Very convenient, given how similar a lot of these pieces are. In the third picture, the outlines of the gears are on the structural piece, with a blue indicator showing where to line everything up. I’m sorry to have to report that even with all this help, I initially installed the gears on the wrong side and had to reposition.

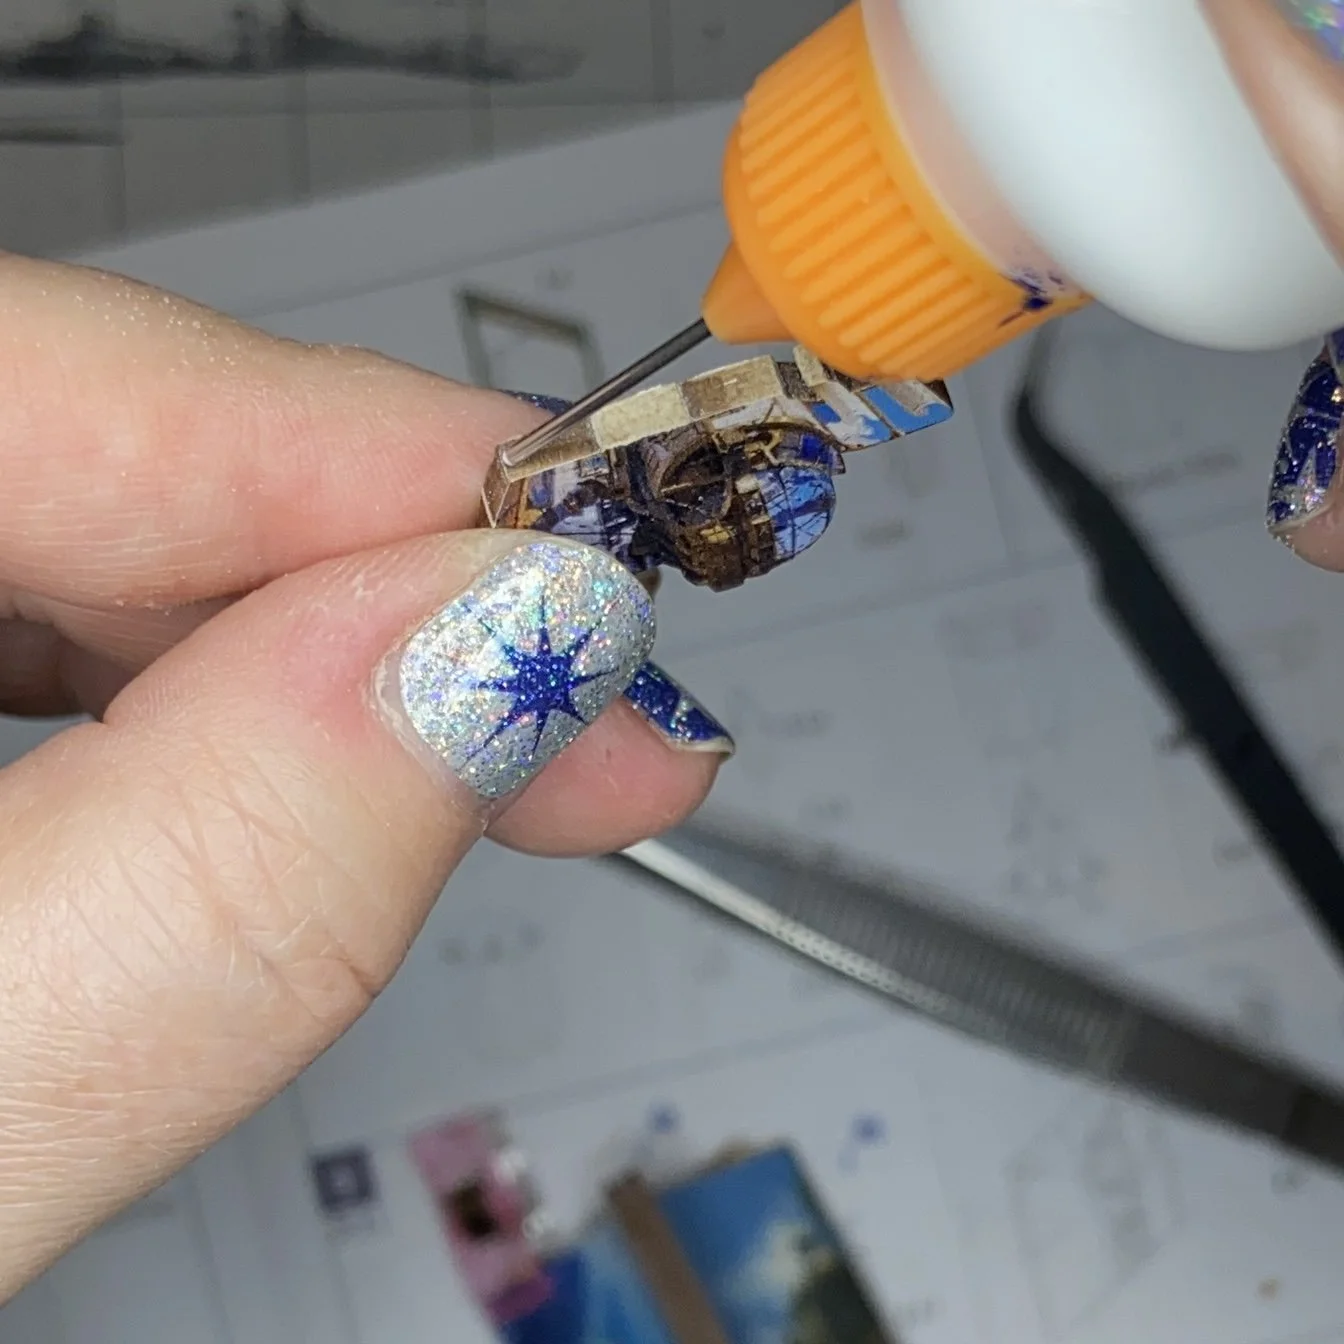
My first real problem came when I tried to attach pieces to the surface of the carousel. I knew that behind the picture, there was a slot for this airship piece. I’d seen it before I attached the picture. But once everything was together, I didn’t know how to find the slot. I couldn’t feel it with my finger, and since the back was now covered, I couldn’t see it either. I decided to improvise (always a bad plan with these kits) and just glue the airship in place. So first, I cut away the tab on the back of the airship and sanded it smooth. Then I used my little precision applicator filled with my bookmaker’s glue on the smooth edge, and then I just set it in place and left it to dry. Worked just fine.
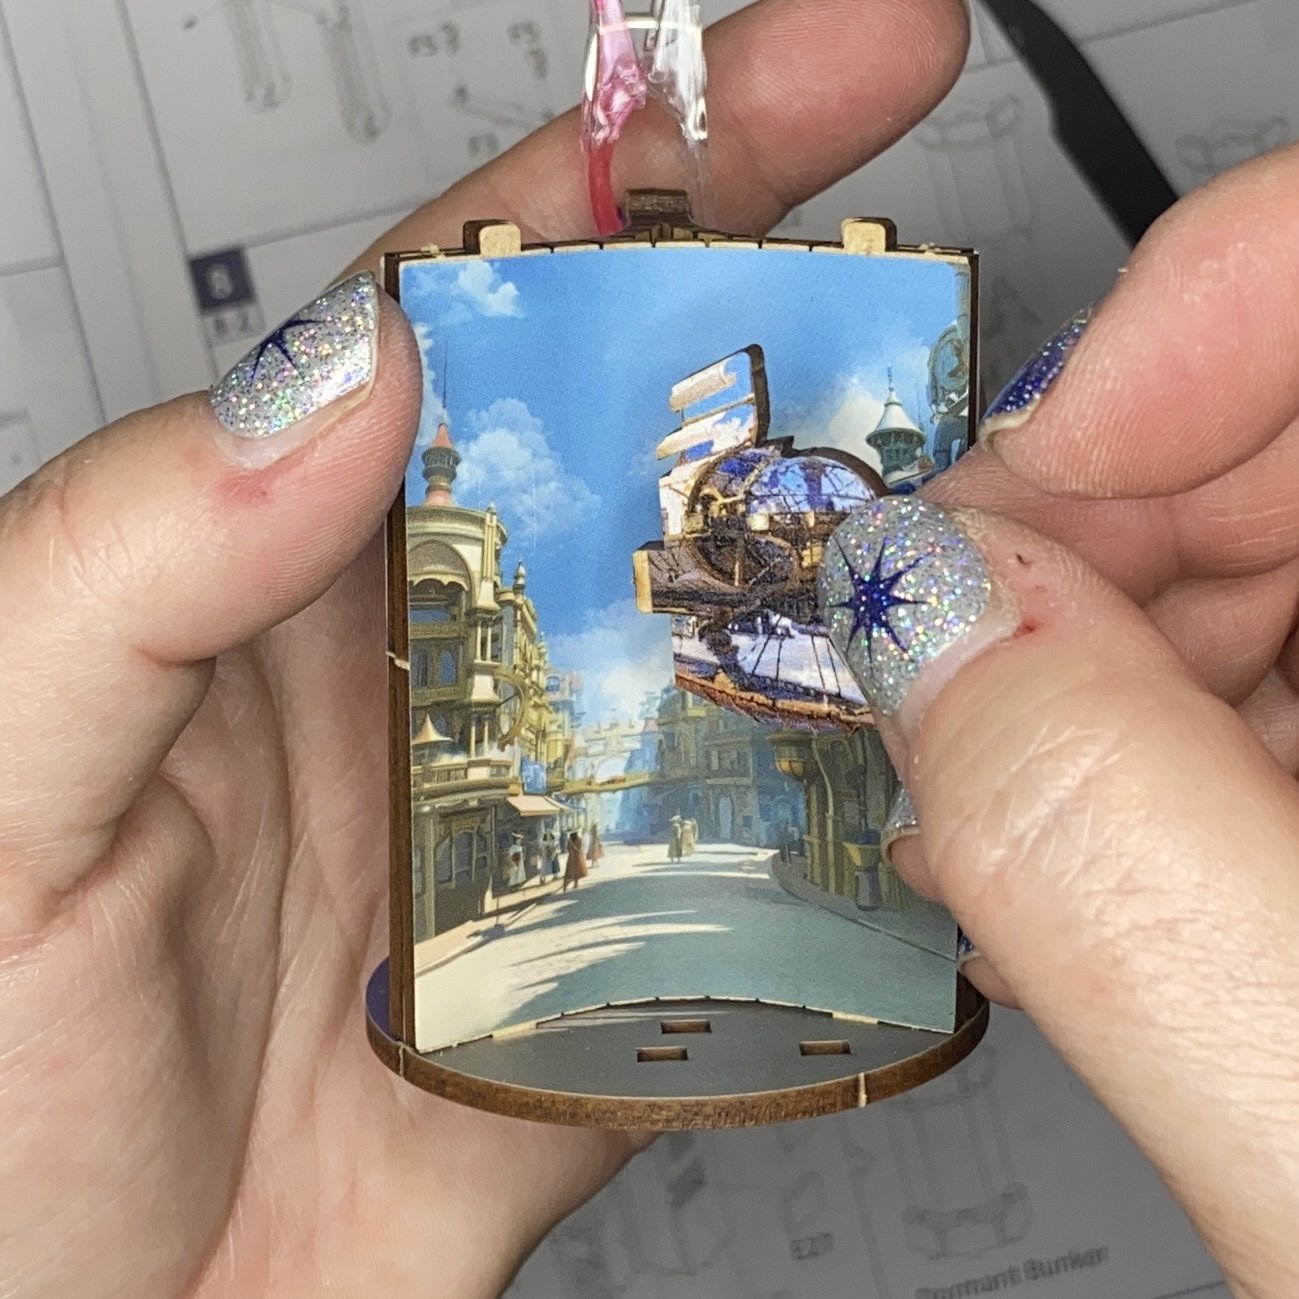
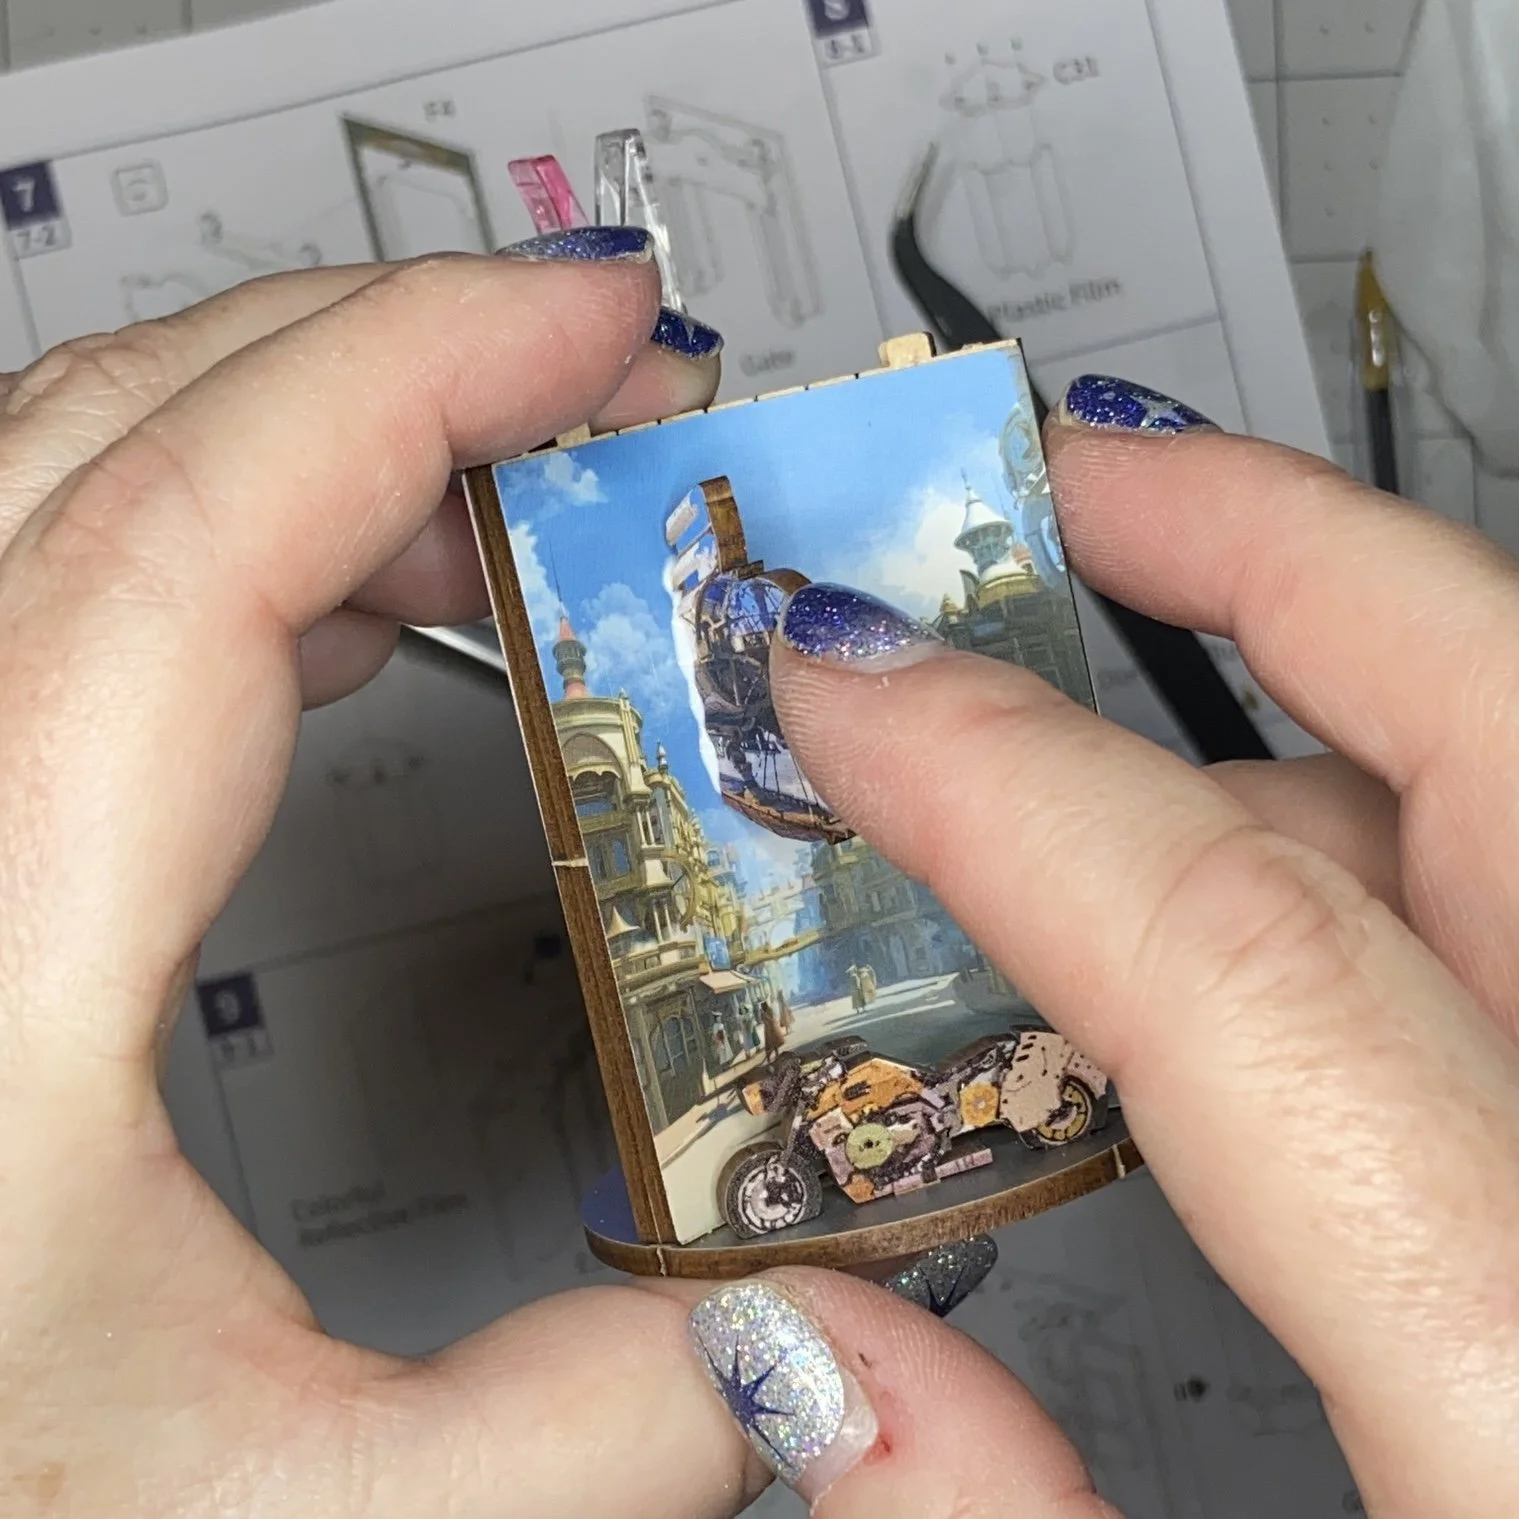

It was only a little later, when I judged the glue had dried enough to allow me to work on other sides of the carousel, that I realized there were tiny cutouts in the pictures, which peeled easily away to expose the slot. I felt like a right idiot. The palm branches notched into the jungle picture, right where they were supposed to go. Ah well, live and learn. Honestly, I should have known Tonecheer had arranged something clever and perfect…
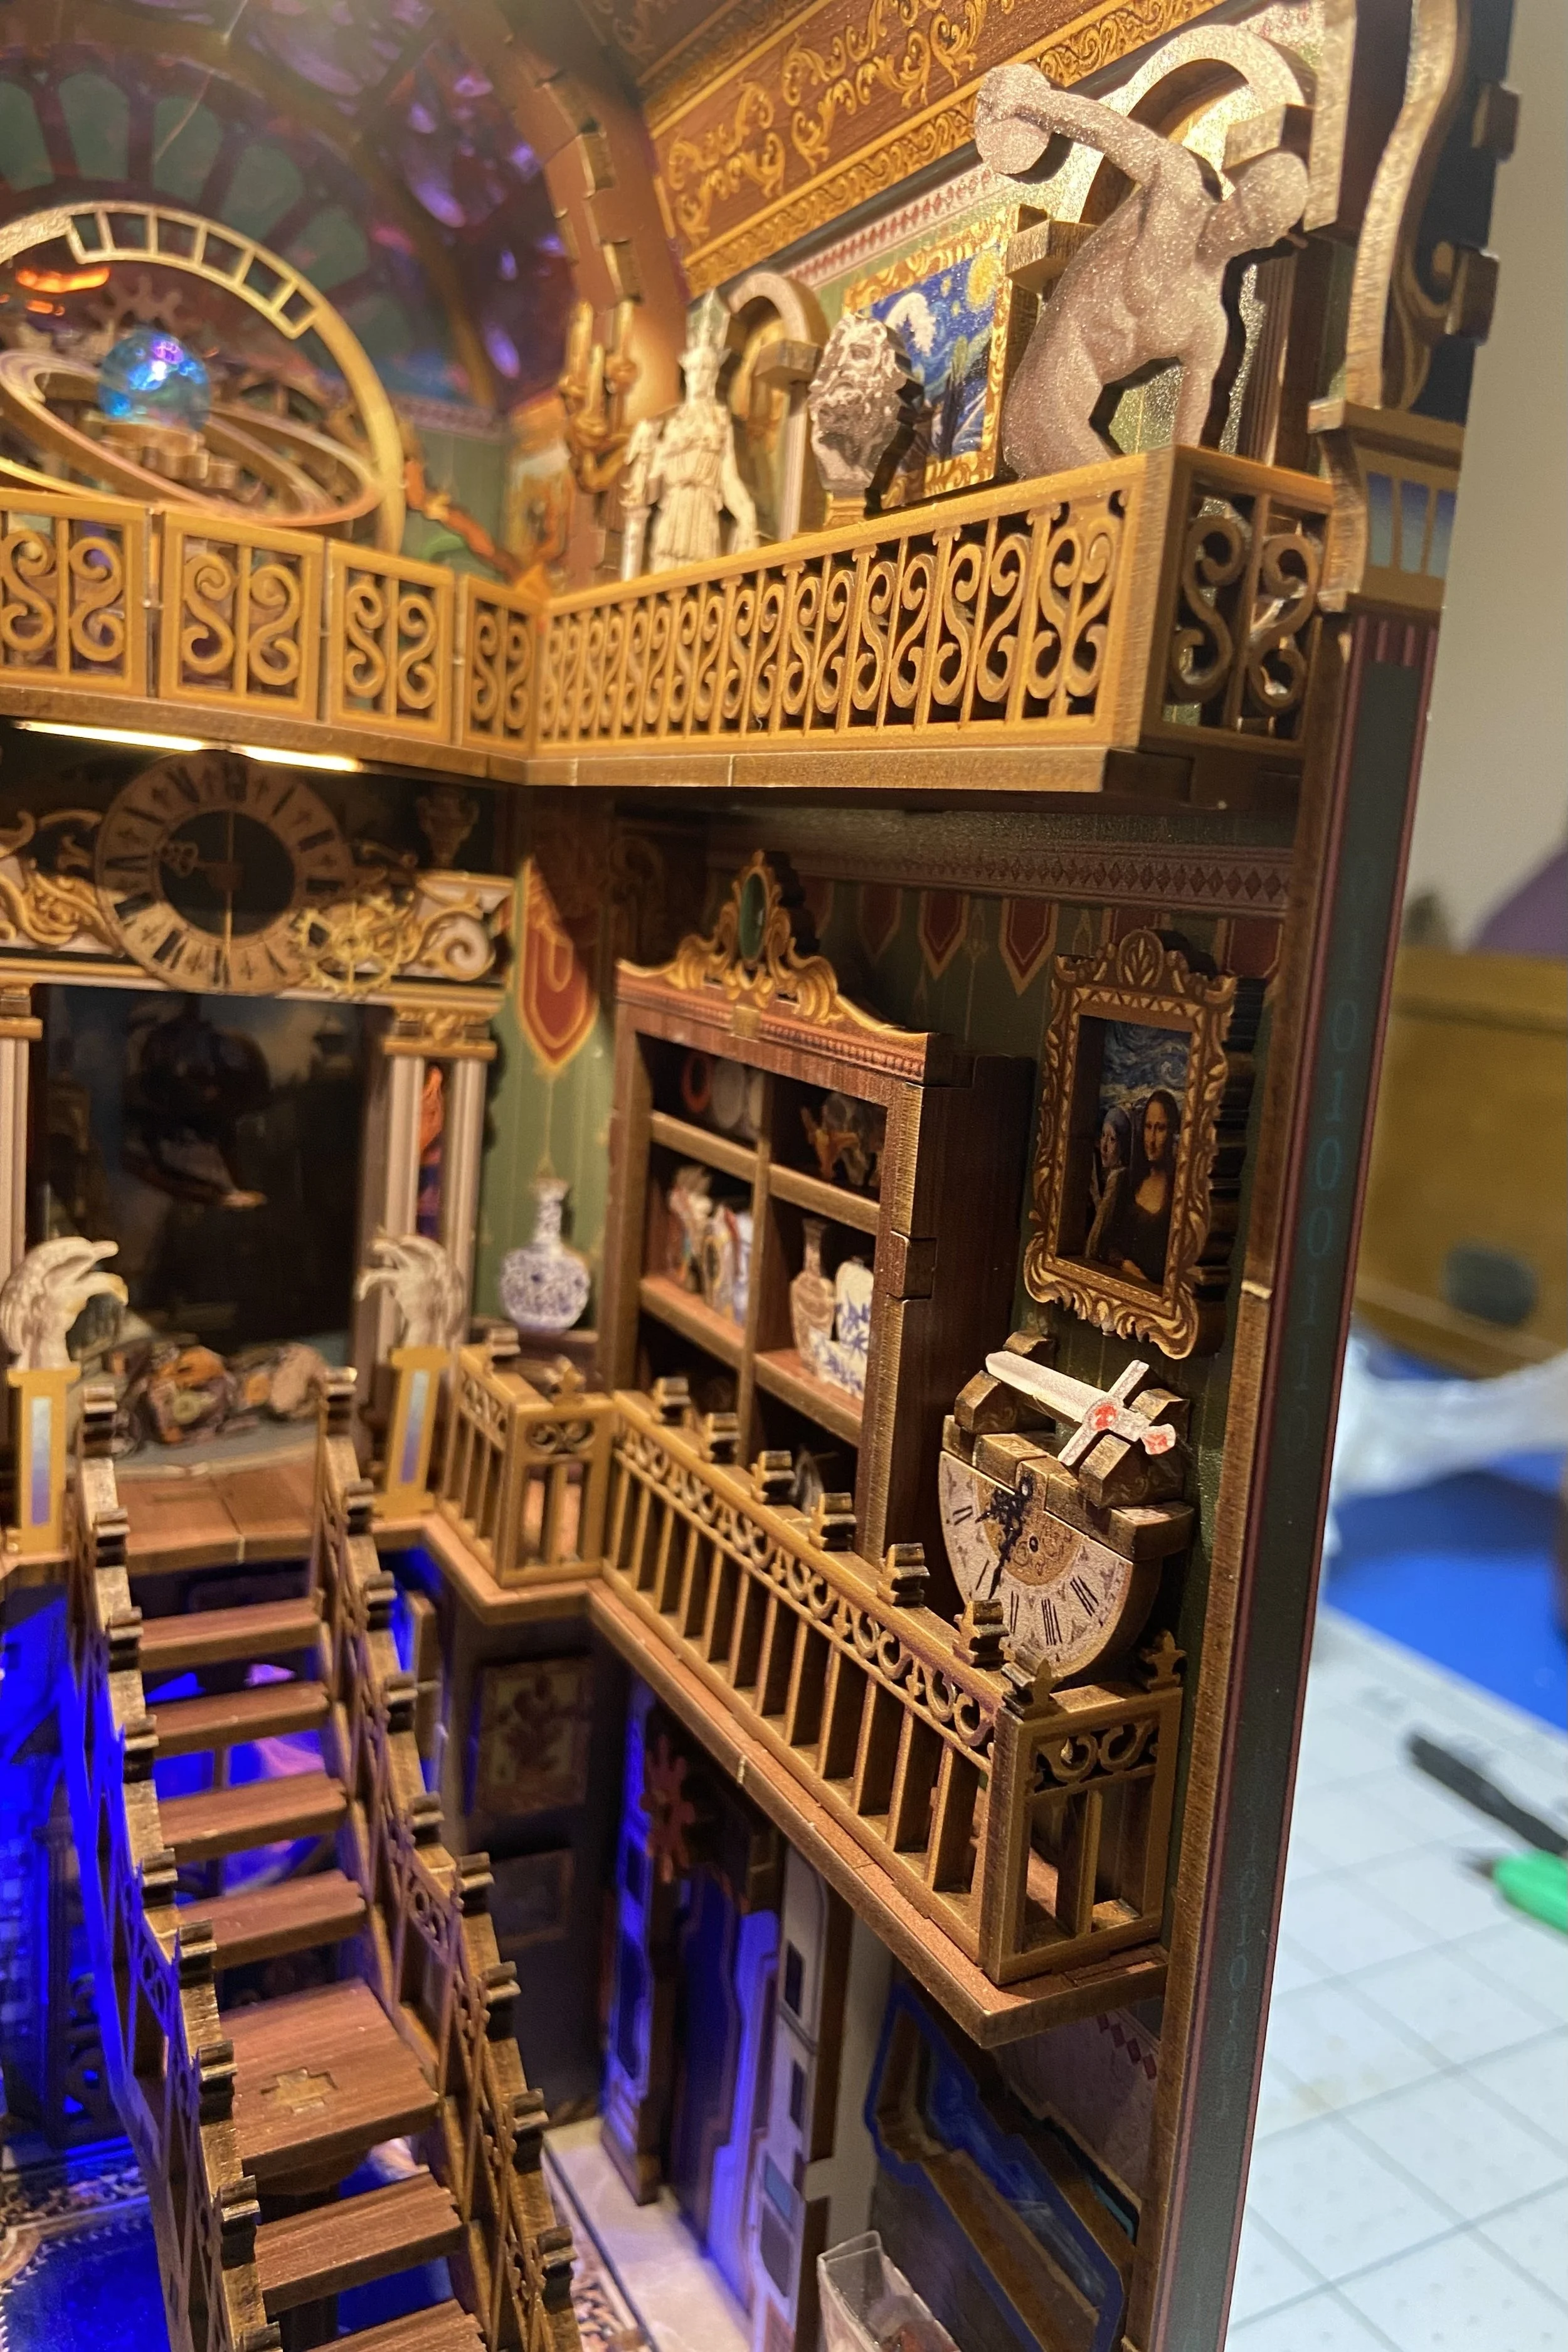
You’d think after all the book nooks I’ve assembled that I’d remember that a lot of these pieces are delicate and won’t stand up to a lot of pressure during assembly. But at least once every project, I break something. If I’m lucky, it can be glued back together. And if I’m really lucky, another piece is glued over the top of the break, both providing additional support and hiding the evidence.
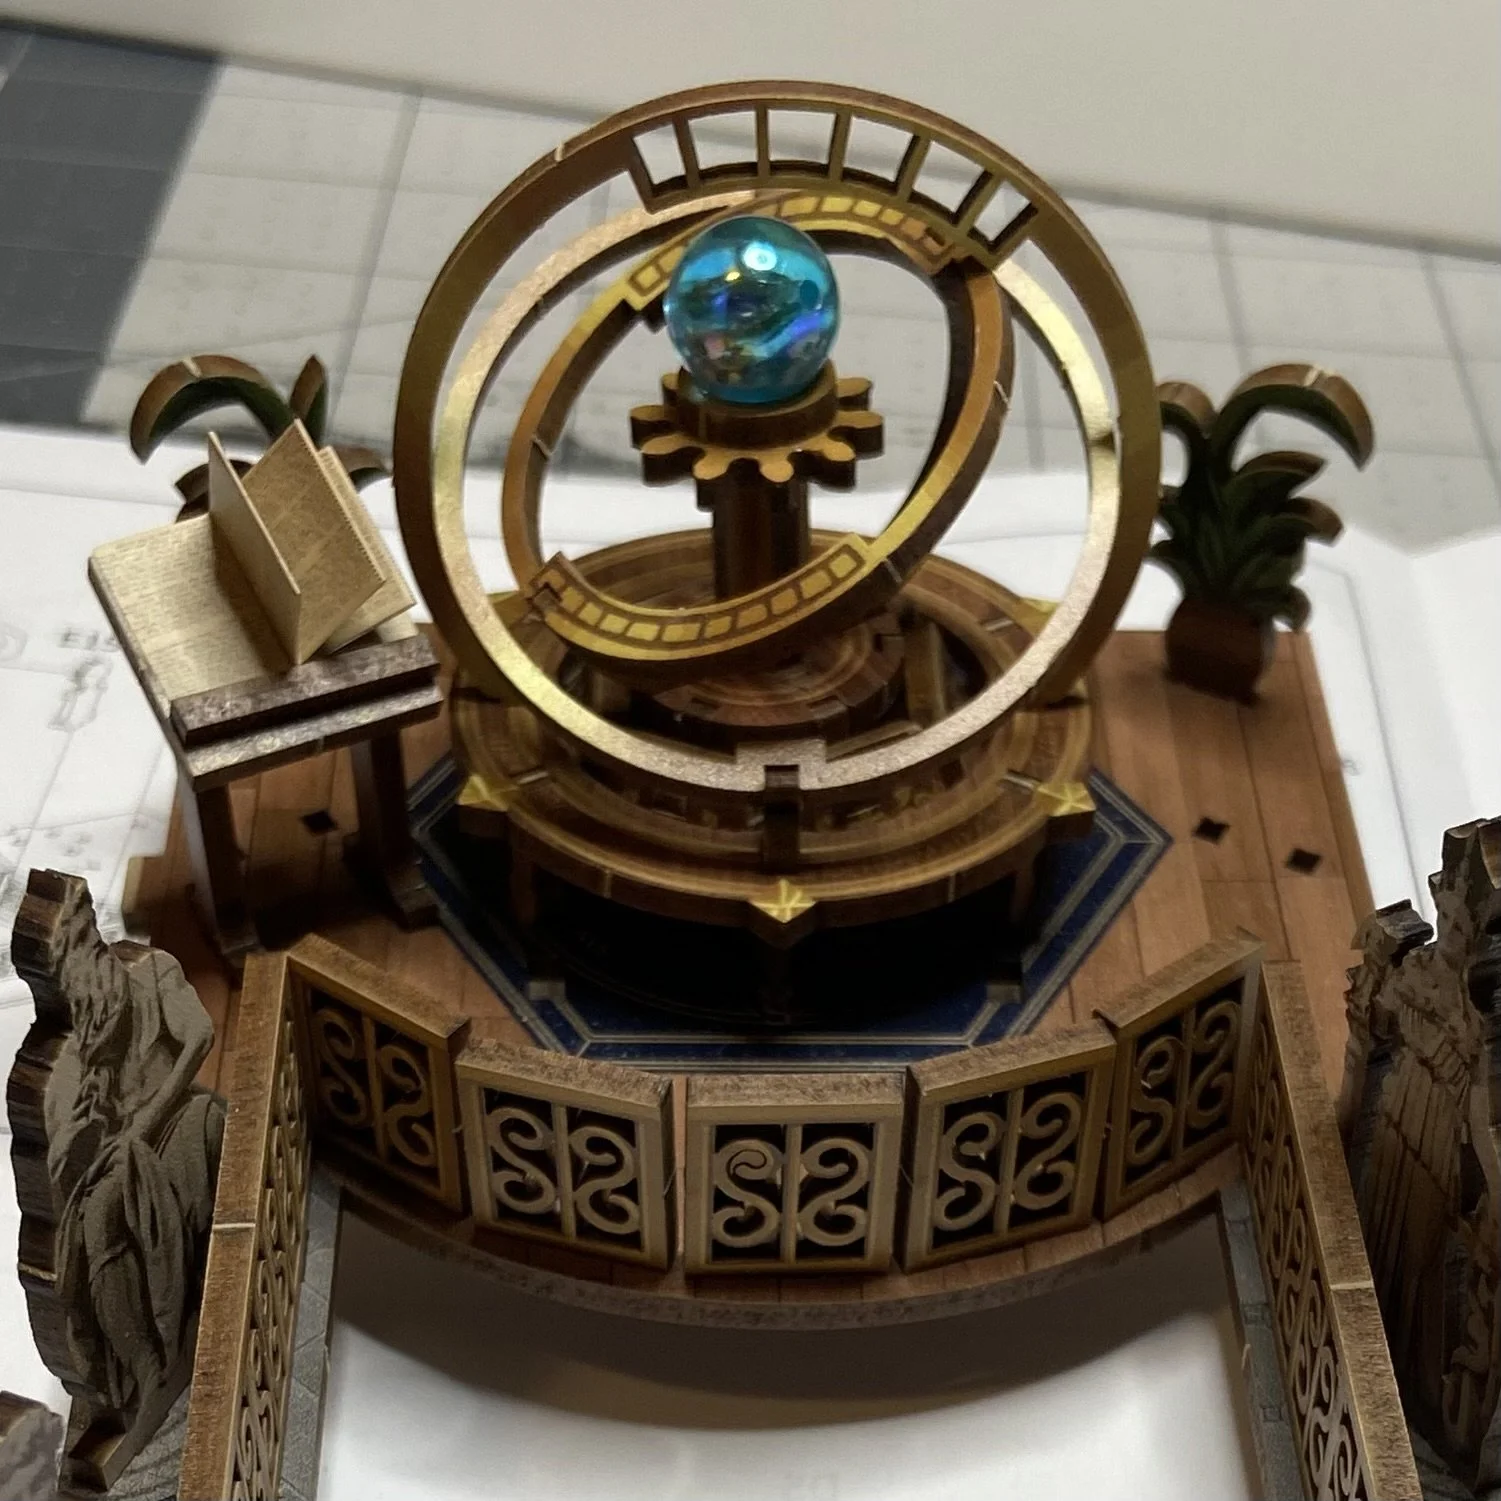
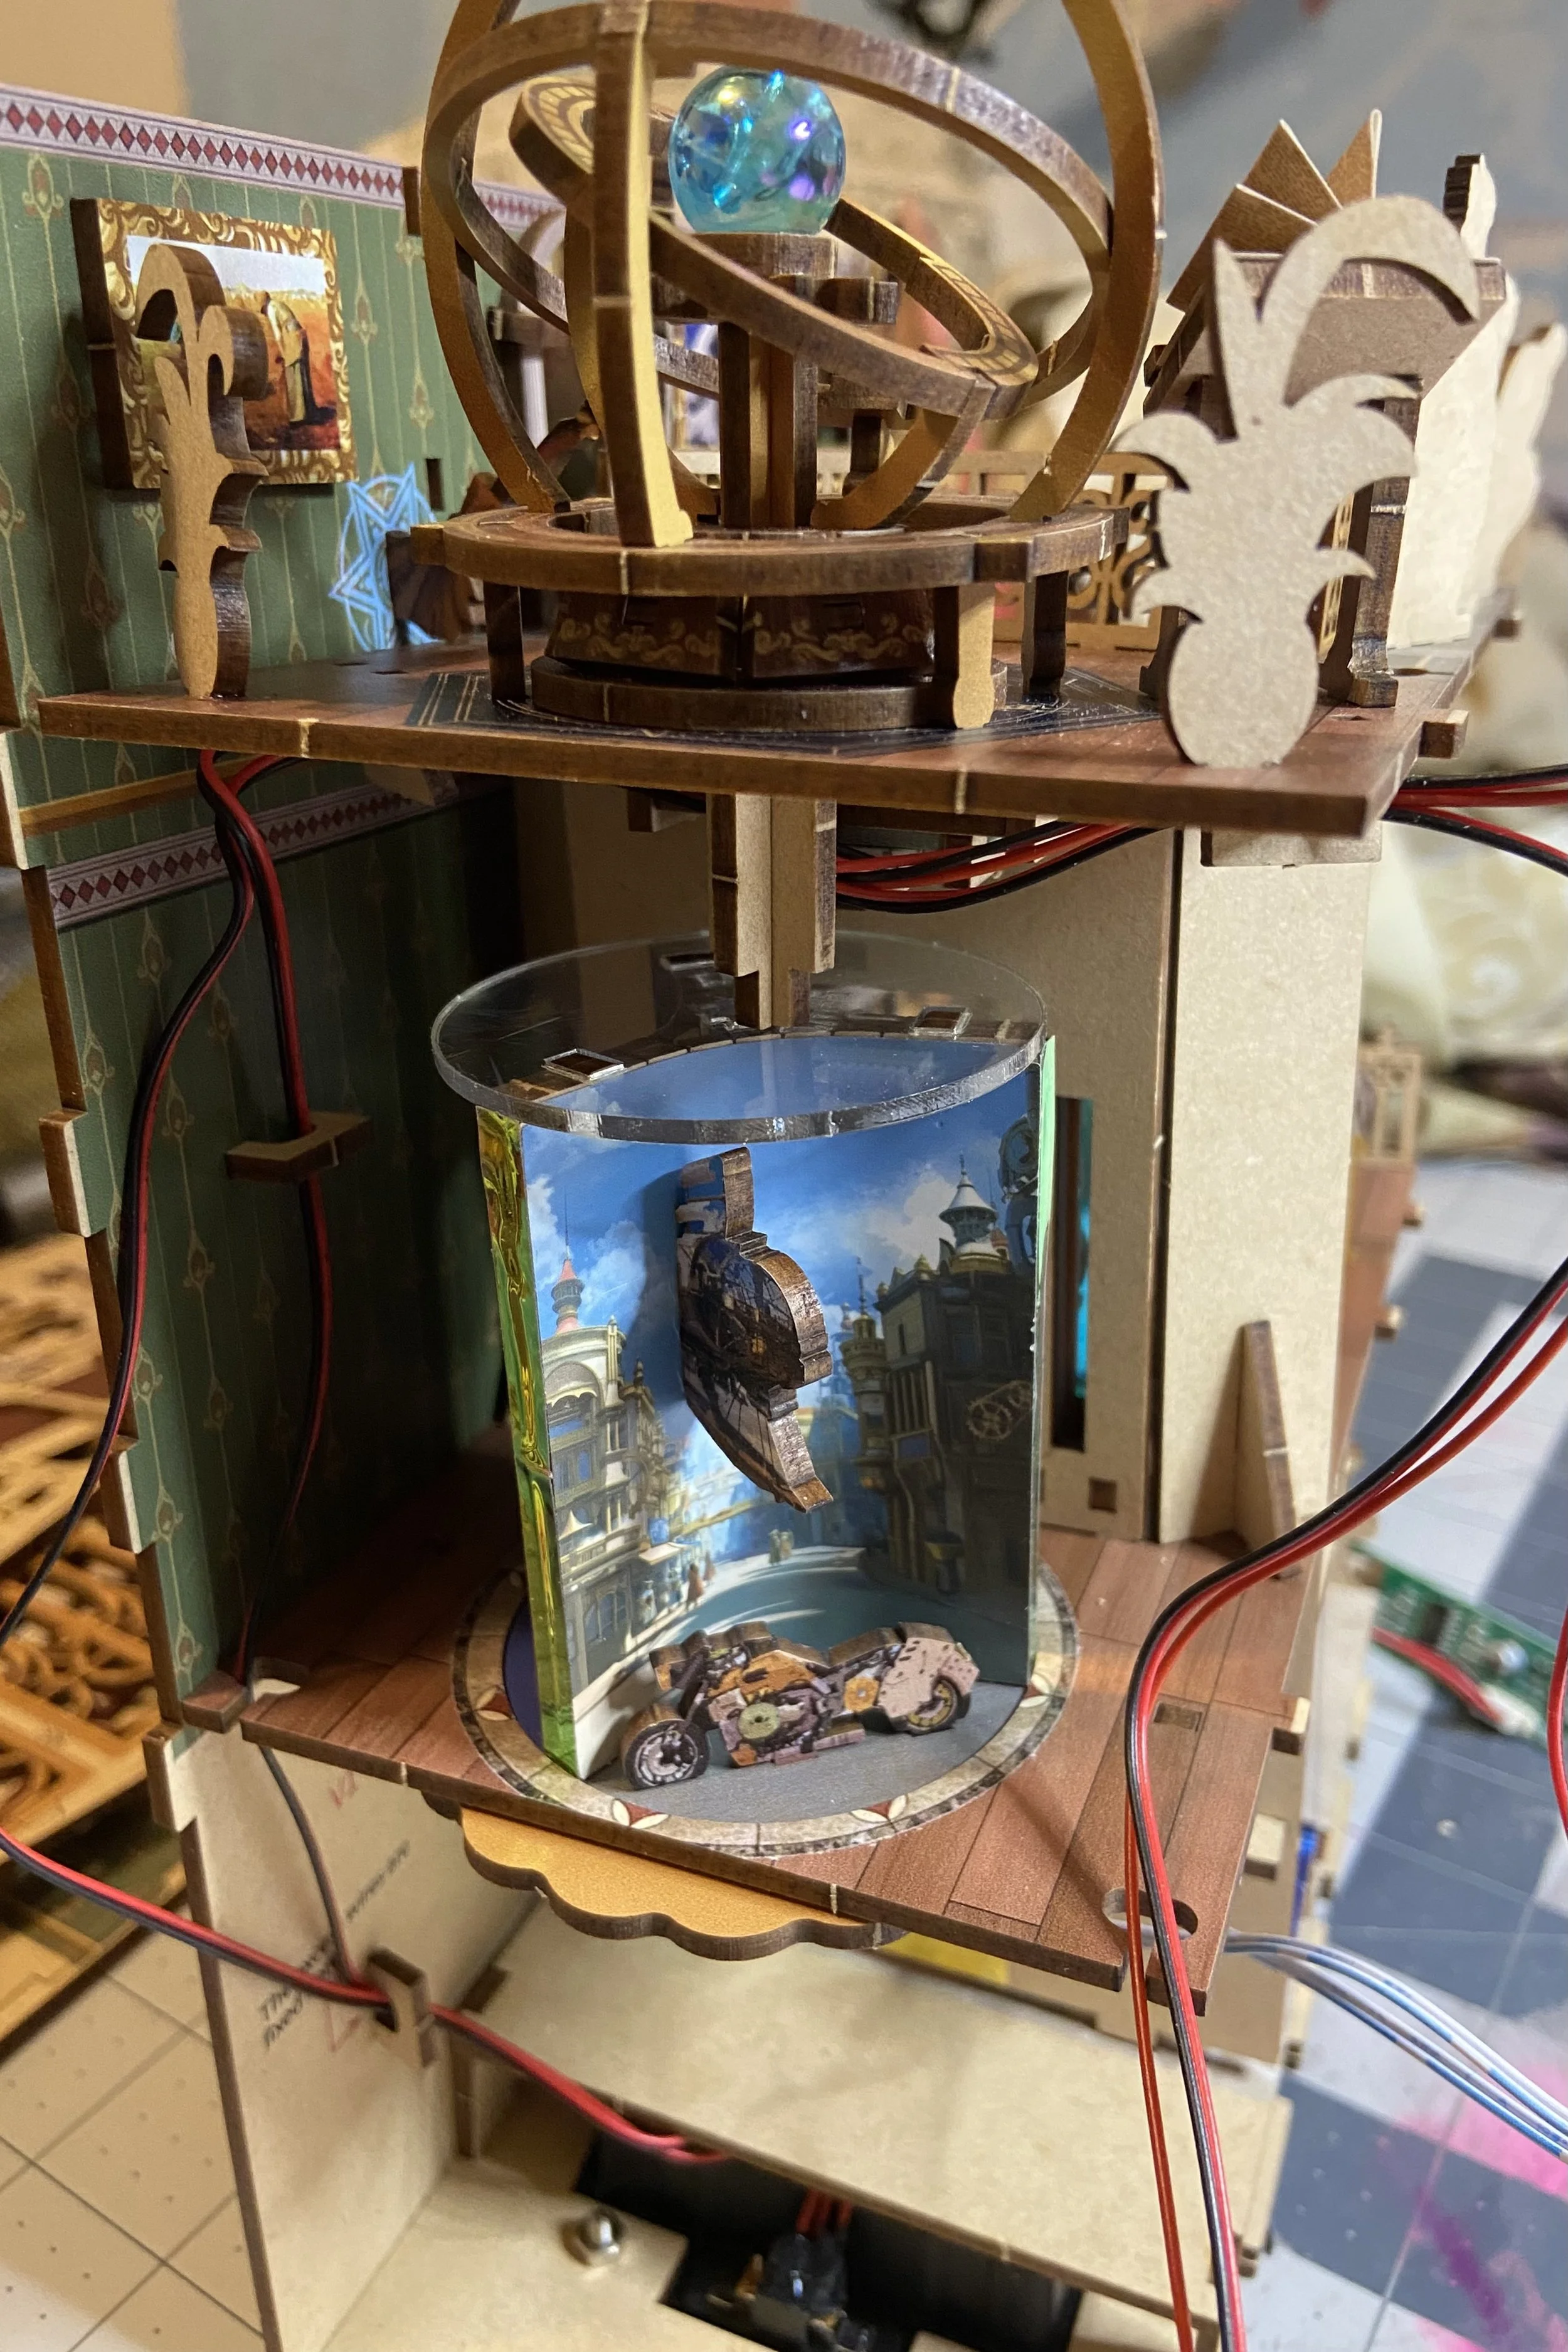
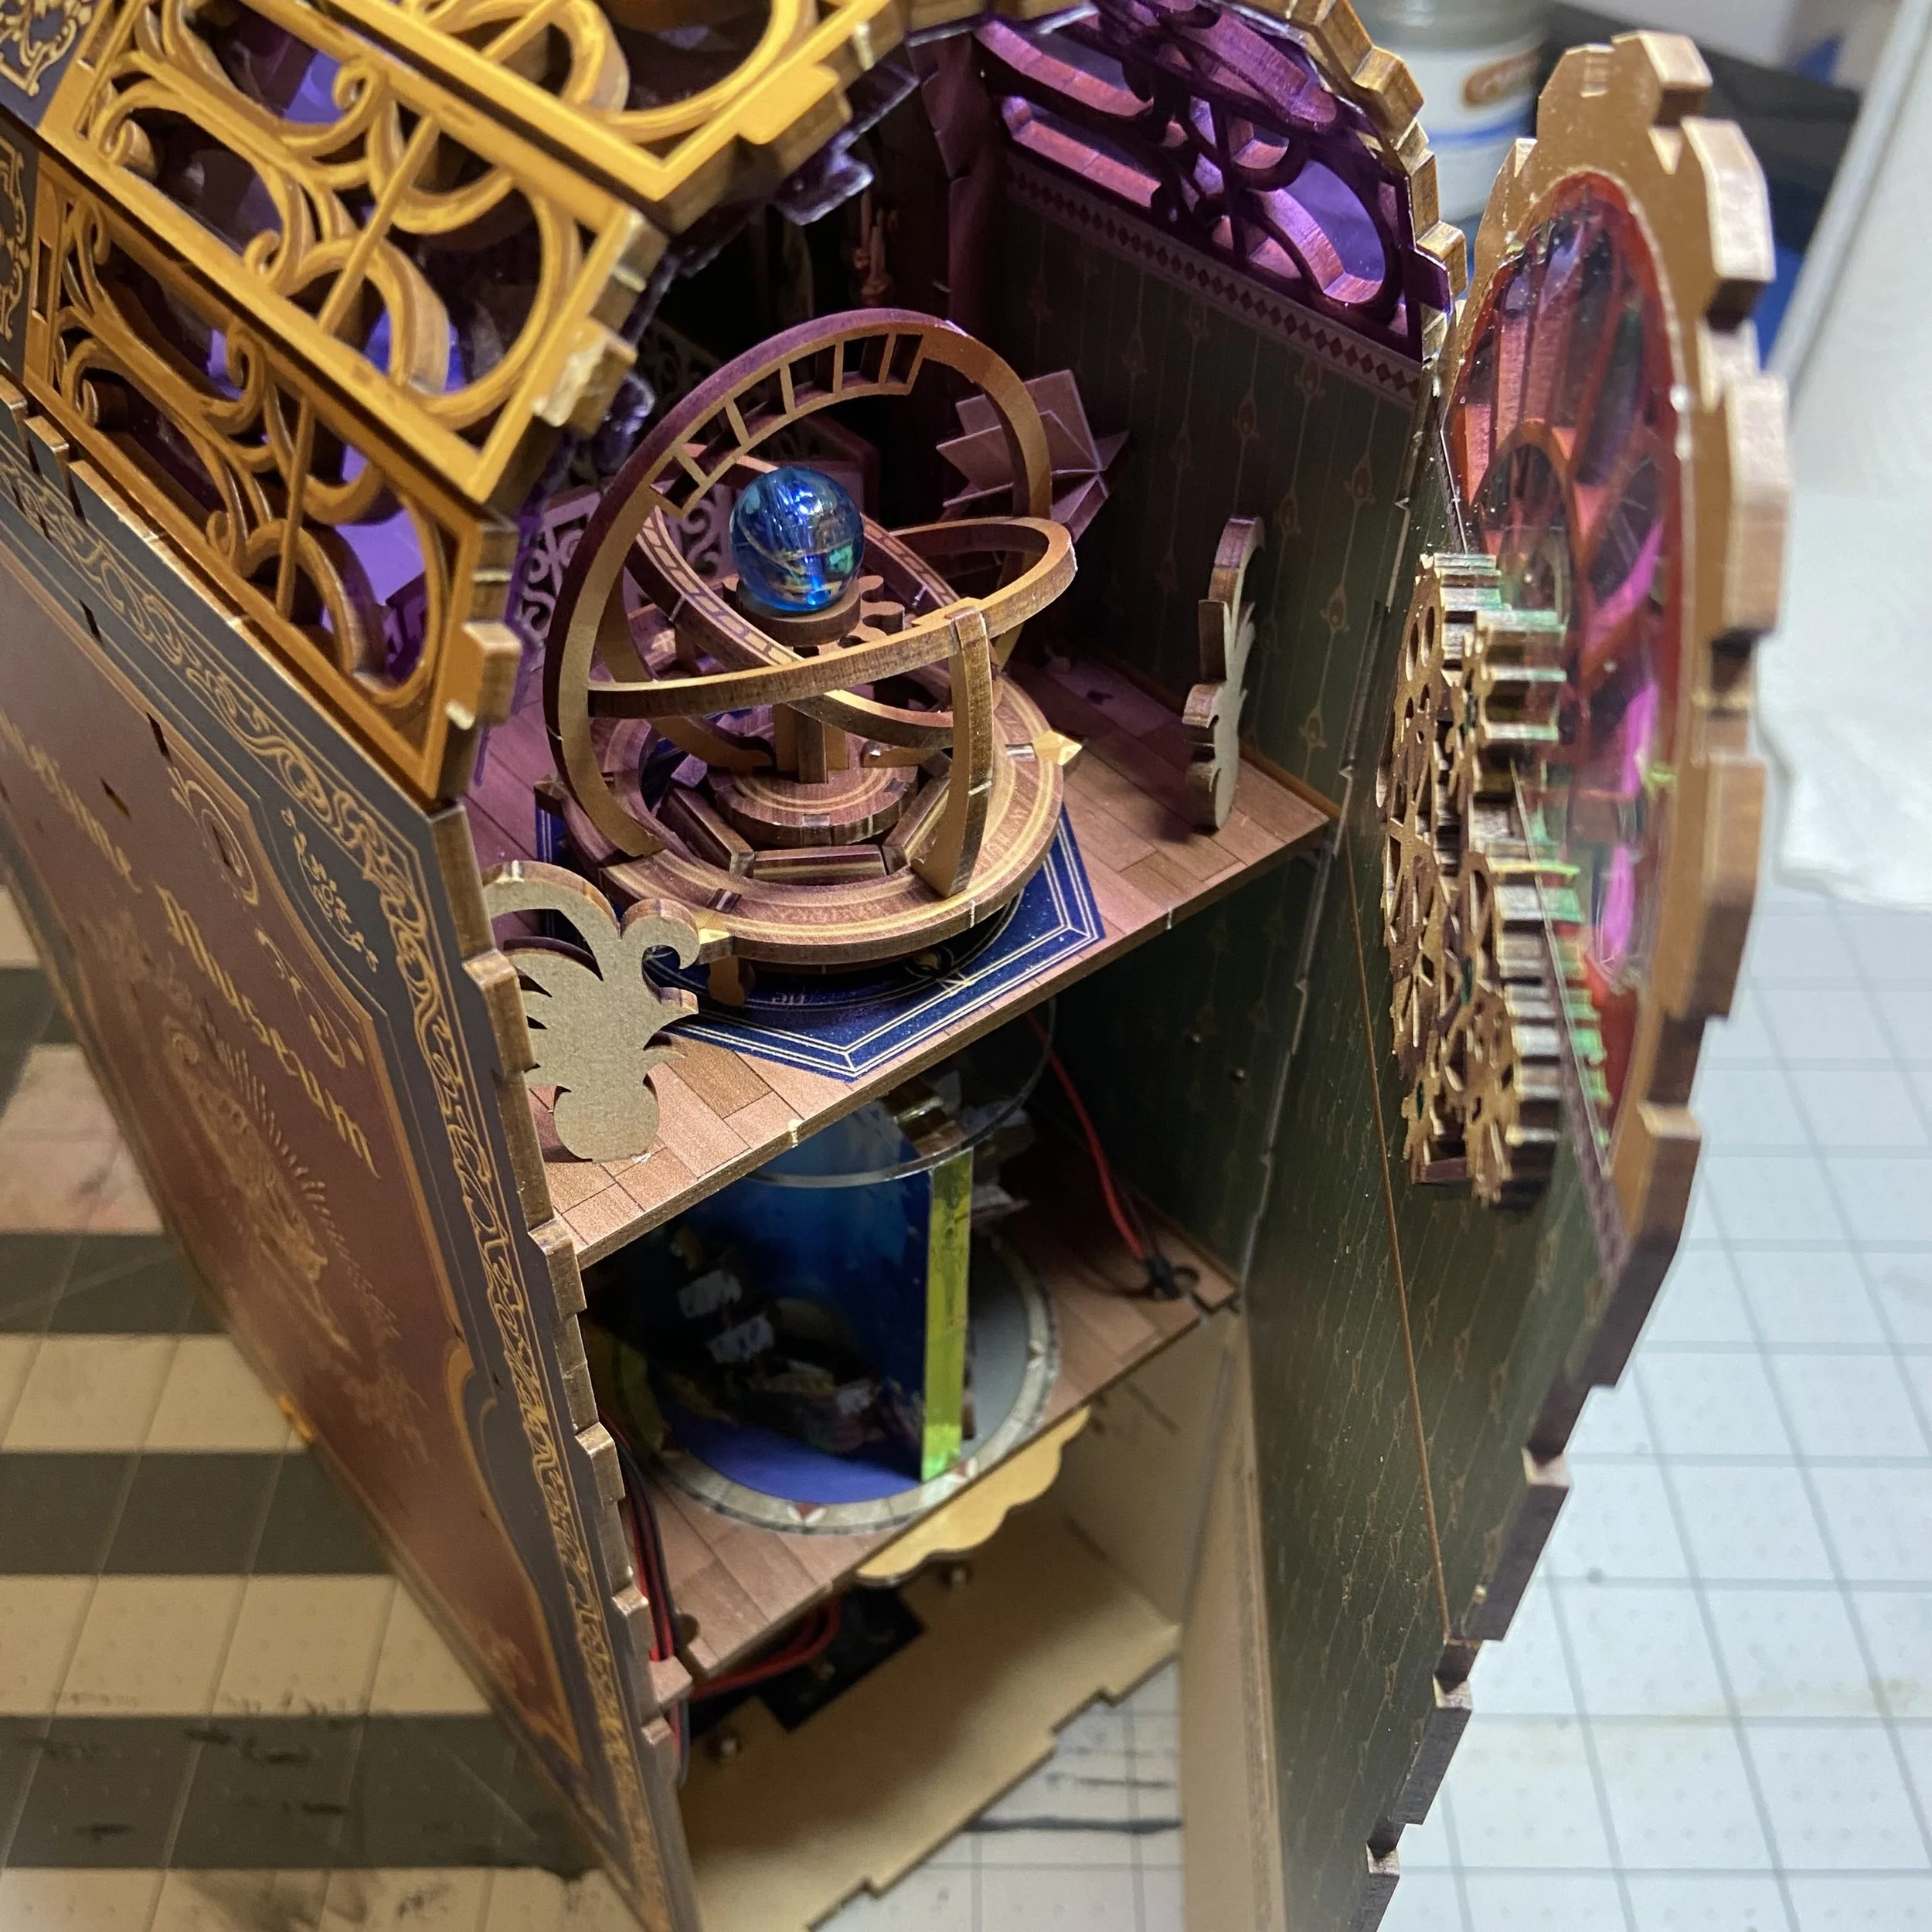
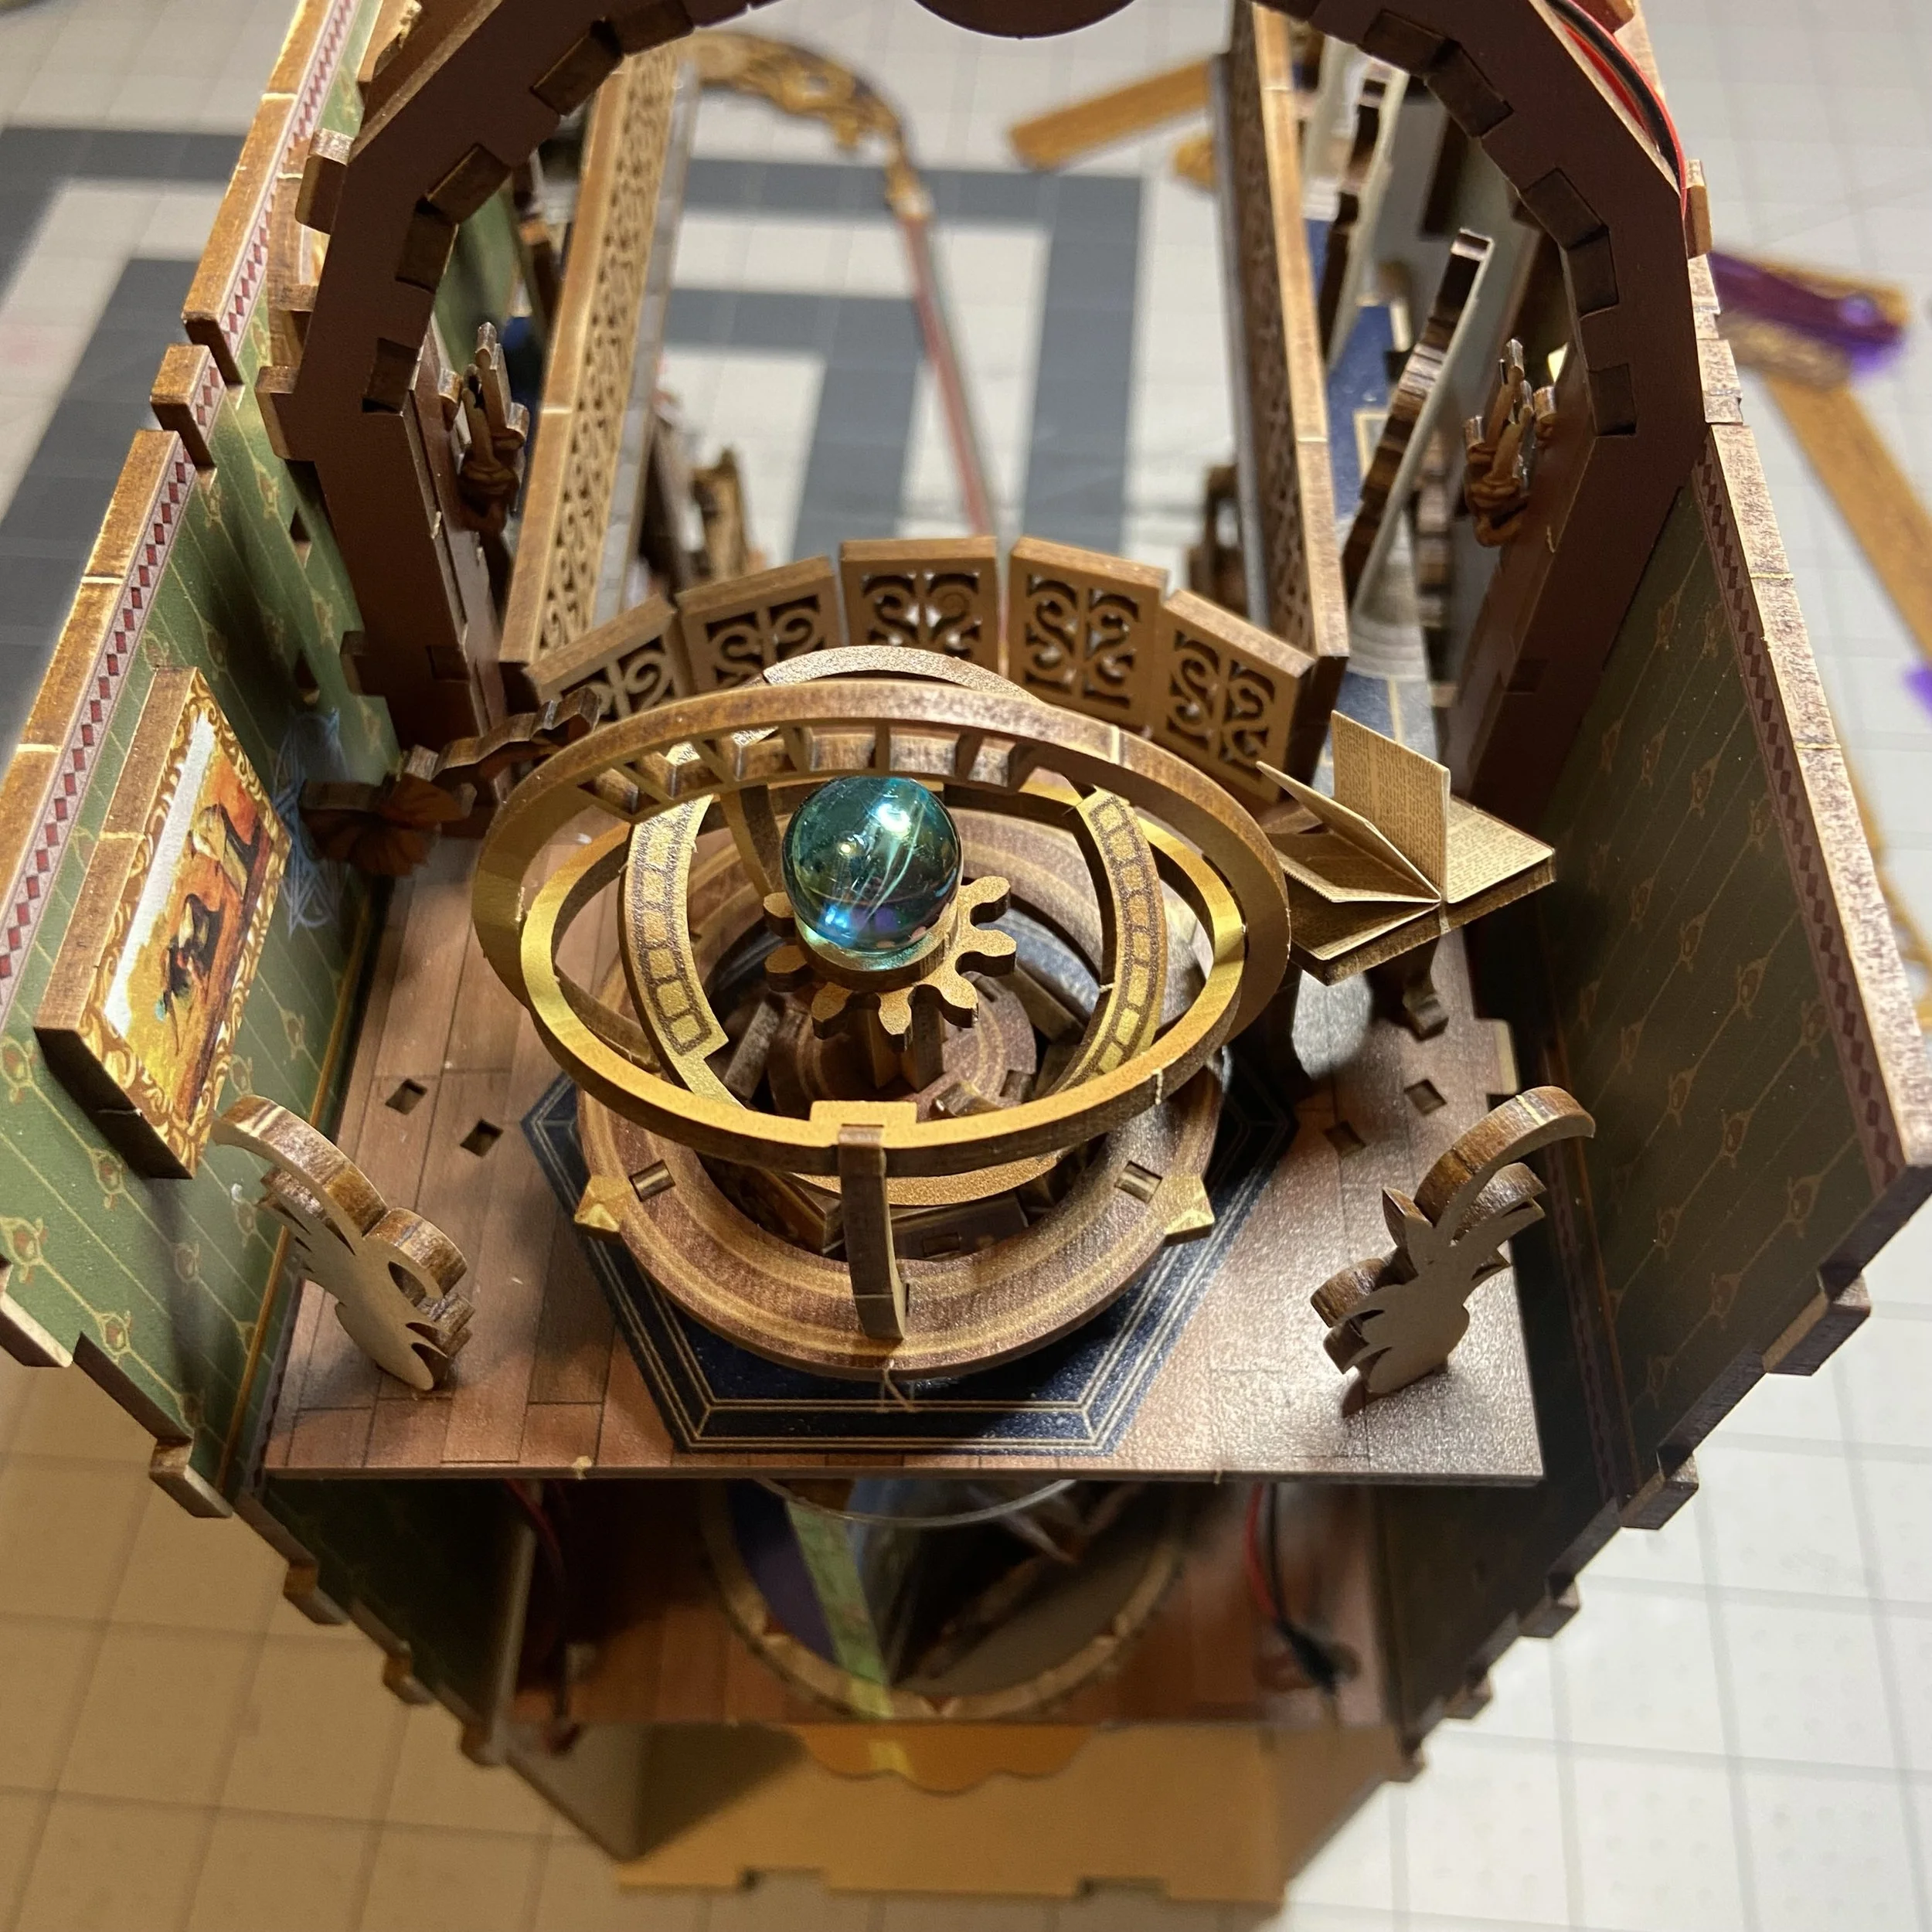
When it came time to assemble what I’m calling the Orb of Truth (the instructions called it something boring like the Planetarium), multiple layers of orbiting rings had to be assembled one at a time. The rings and their supports were all very delicate, and all being pressed into another delicate piece. I reminded myself to go slowly, to be patient, and if necessary, to sand down the attachment points just enough to allow them to slide in easily. If I decided they went in too easily because I’d overdone the sanding, I just added a little glue. I managed to assemble the Orb of Truth successfully without breaking anything. But this kit had extras of all those ring and support pieces, just in case. Bless you, Tonecheer…
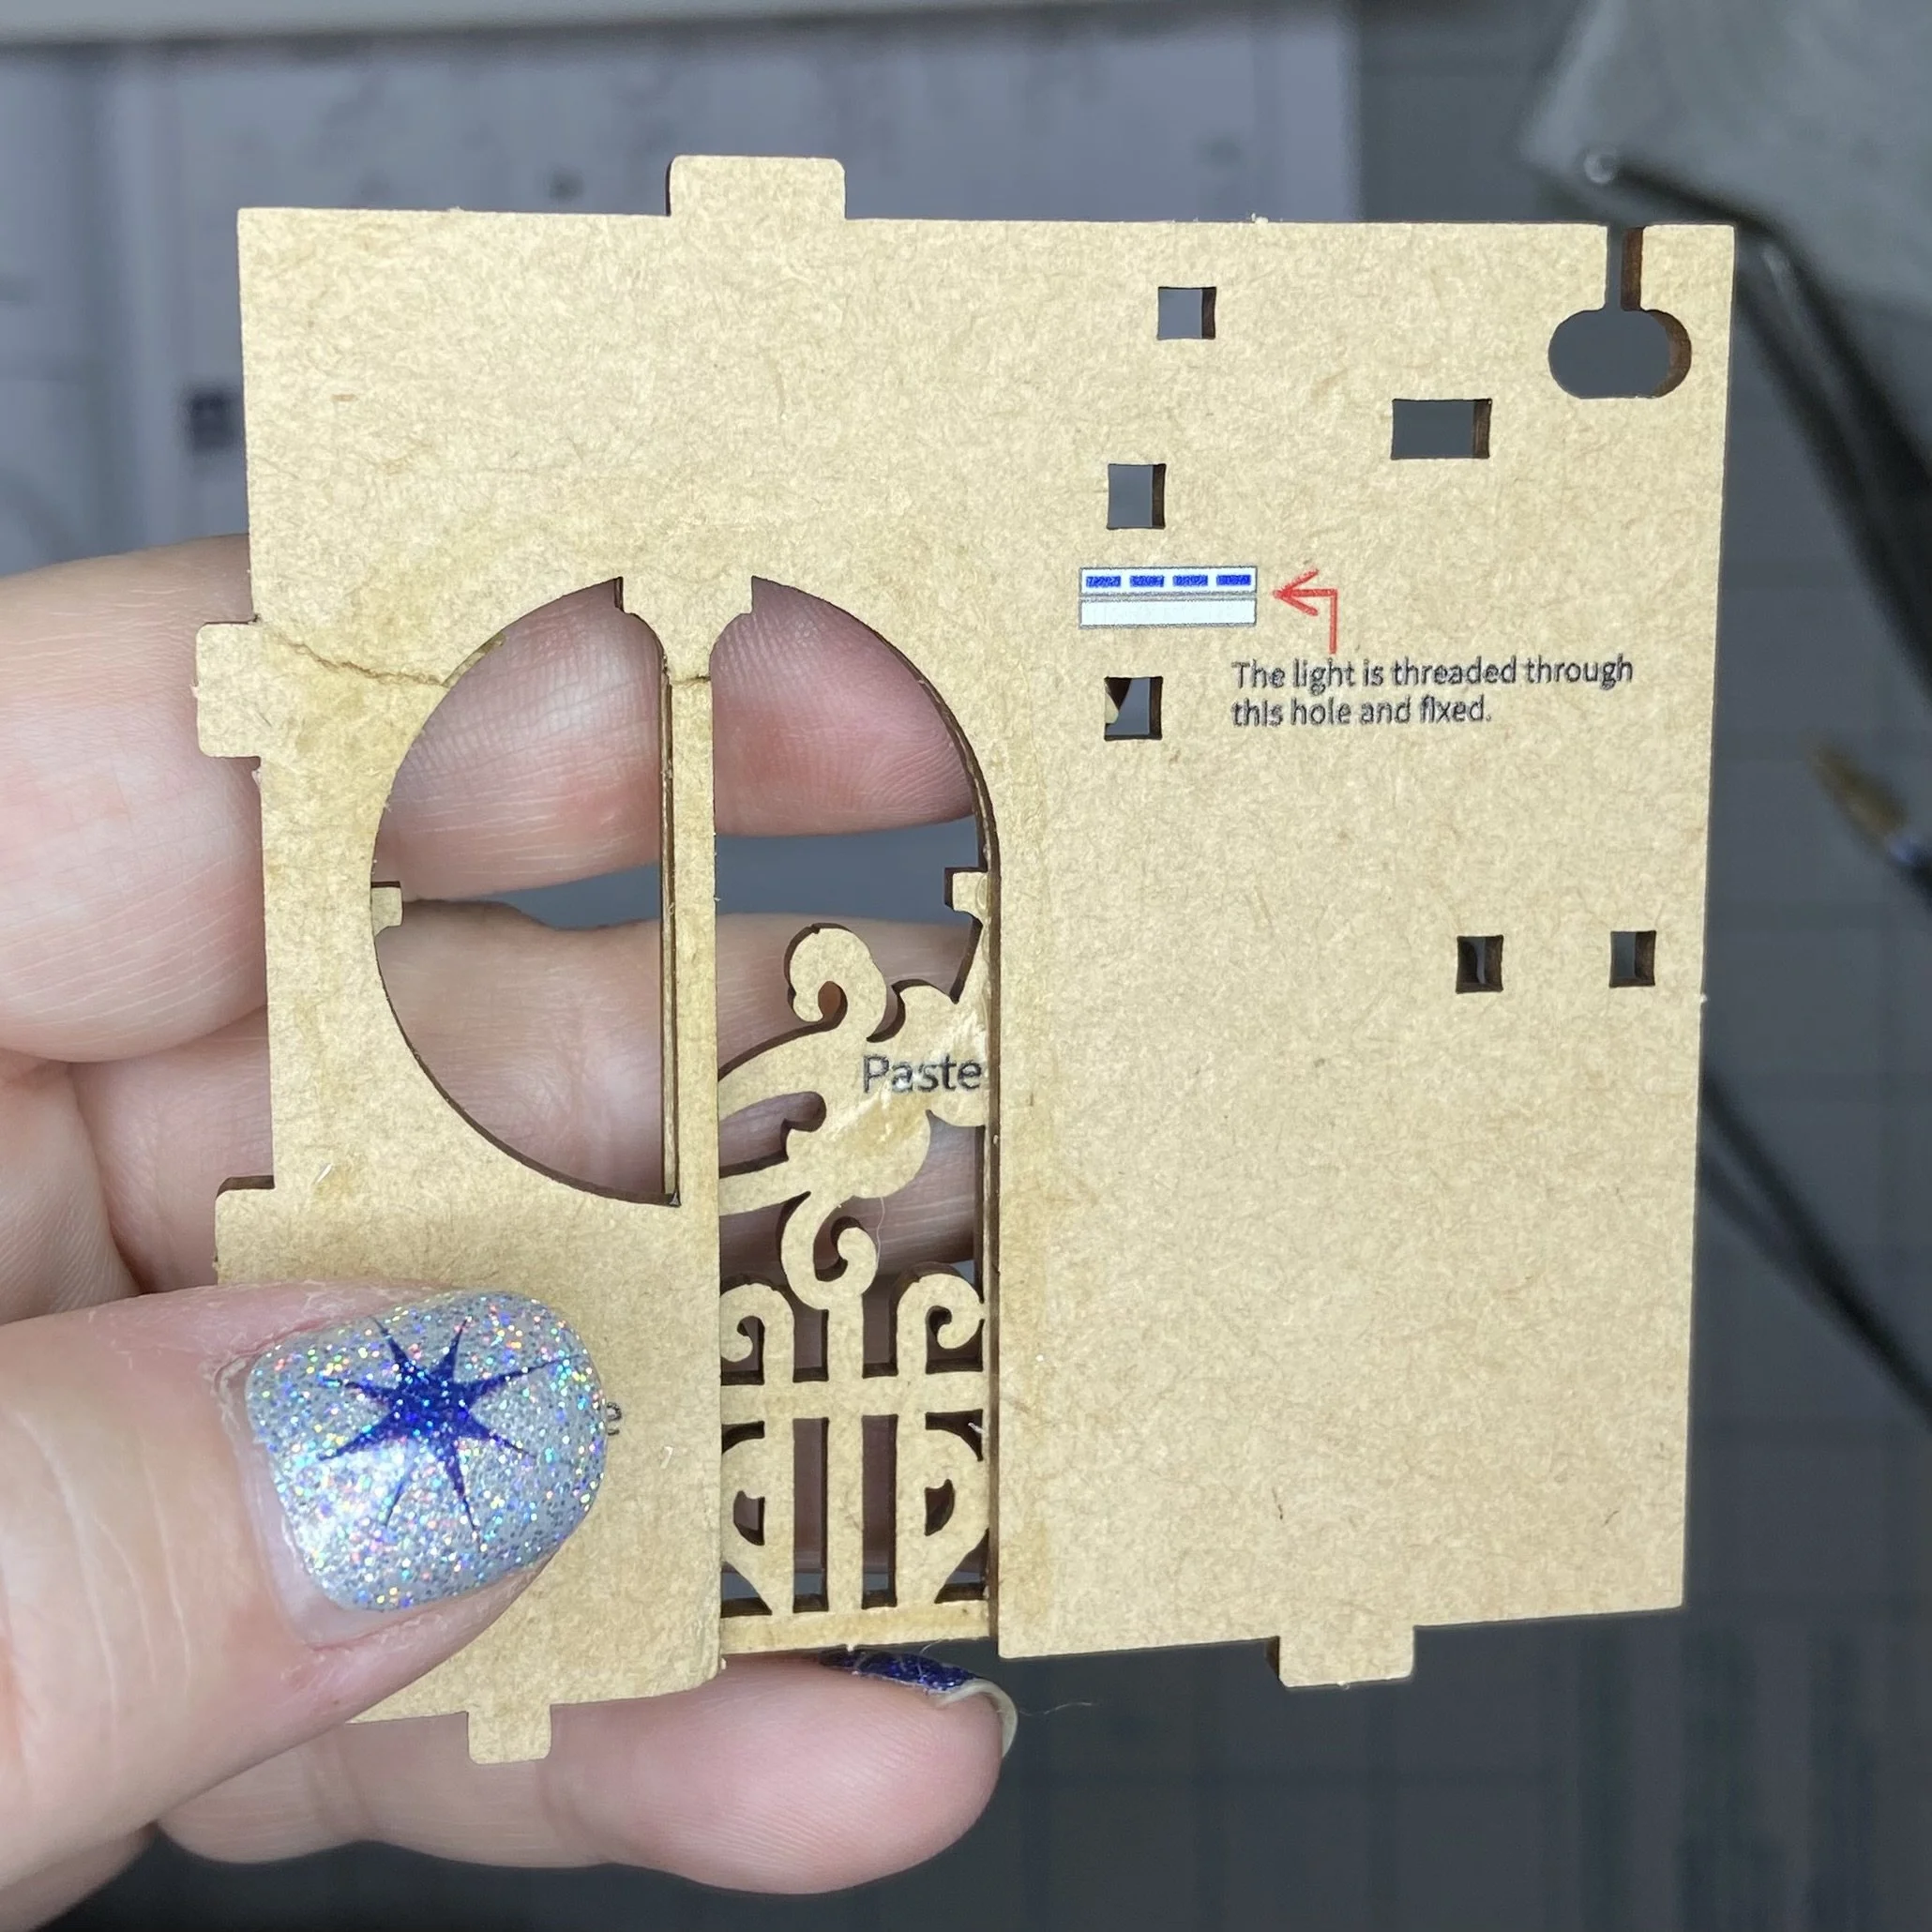
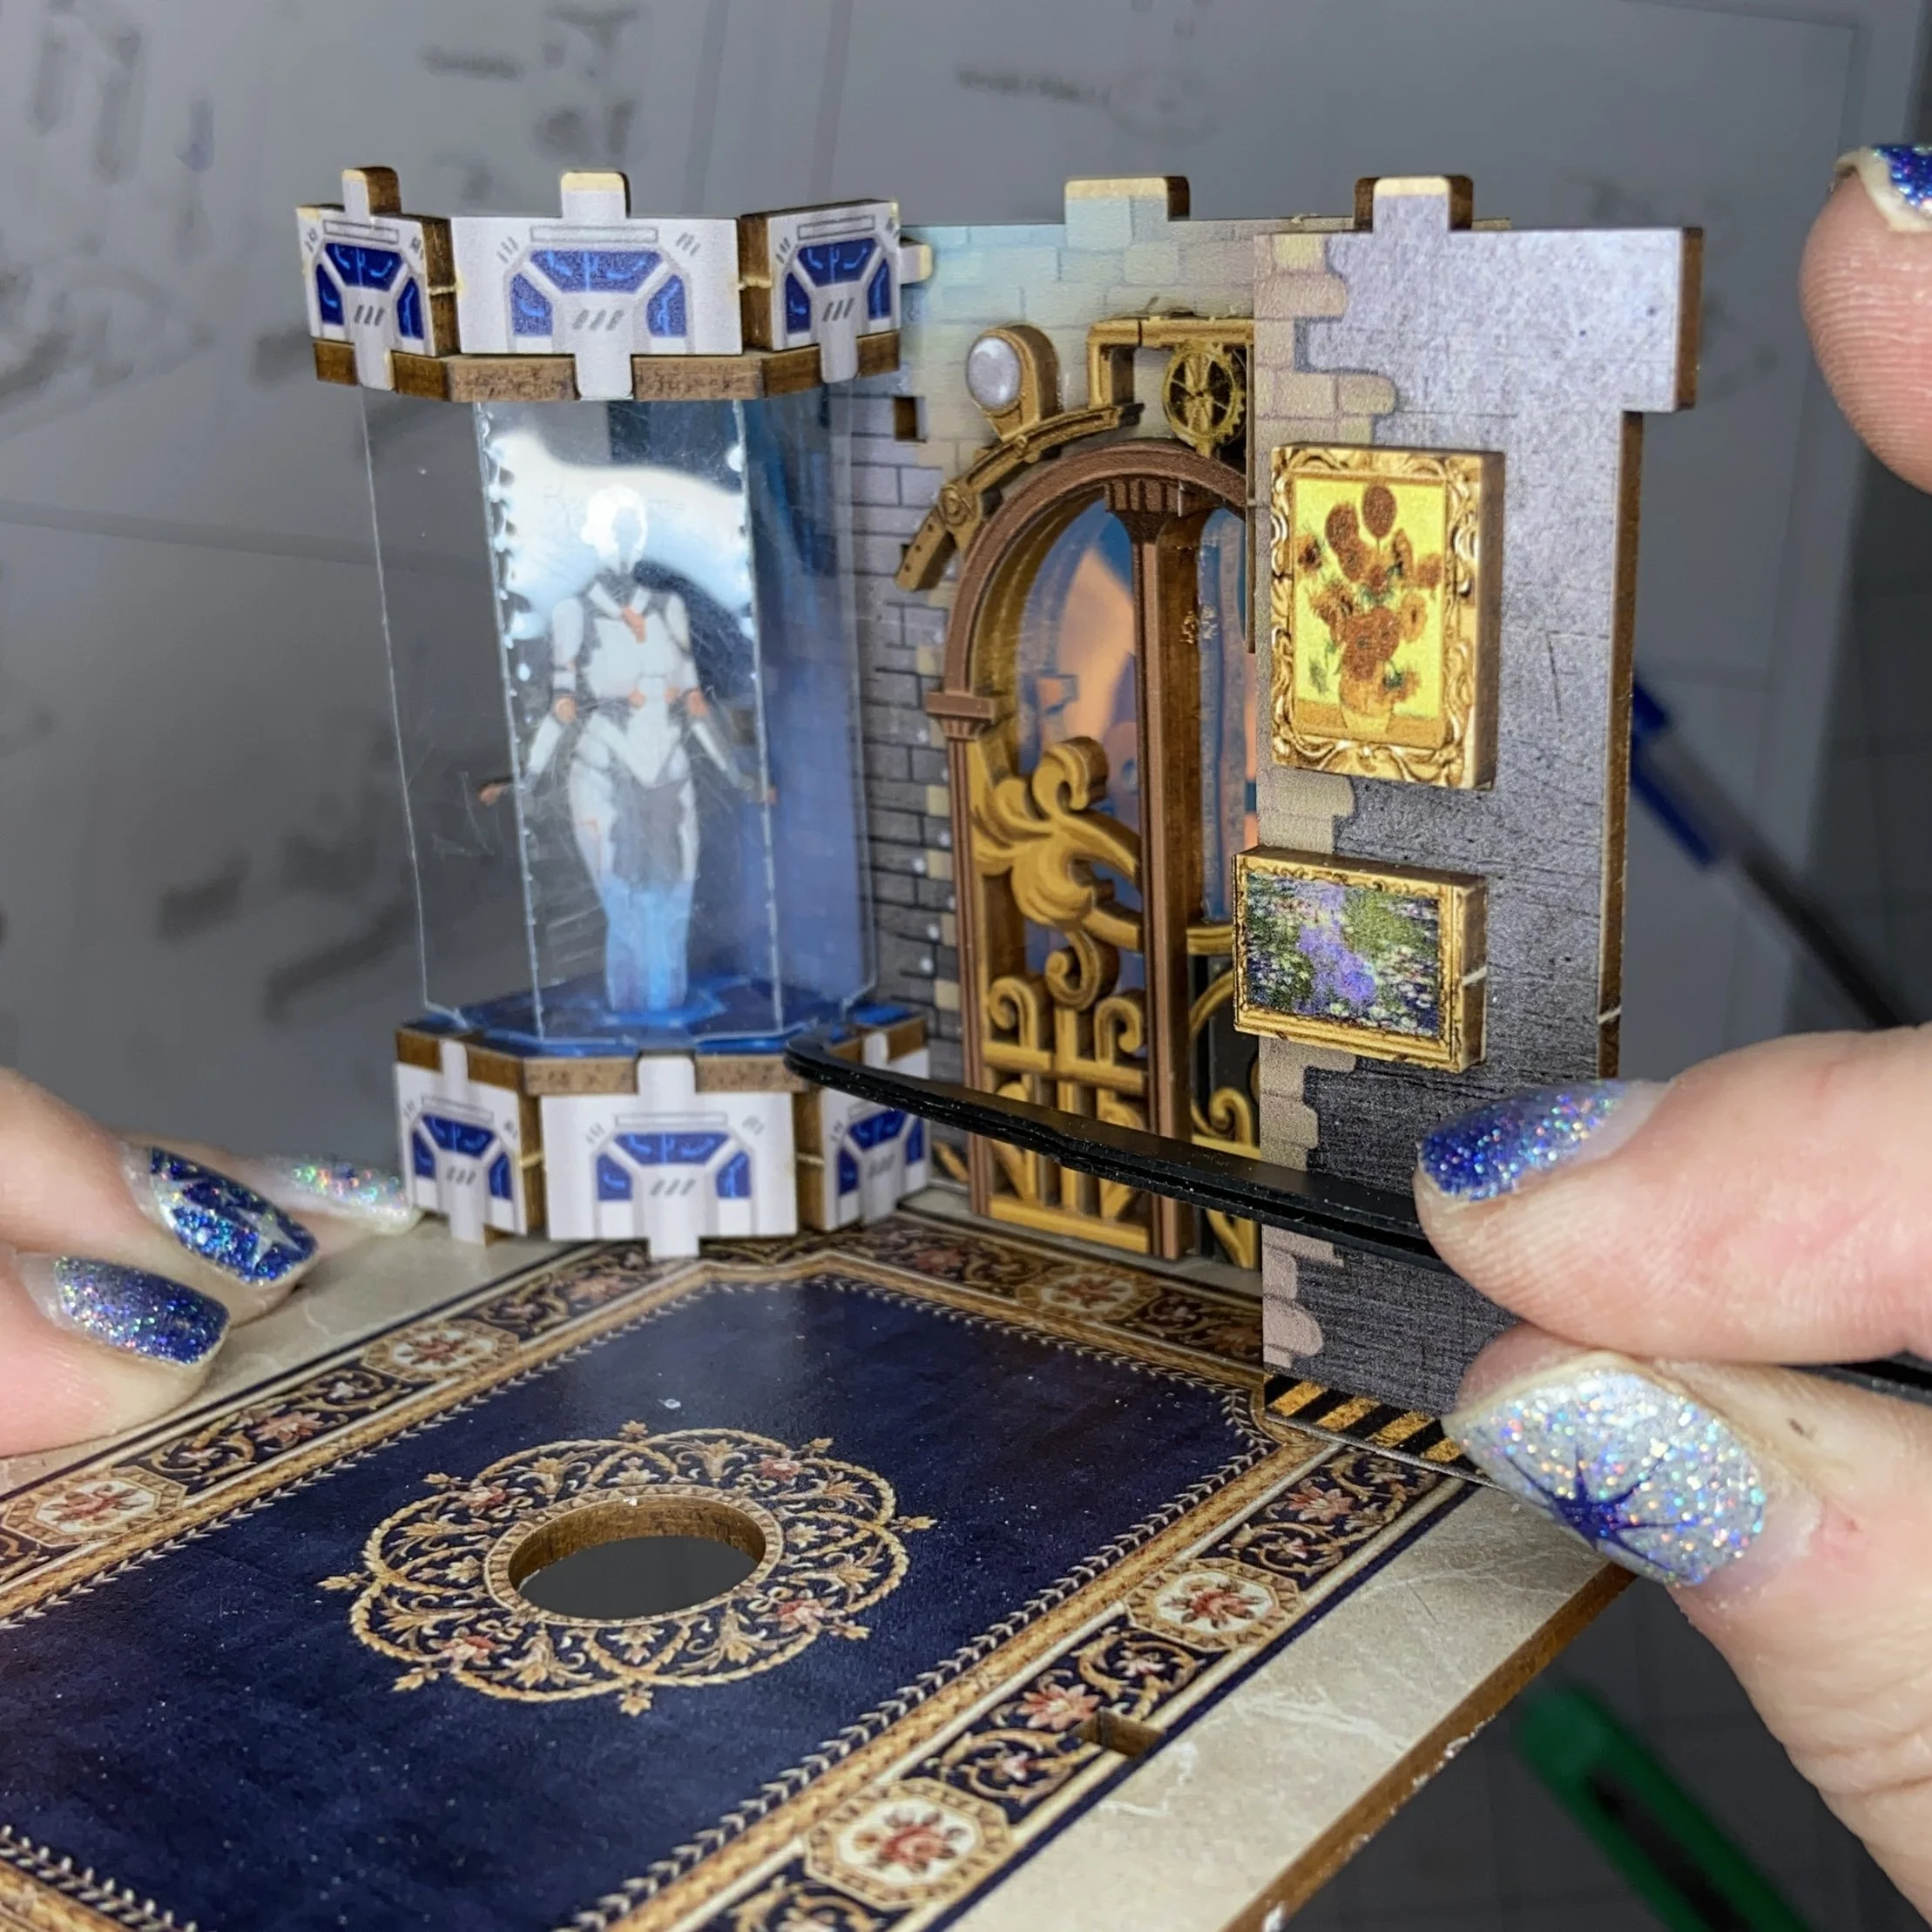
I also struggled with assembling a piece called the Dormant Bunker, which I think is supposed to reference a person in suspended animation (or cryosleep, if you prefer). This structure involved a clear plastic piece that had notches to be inserted at the top and bottom of the frame. But I could never get the piece to fit properly. I trimmed down the notches, in the hope that they would fit, but they just never went in all the way, leaving a gap at the bottom, and making the top too tall to fit where it would need to go later. So…I improvised again. I just cut the notches off the top entirely, and then glued in the notches at the bottom. It’s not perfect, but you absolutely cannot tell it’s not quite right in the end product, so I’m going to claim the win on this one.
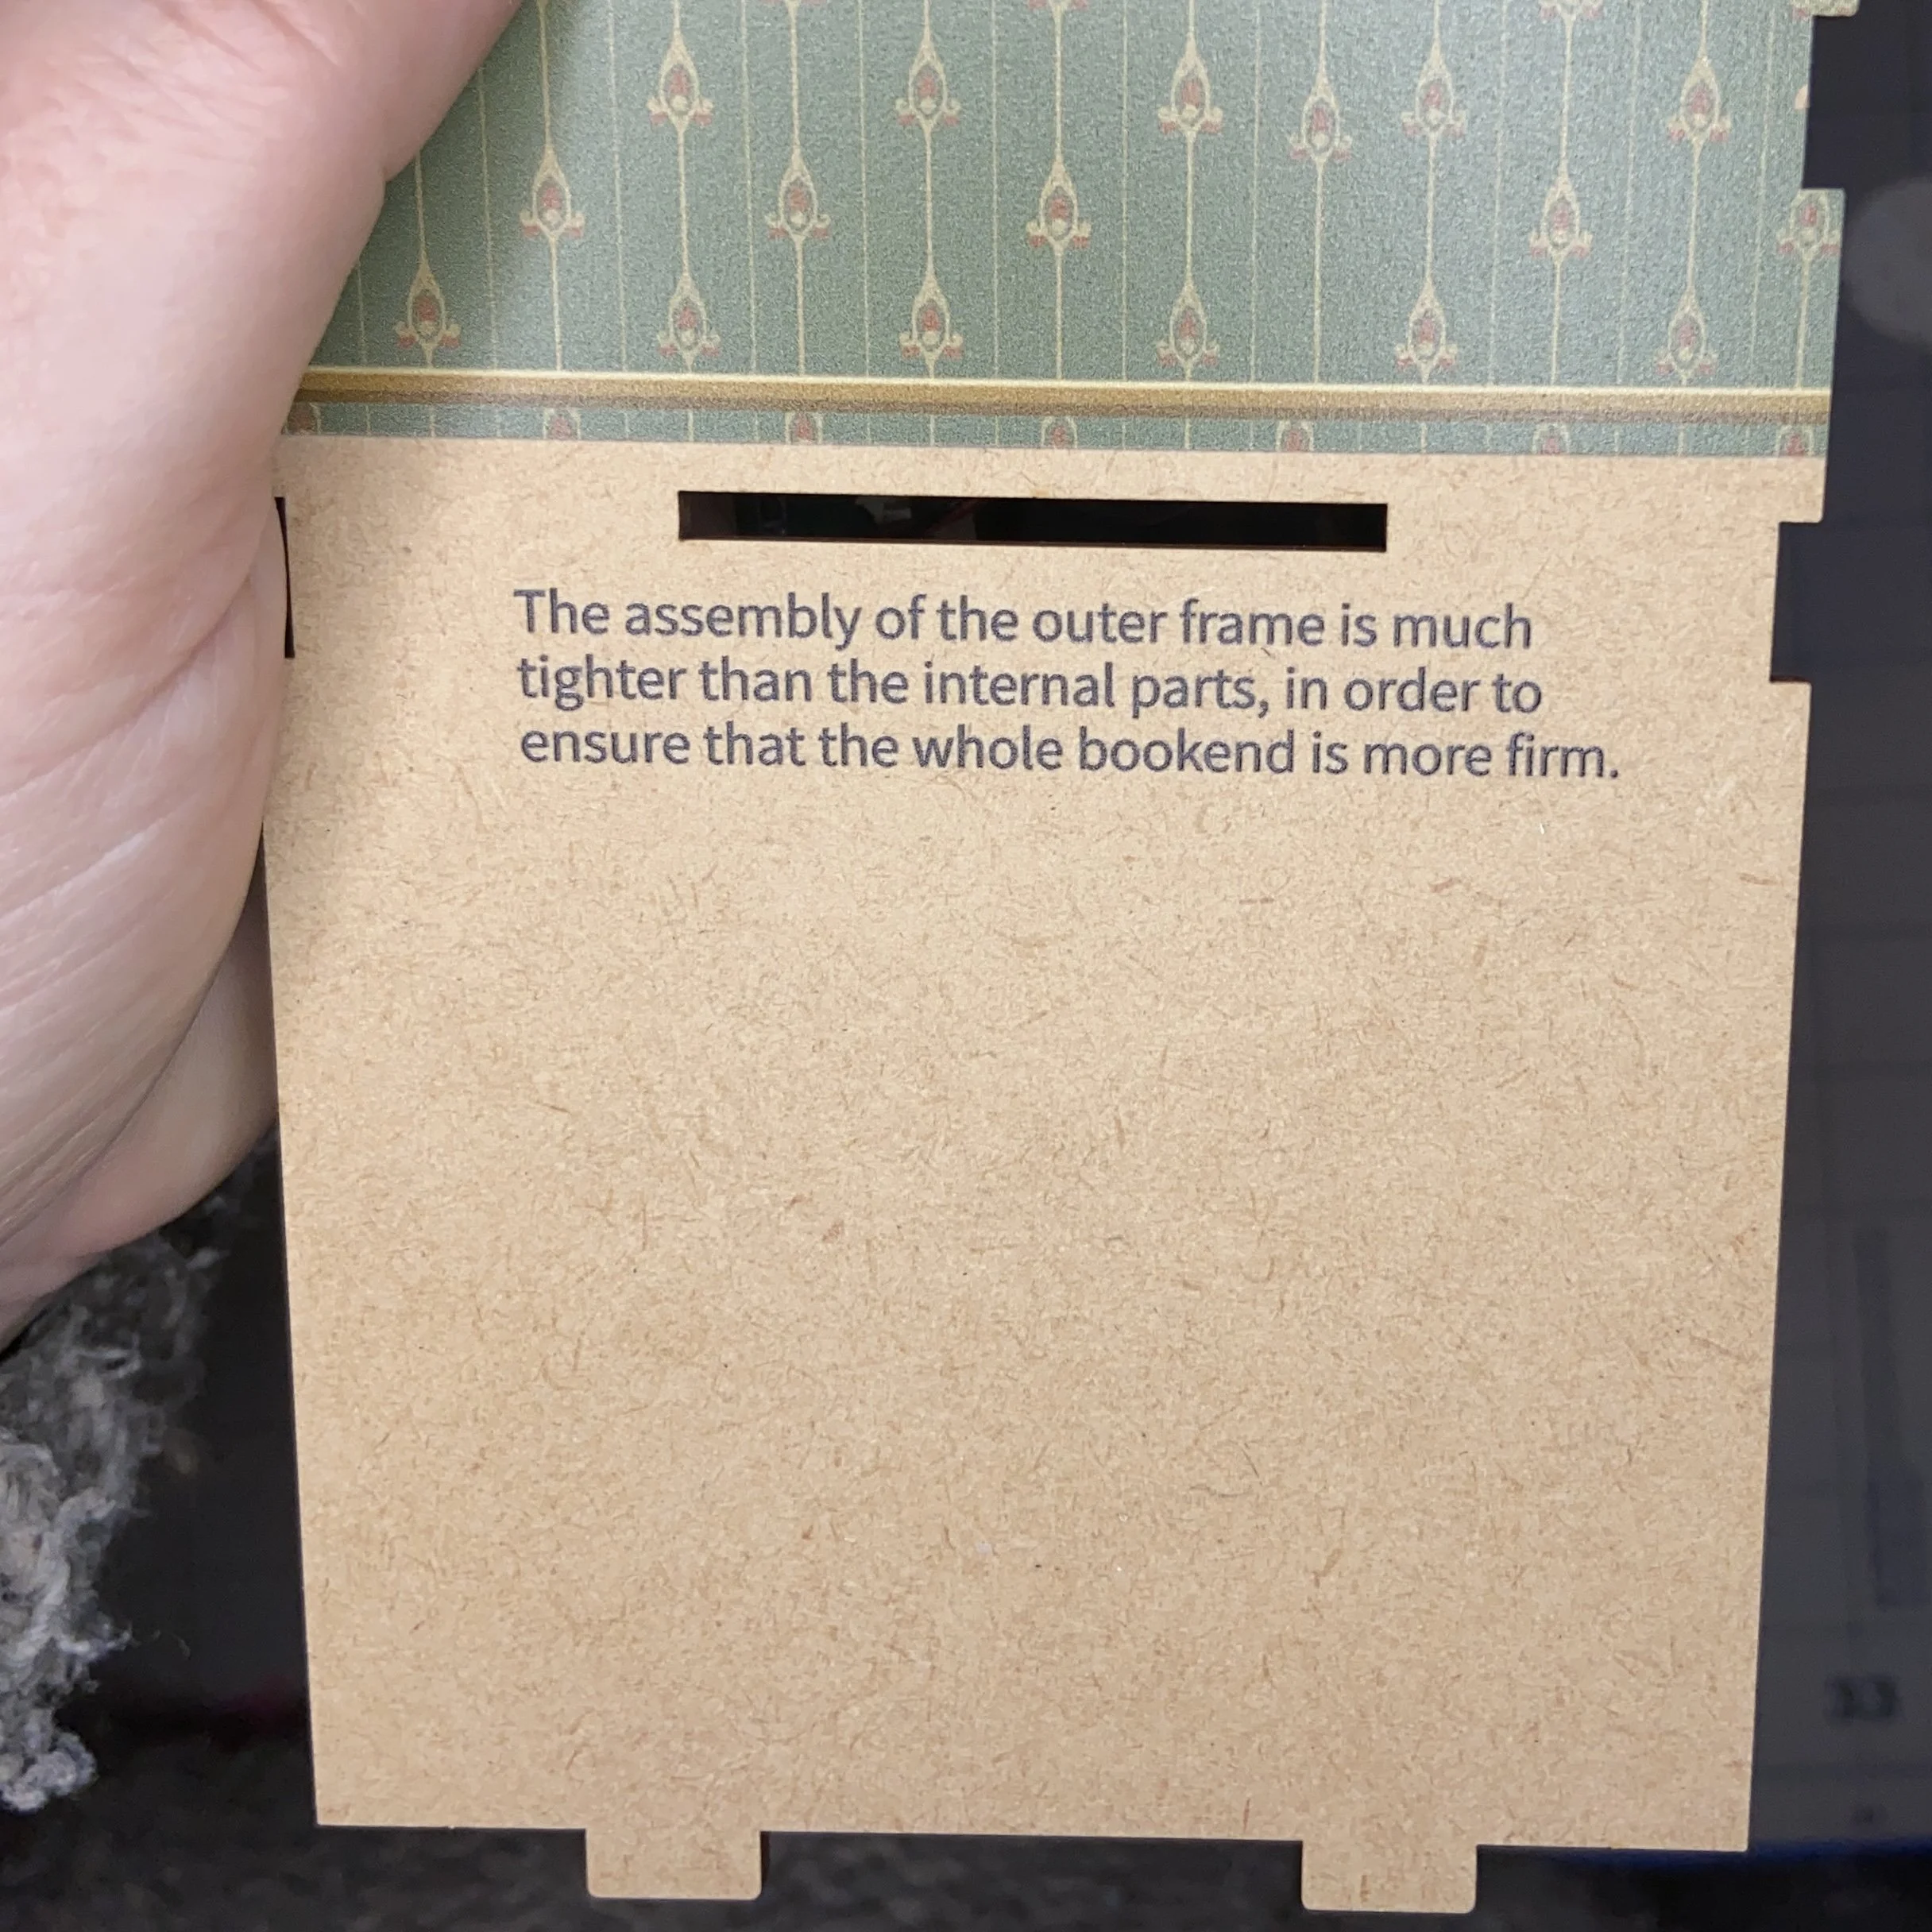
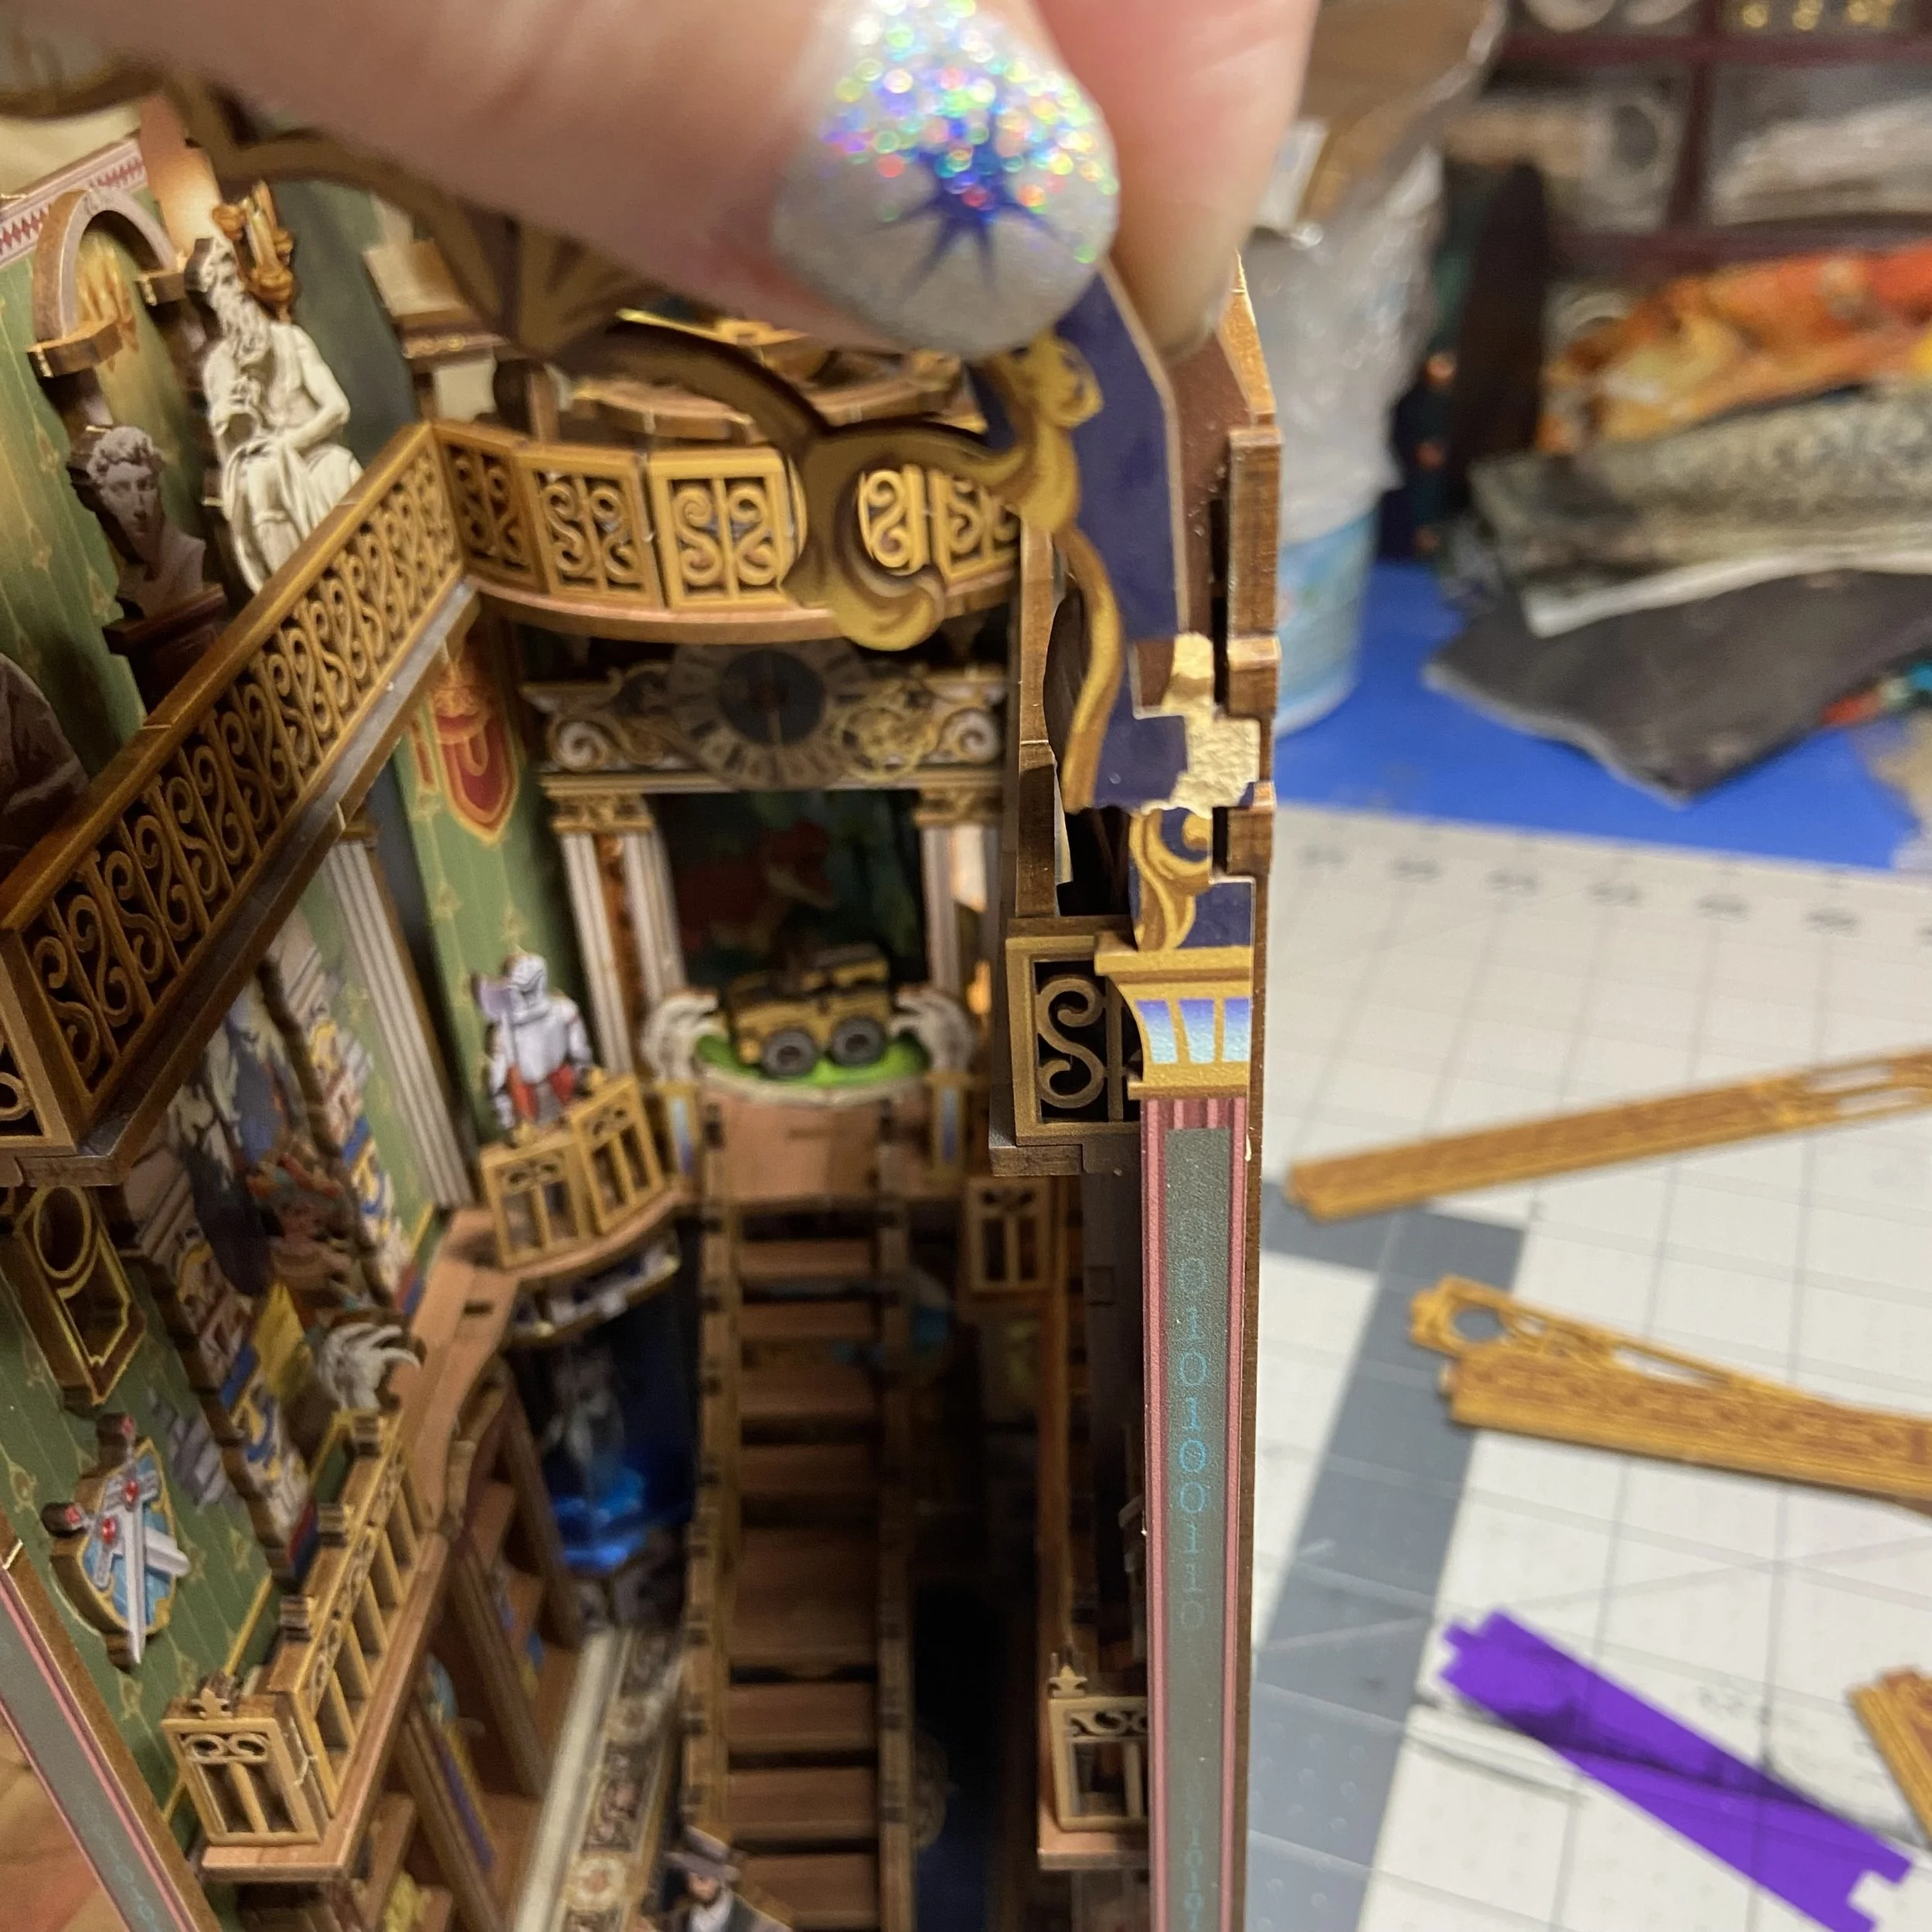
Toward the end, everything seemed to be coming together well enough. The instructions issue a warning, which is repeated on more than one structural piece: the assembly of the outer frame is much tighter than the internal parts. This is supposed to make the whole nook more rigid, which I’m sure it does. But my gosh, they are not kidding. In addition to the basic challenge of lining up multiple notches to the appropriate slots, the fact that everything fits much more tightly ups the difficulty of assembly quite a lot. But, I was getting it done.
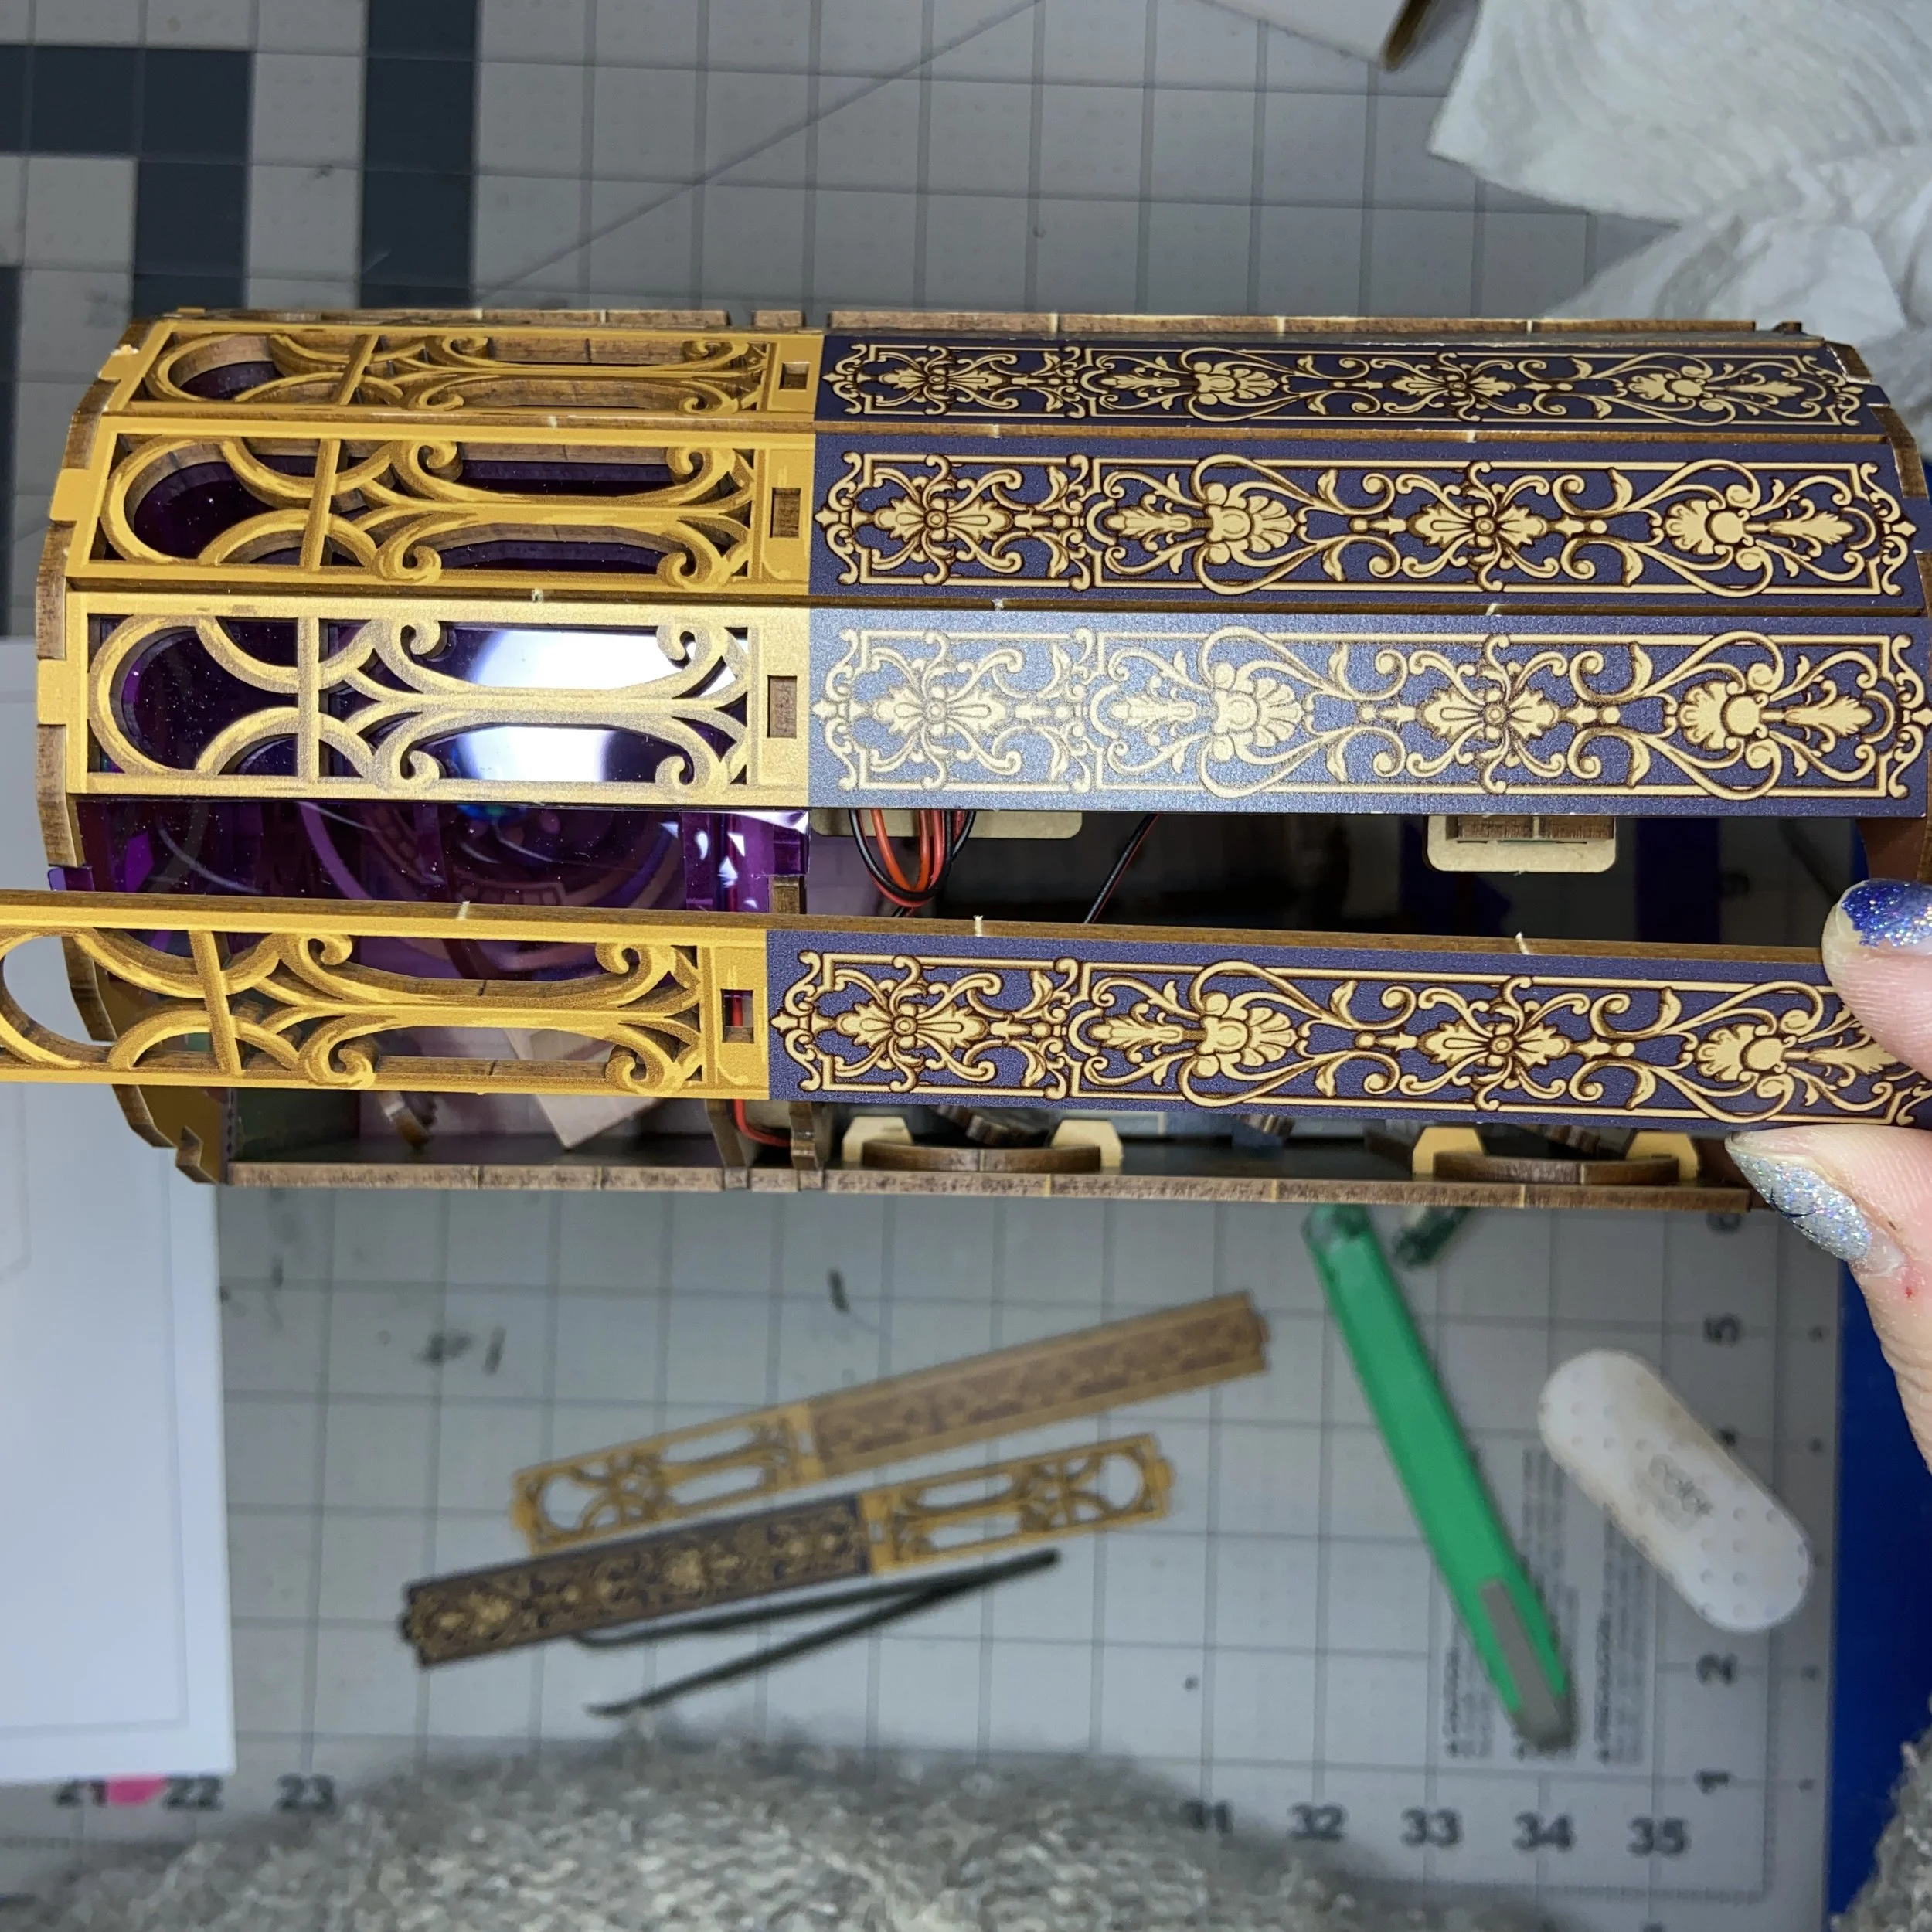
After the sides and back were on, I assembled the roof with its purple “glass” strip by strip. So pretty!
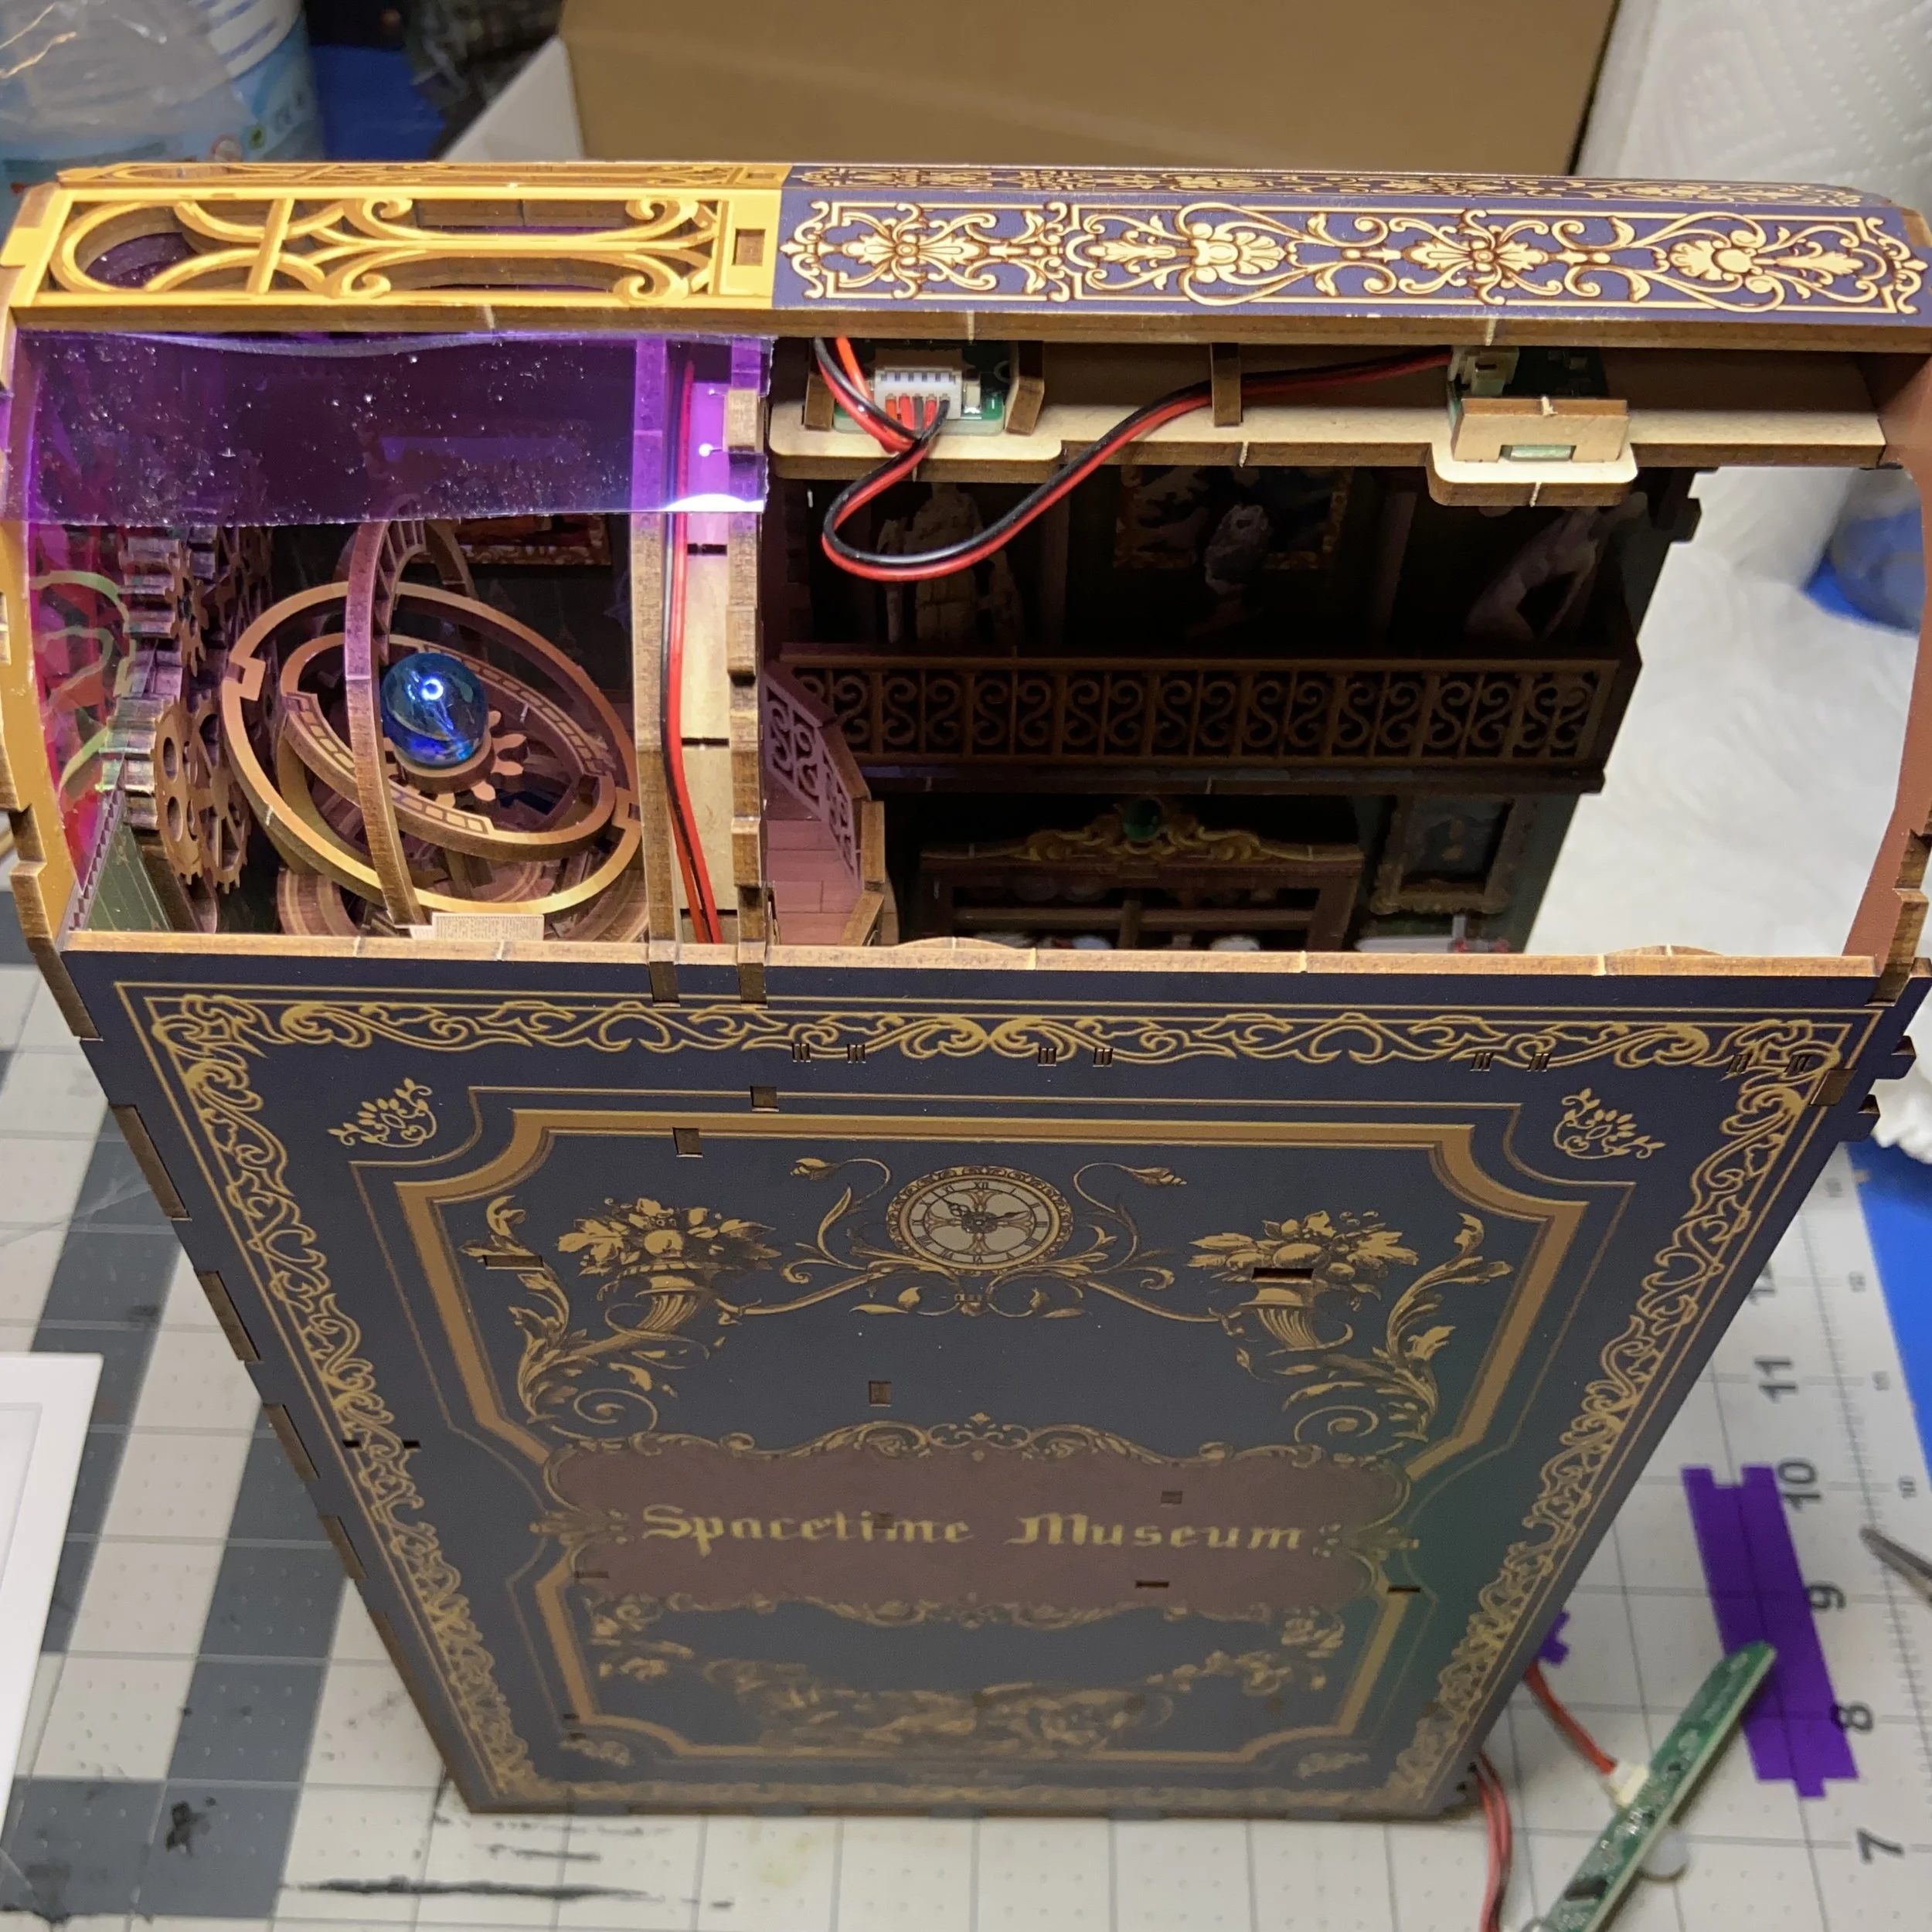
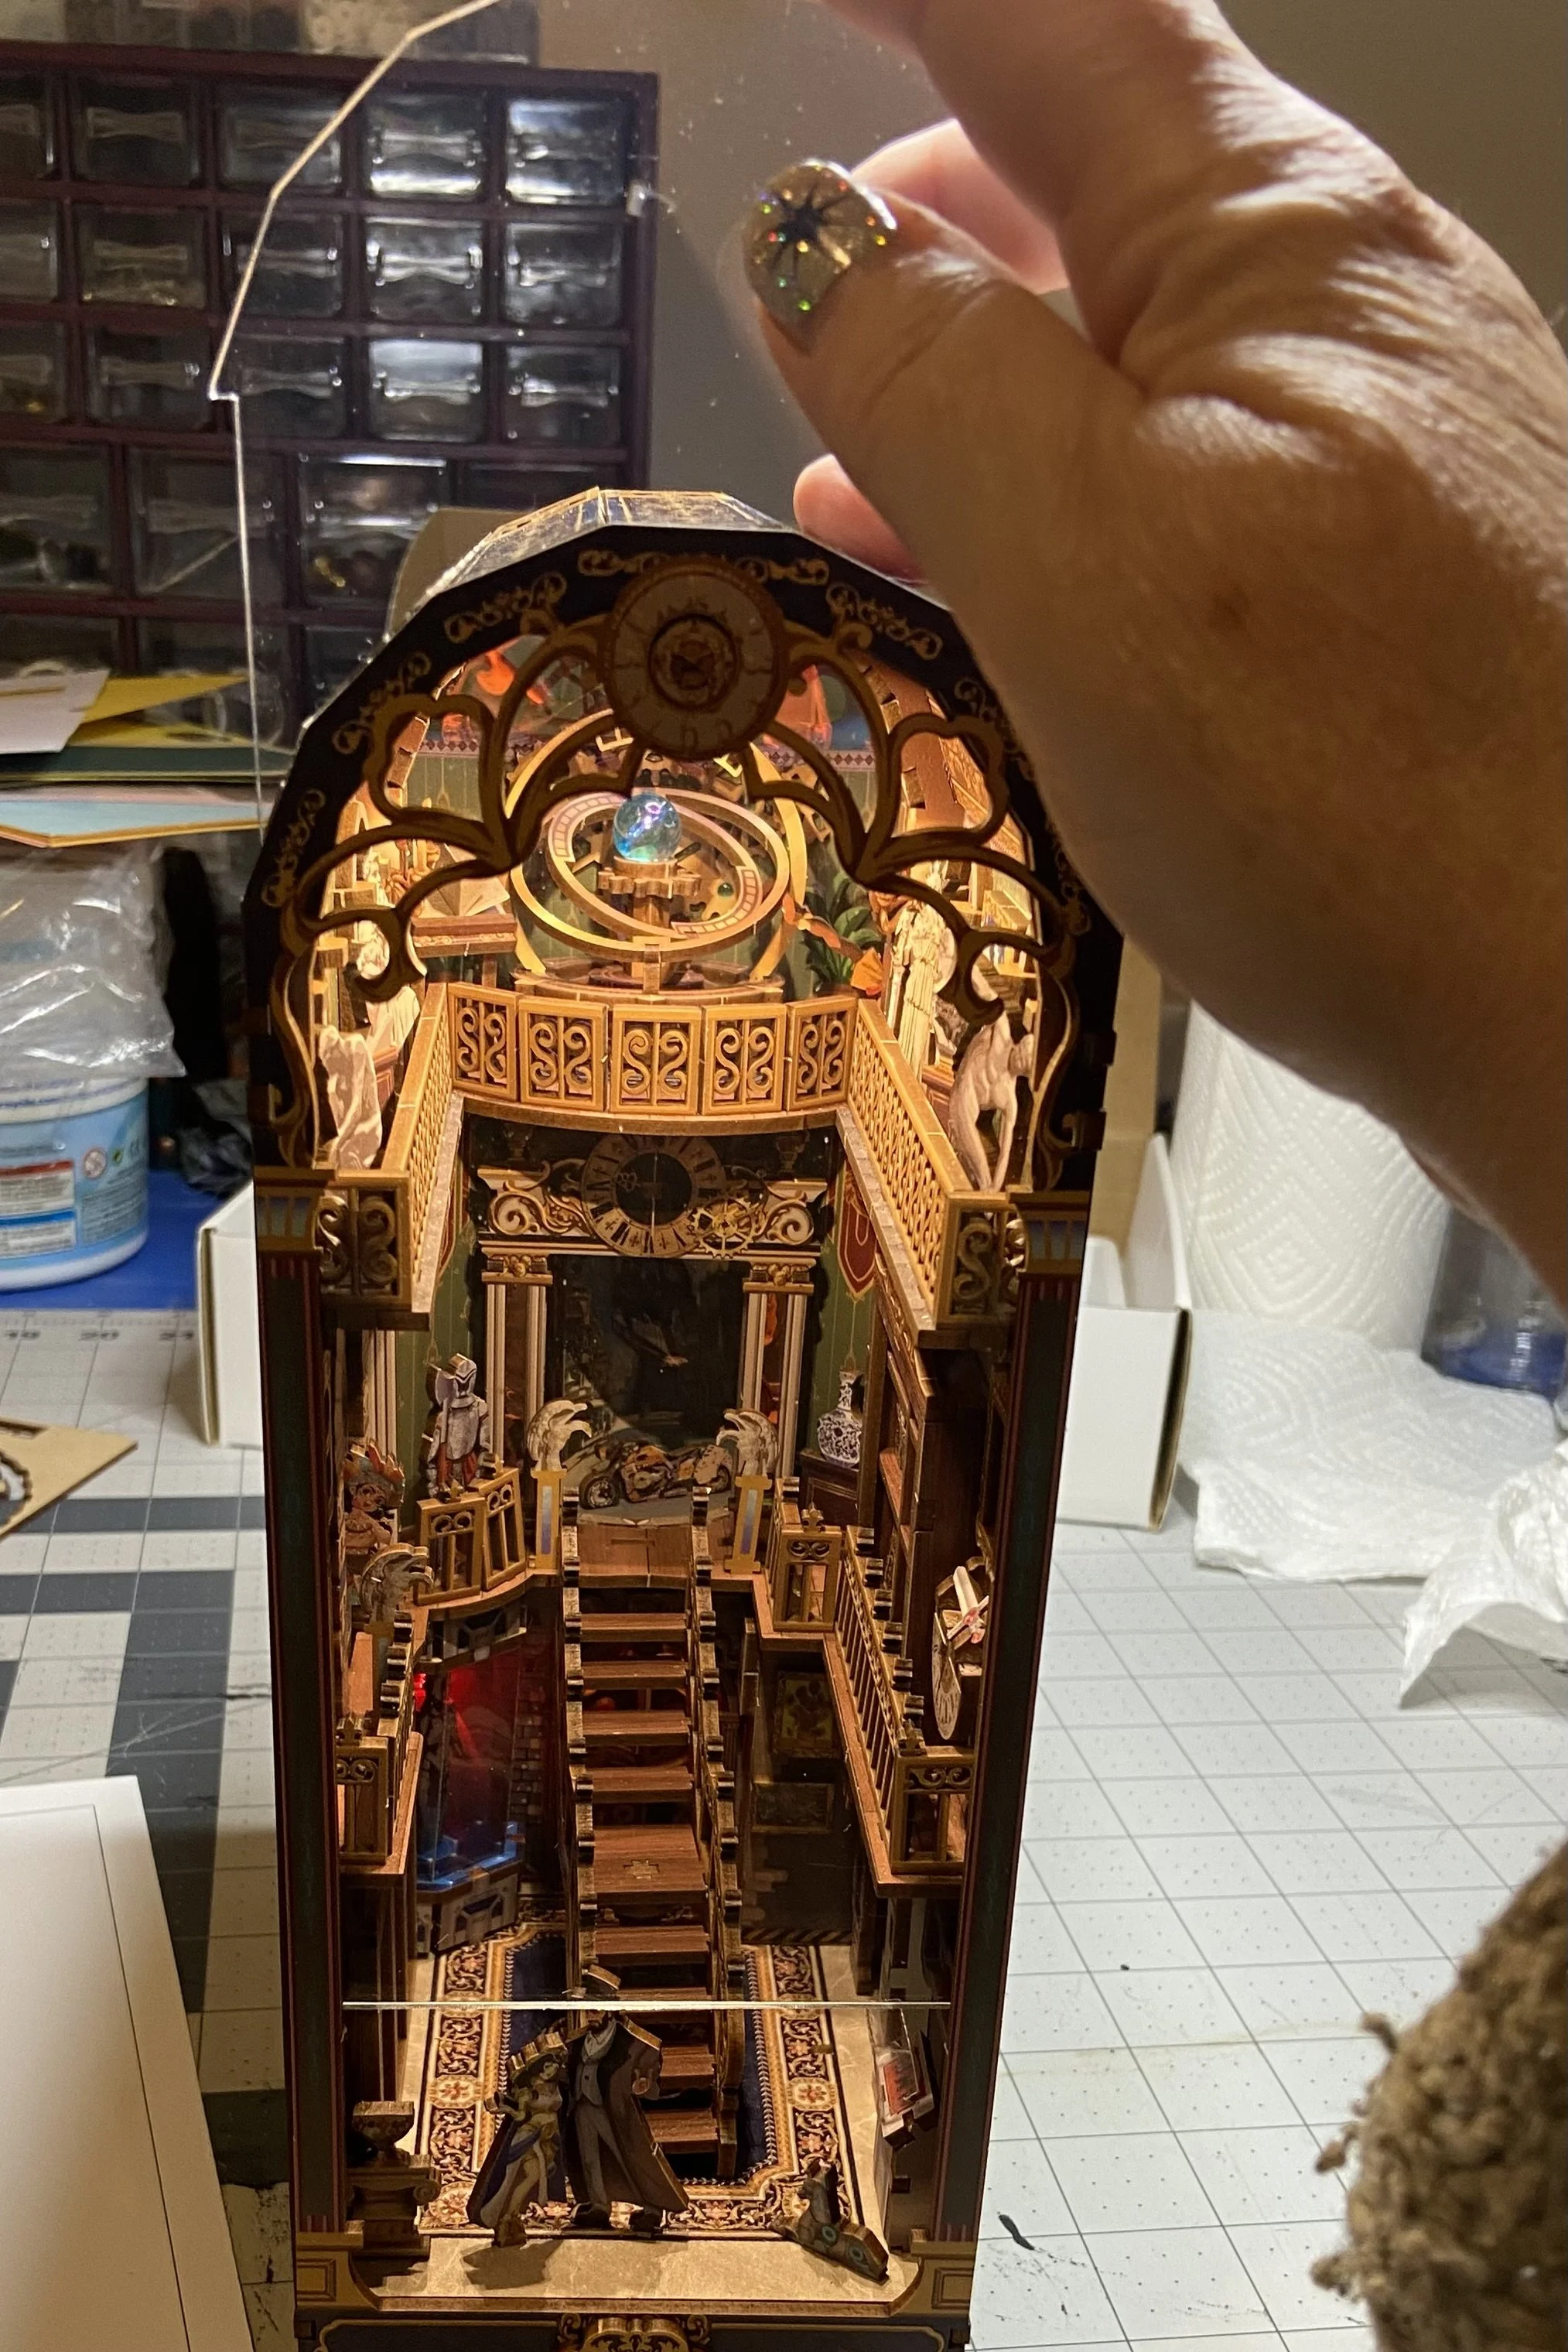
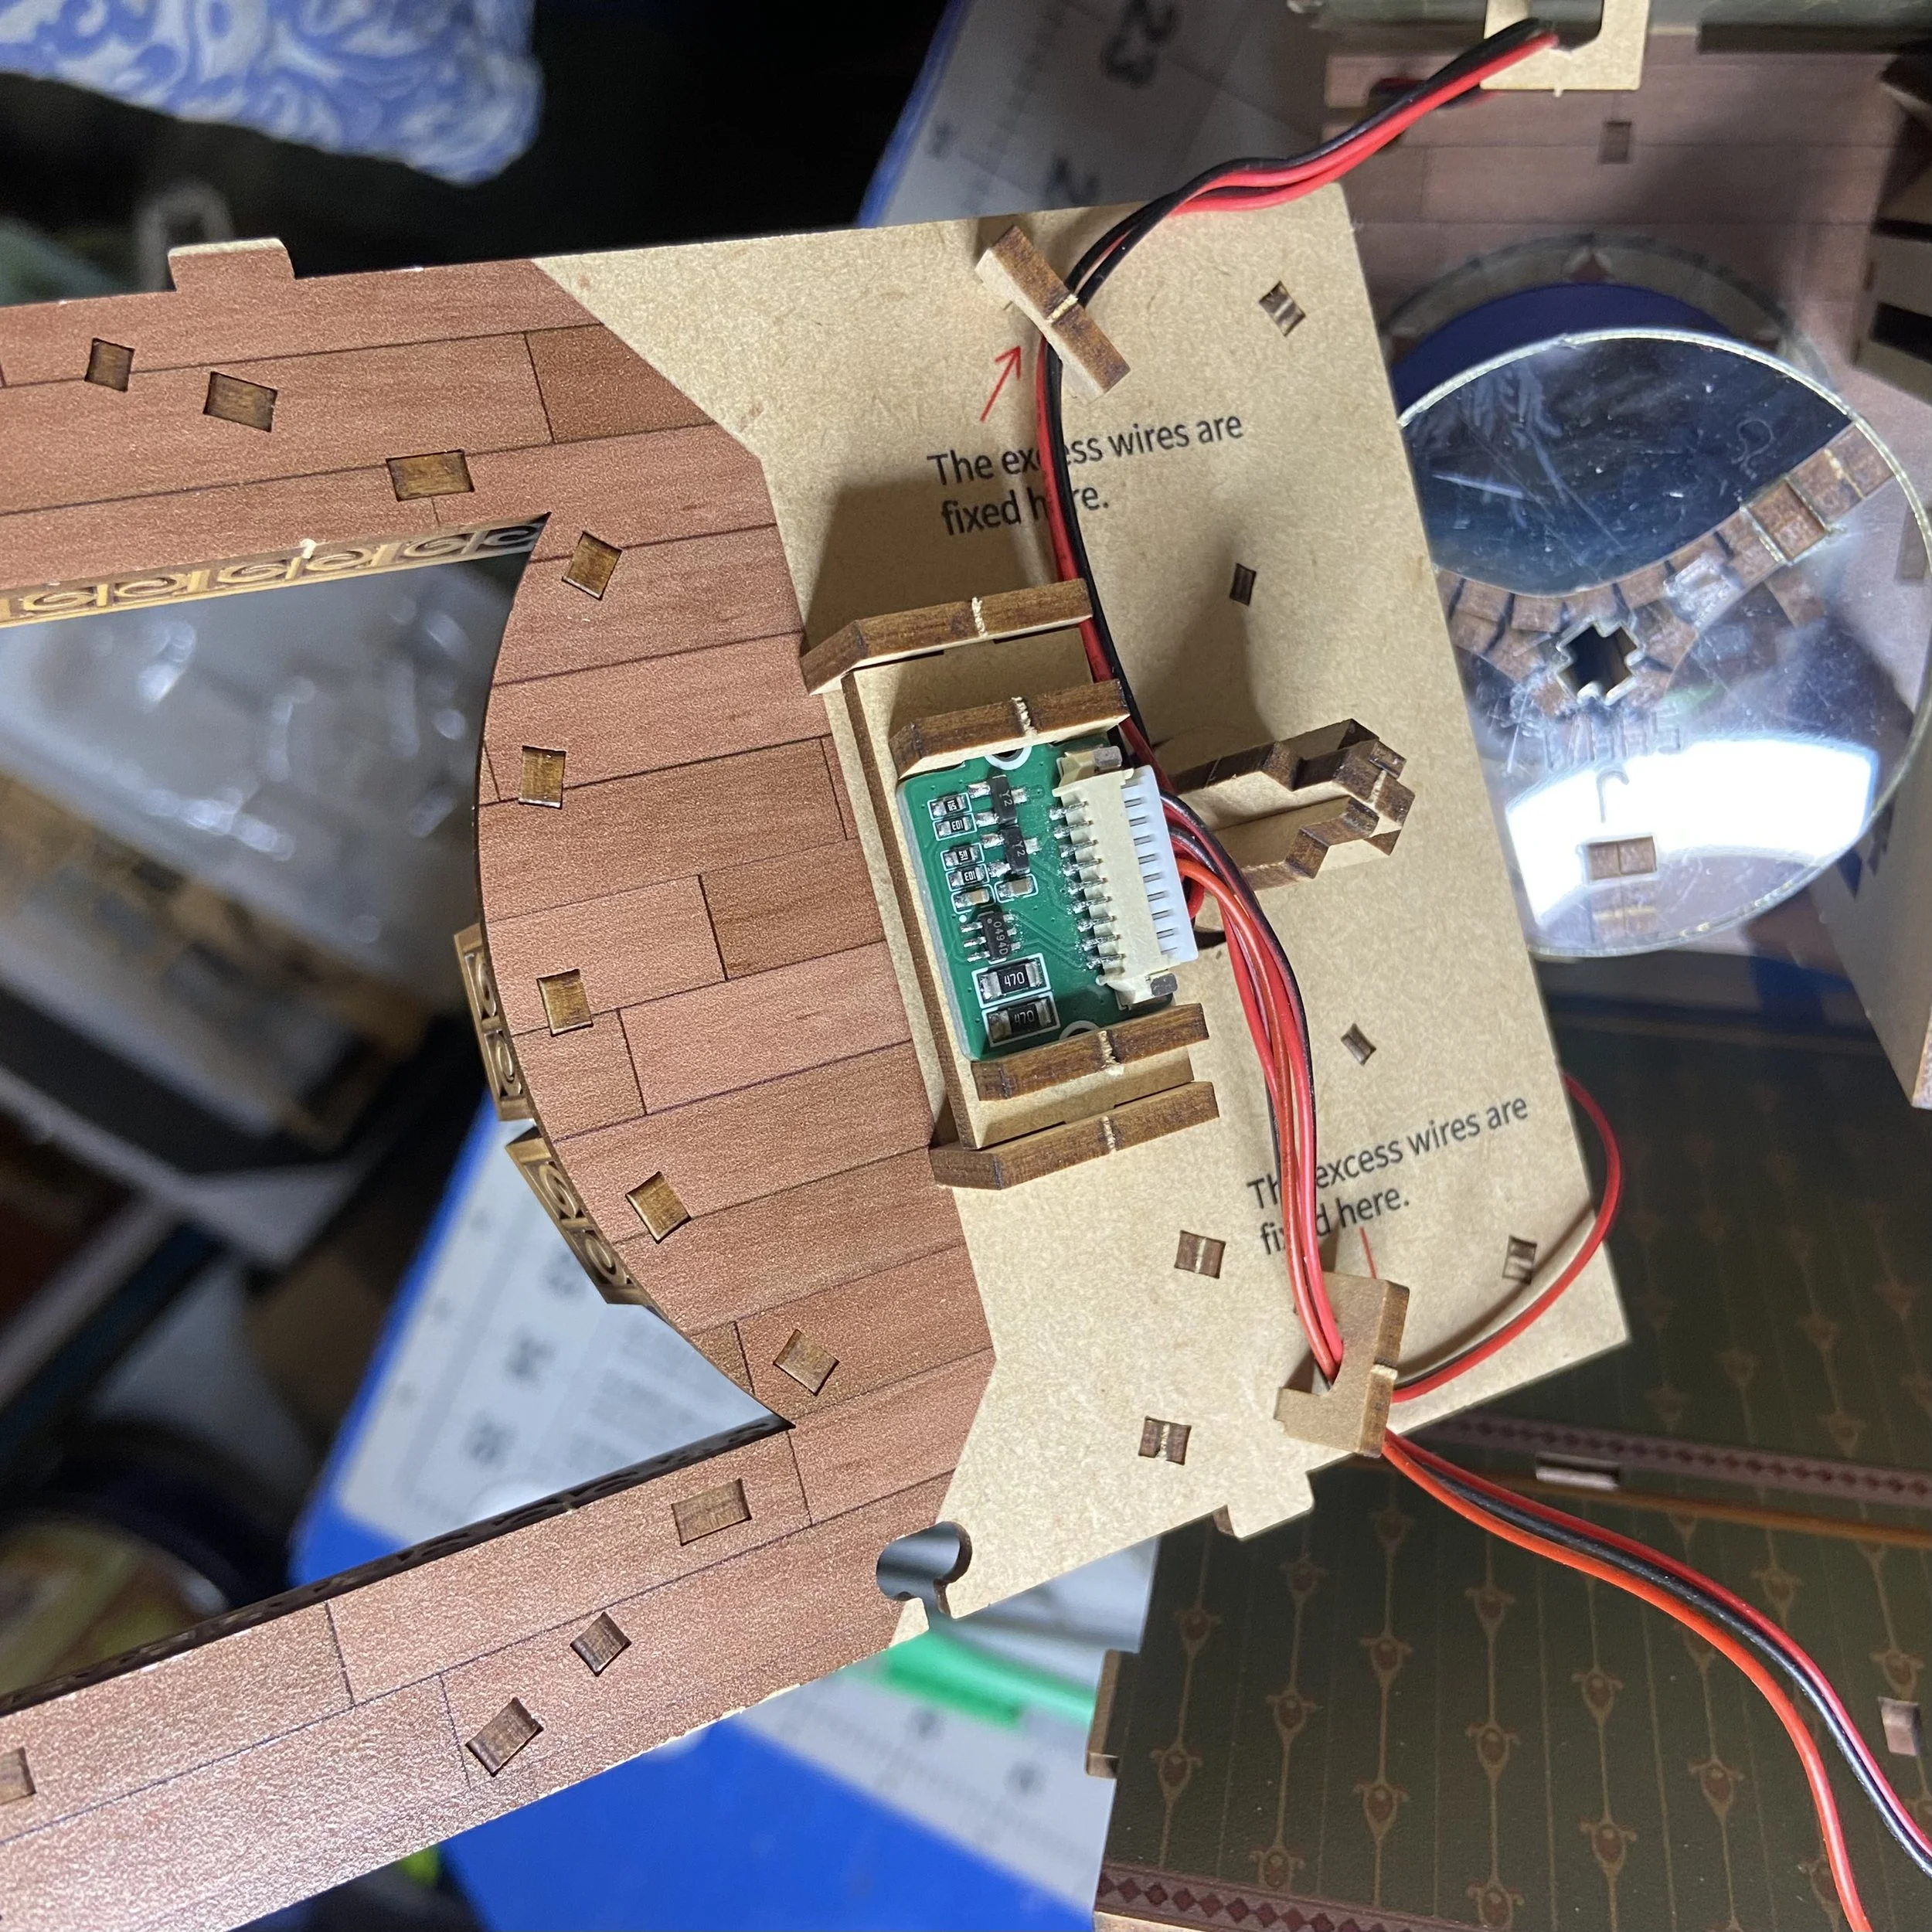
After the roof was on, and the front archway was attached, the dust cover could slot right in. So clever! I do not enjoy dusting my book nooks that lack such a cover. And you can see the interior views below. Although the interior lights are on, the carousel is completely dark, which is odd, since I installed an LED right above it
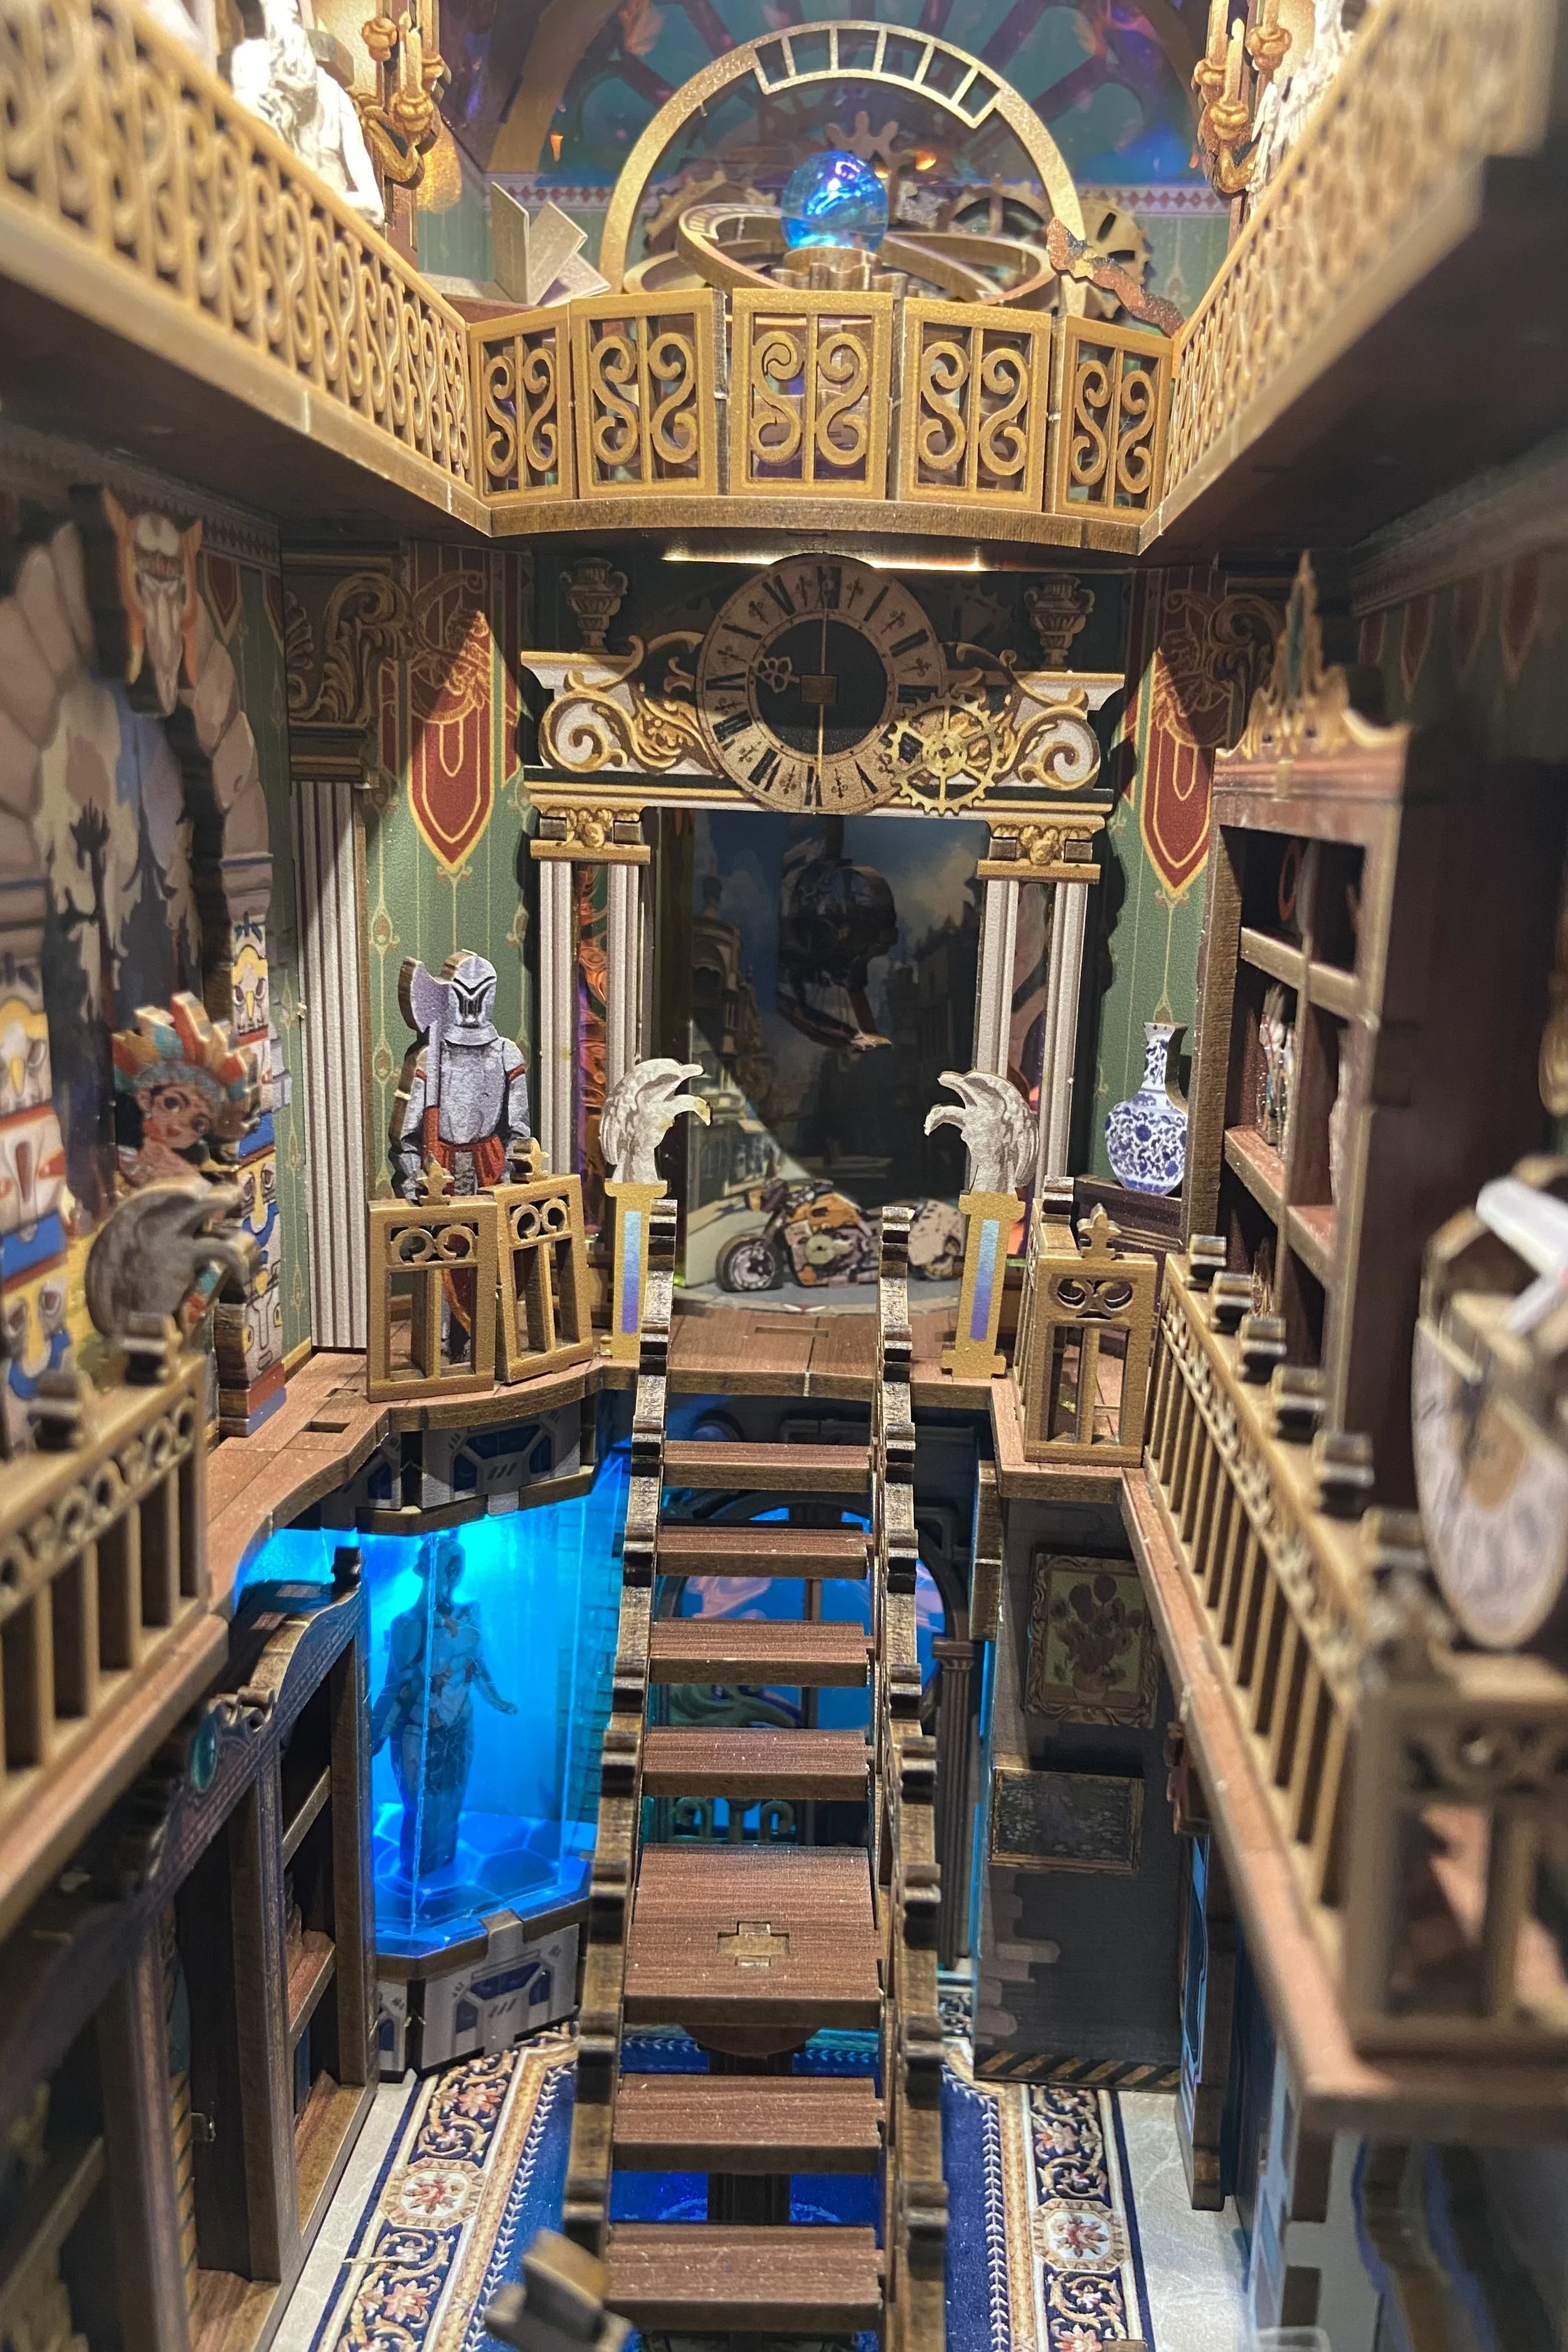
Also, when I went to test all the moving parts, the carousel’s gear at the back turned just fine, which didn’t really matter since the carousel could hardly be seen. The gear on the right side that turned the staircase was very stiff, and I could only make the staircase turn very slightly to the left. And the slider on the right side that was supposed to operate a door on the inside came off in my hand. The heck with it…the door can stay where it is.
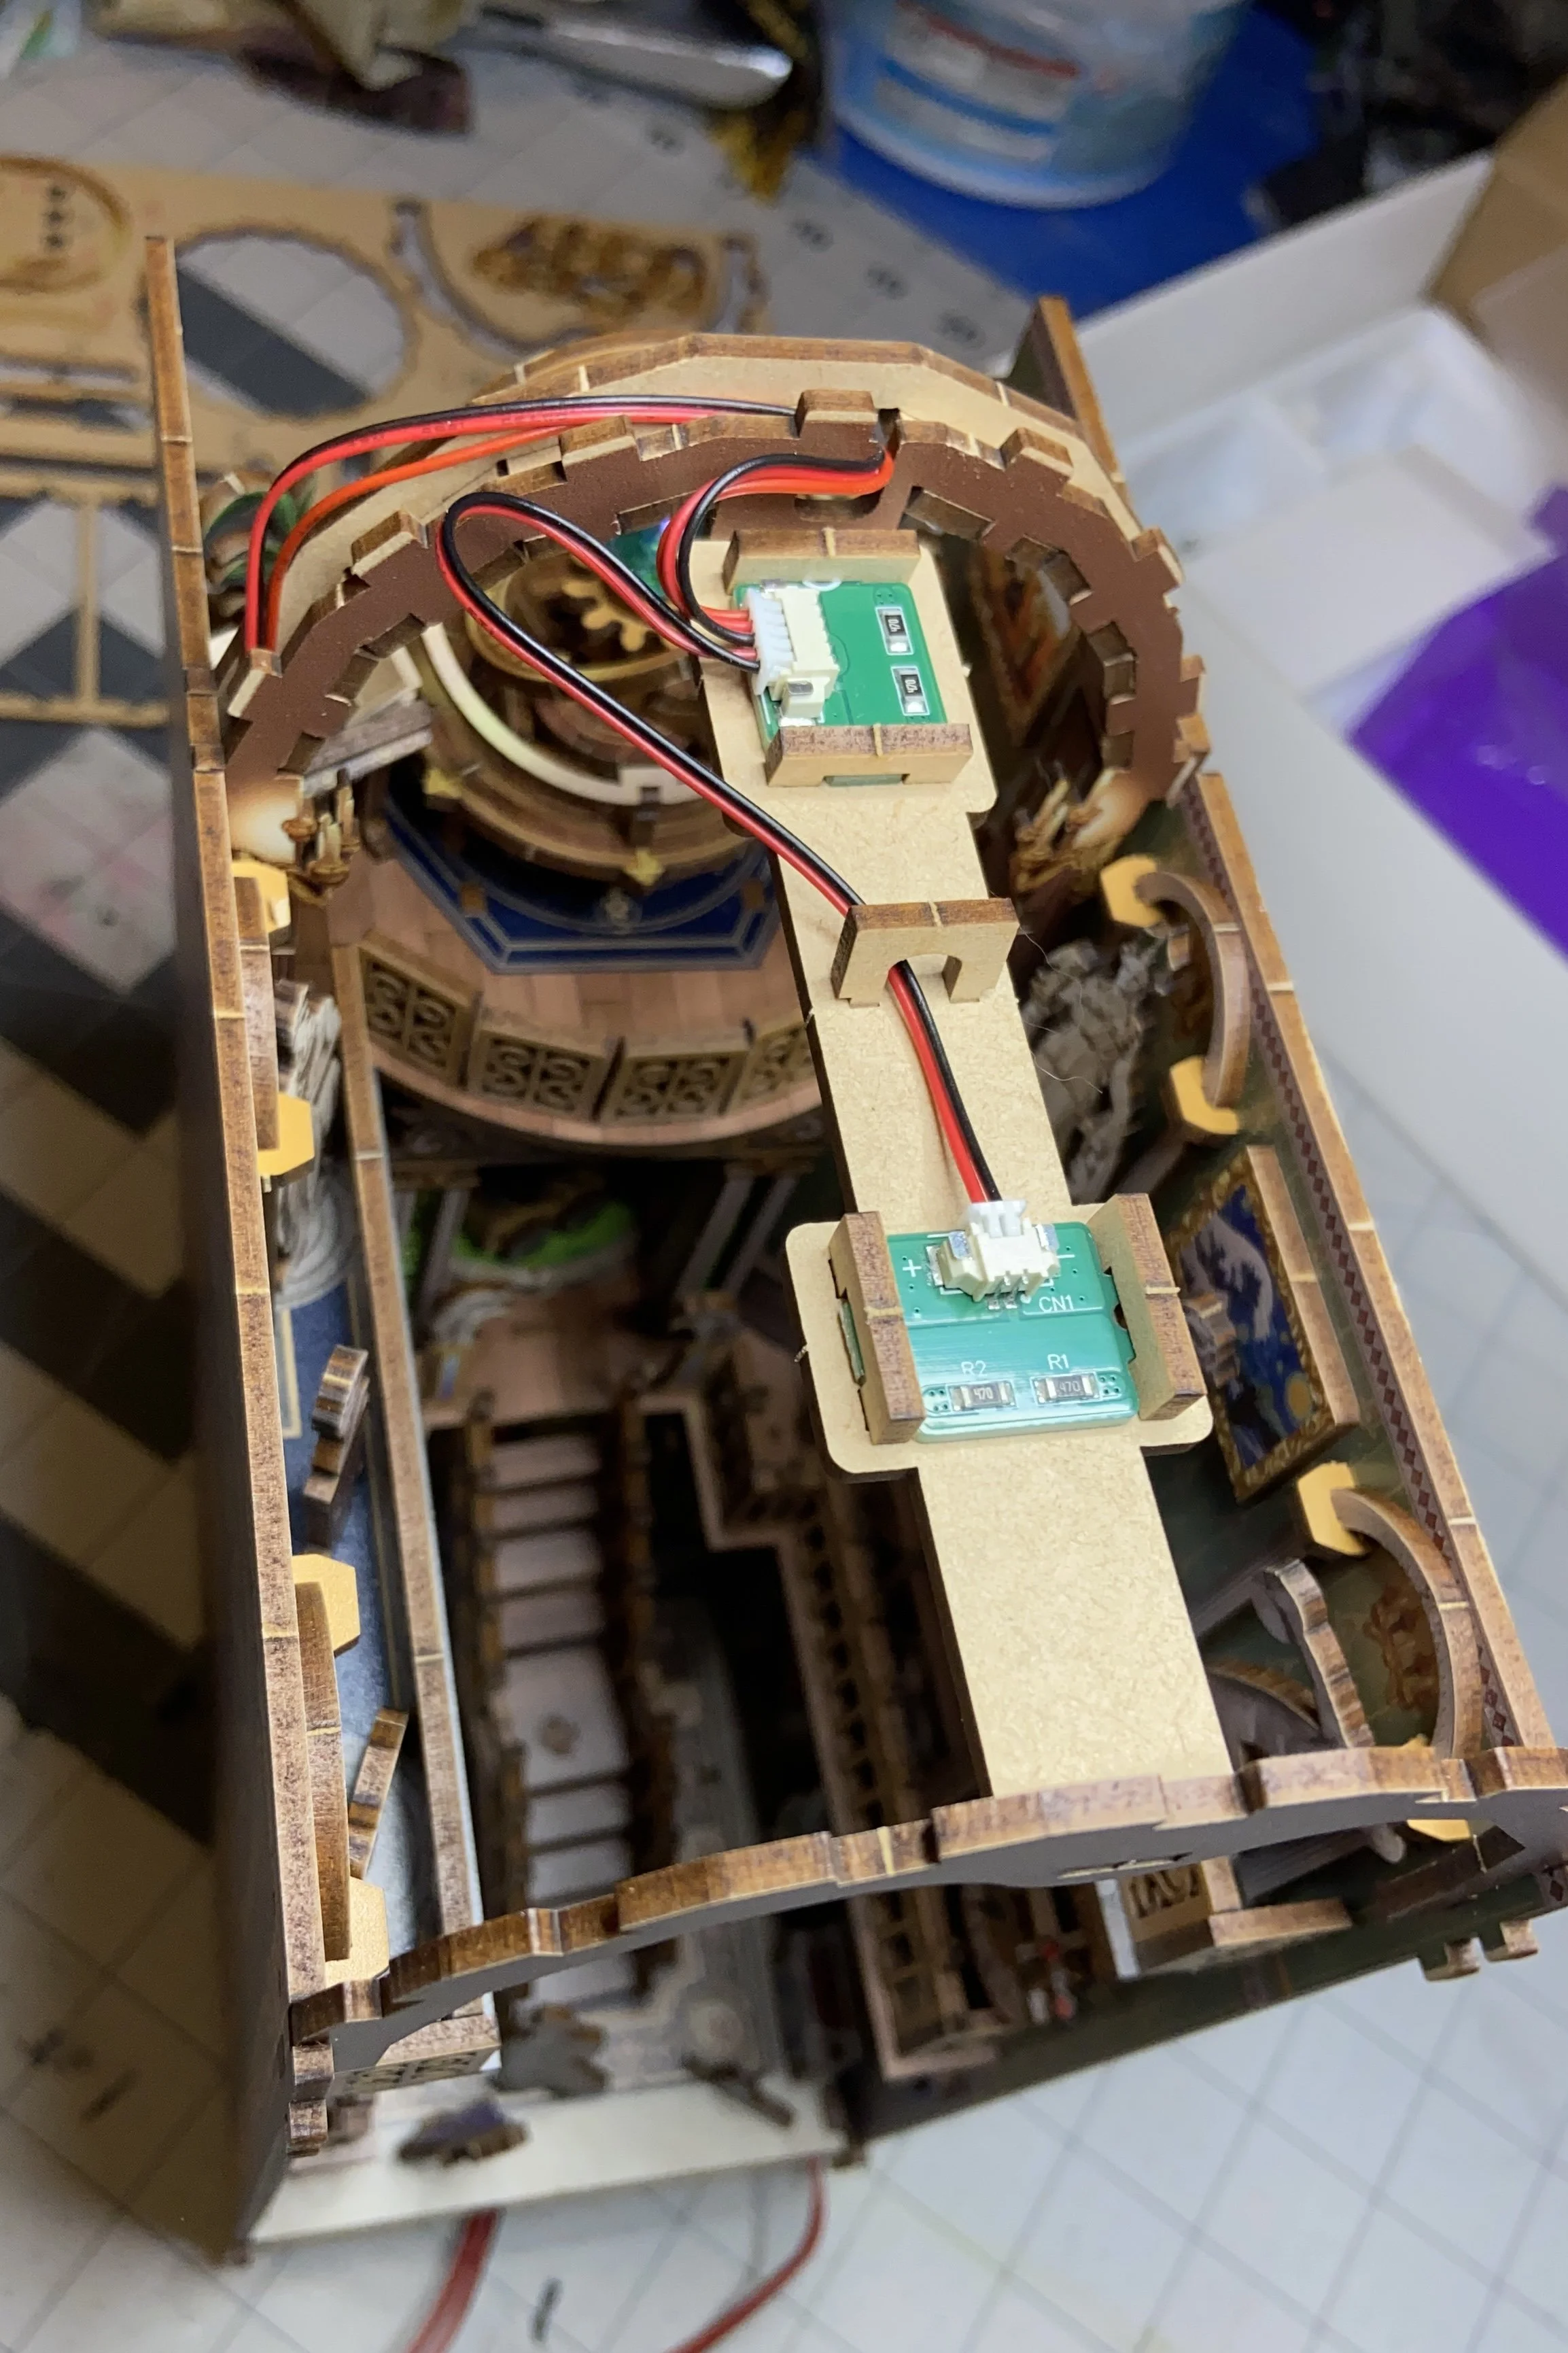
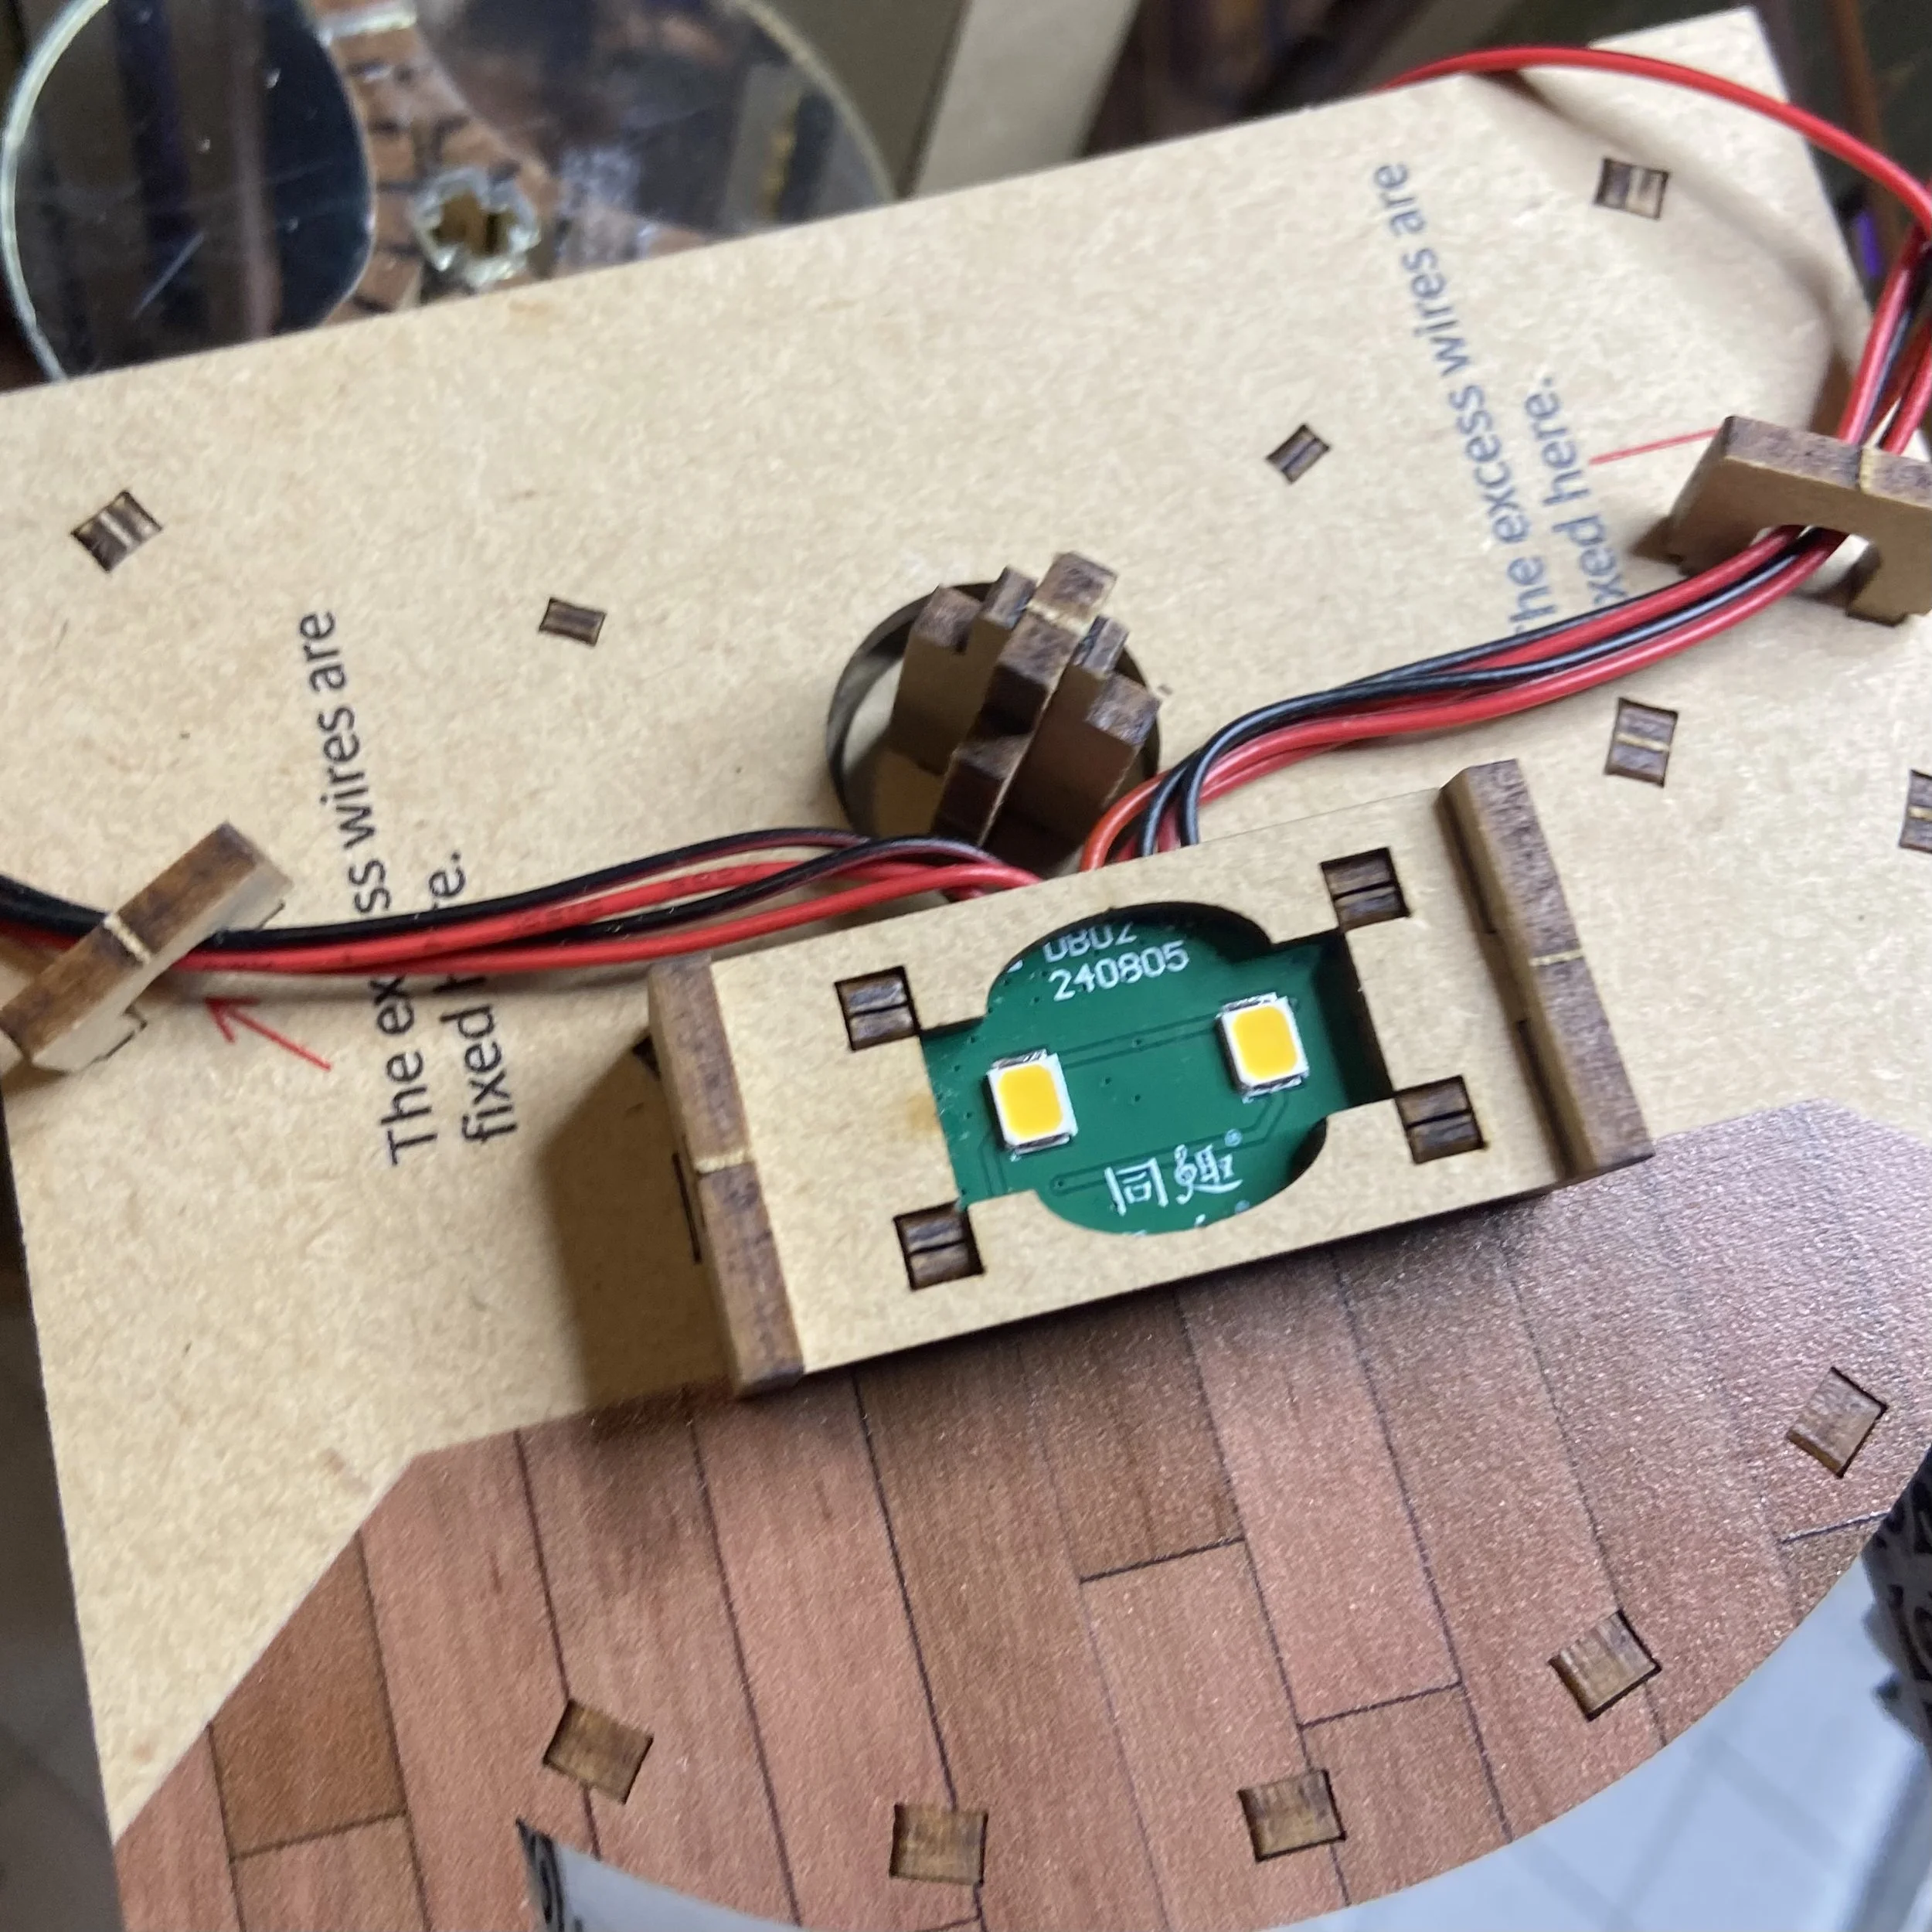
However, I pondered why the carousel was not illuminated, studying the instructions (more carefully than I had the first time, obviously). I came to the conclusion that I’d installed that particular LED upside down, so that it was resting right against the ceiling and its light was not visible at all. I dreaded taking the nook apart so much that I actually considered leaving it as it was. But I just couldn’t do it. All that work on the carousel and I couldn’t even see it.
I started at the back, since that’s where the LED was located. It was my hope that I could do a minimal disassembly, reset the LED, and put everything back together. But alas, as soon as I got the back off, I realized I’d have to also take off the roof, the roof supports, and the front piece, as well as pull the sidewalls a little away to give me room to maneuver.
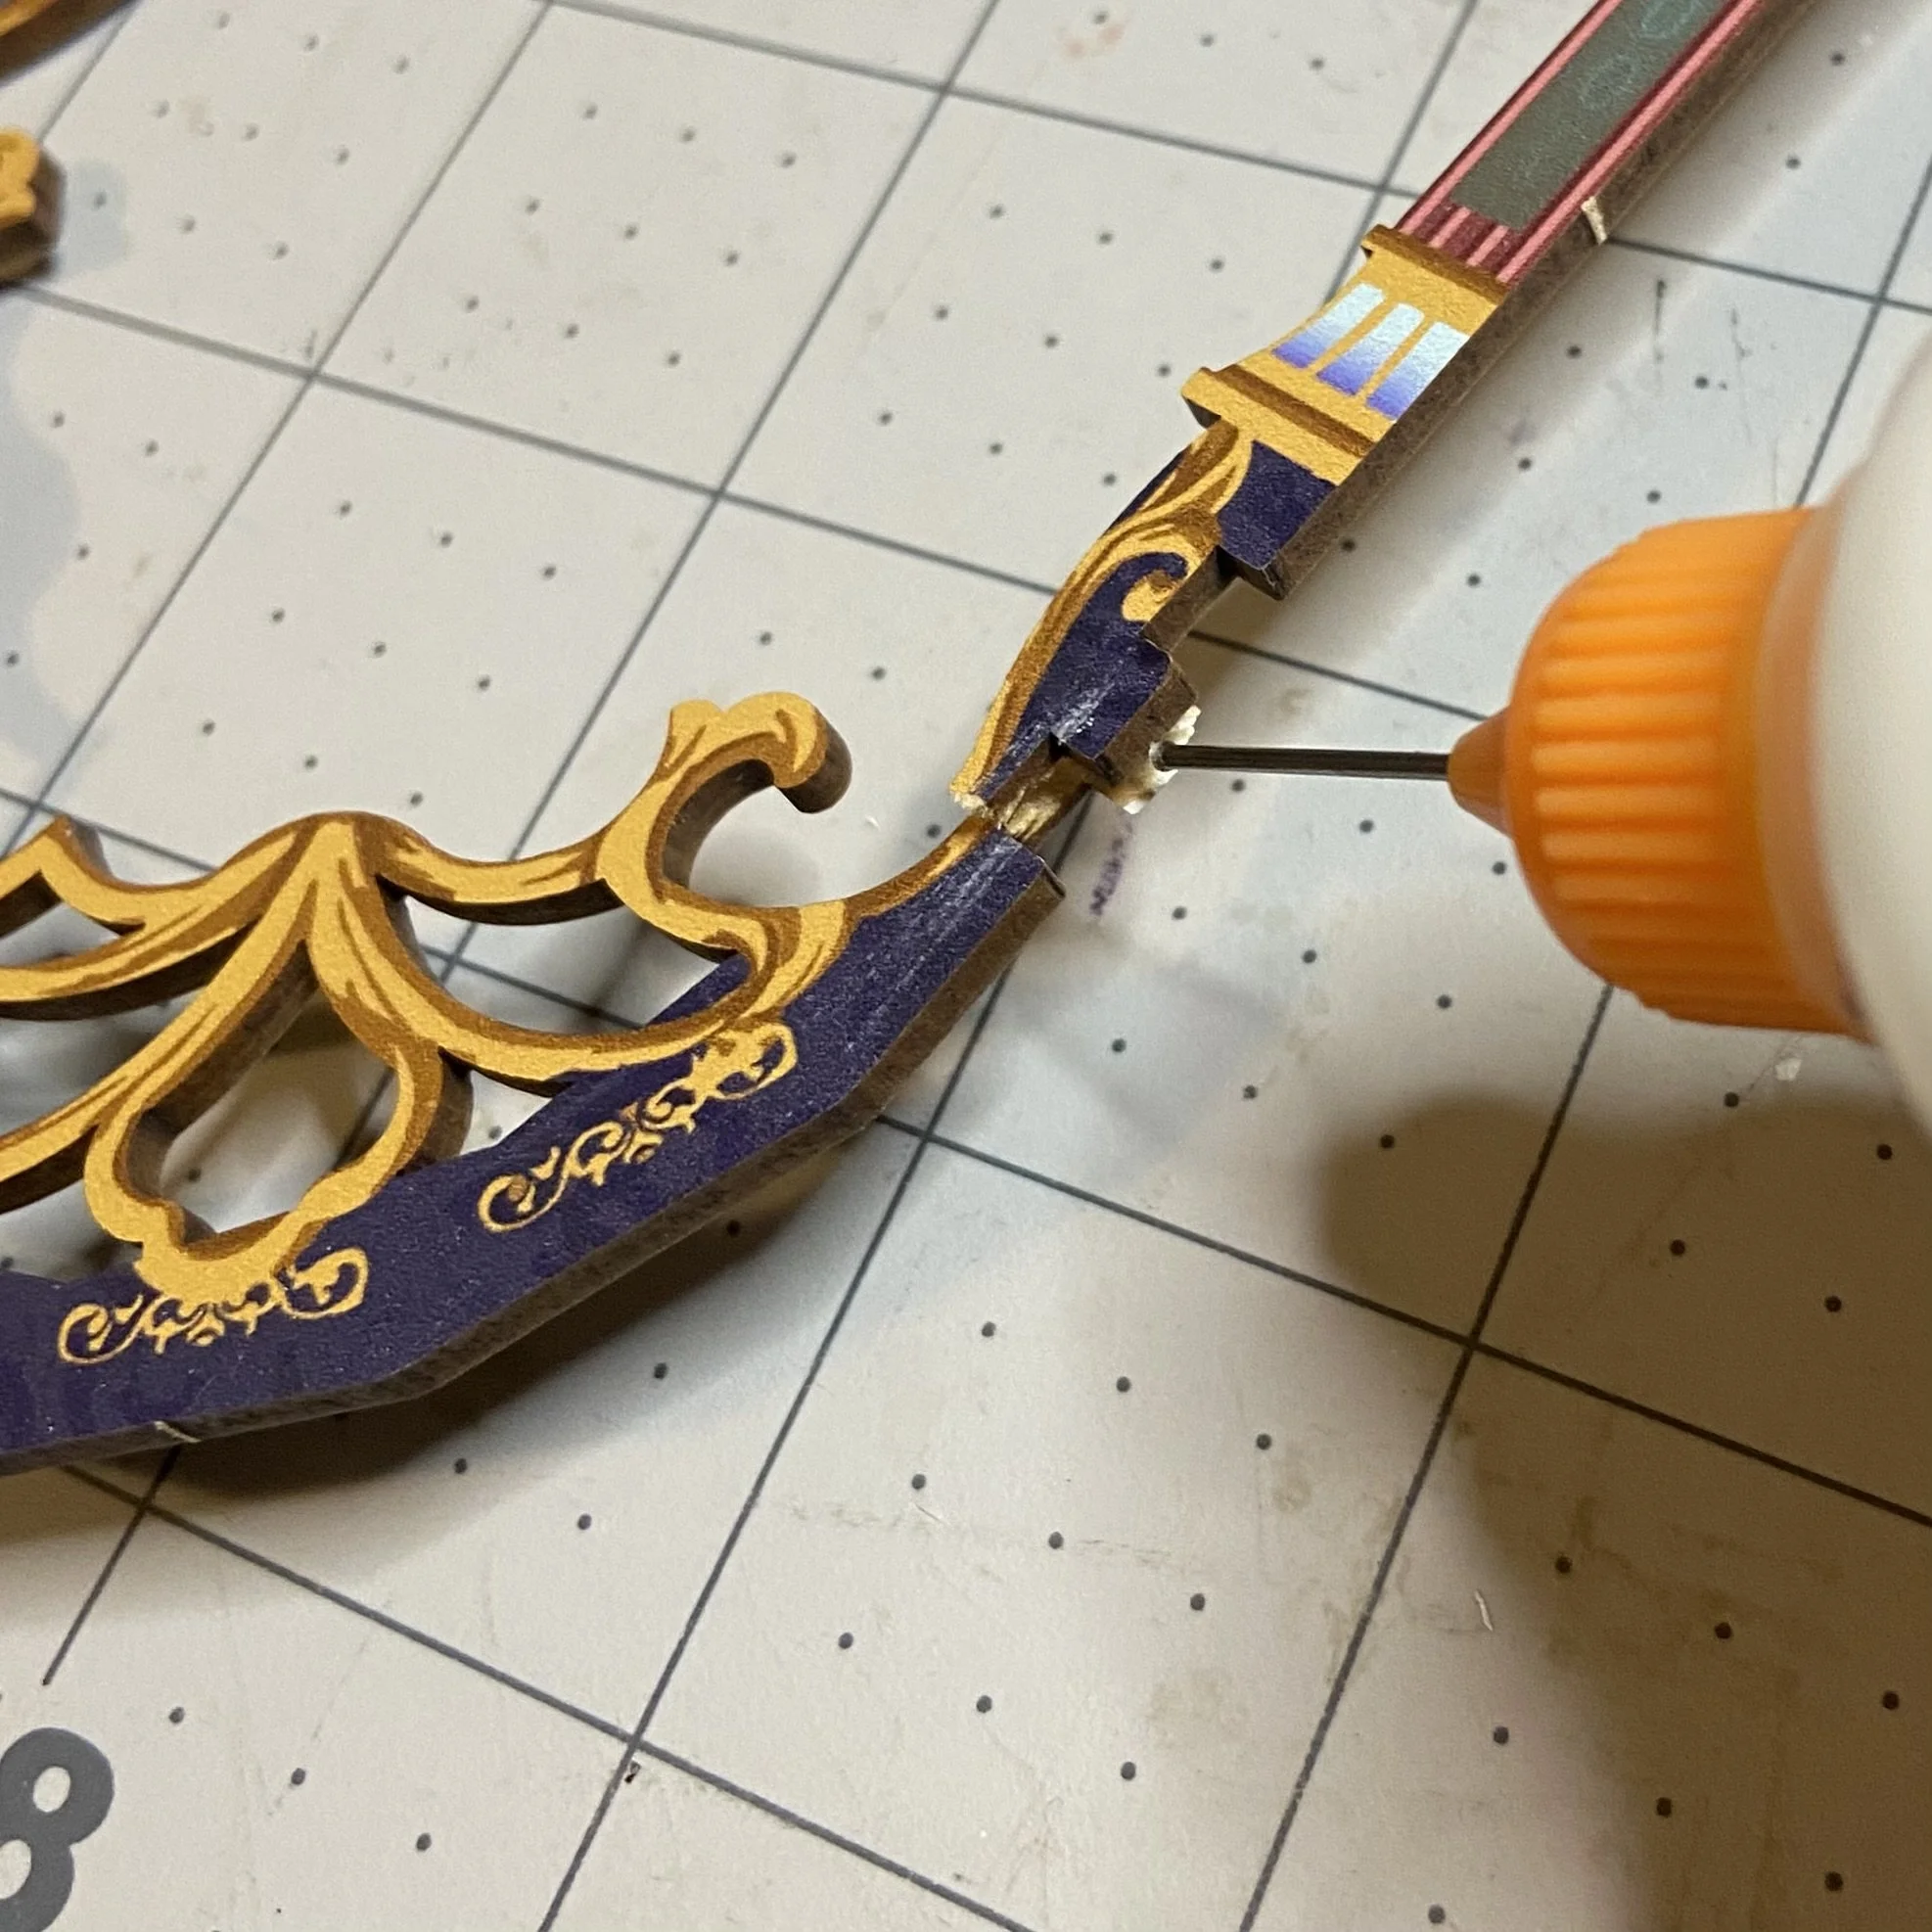
Also, in taking off the front piece, I broke it at the point where it attaches to one of the walls. I had to use more glue and hold it in place with one of my sewing clips. Those things are so handy for so many purposes…

When I finally got the piece I needed out where it was accessible, I could clearly see that I’d installed the LED upside, as I had suspected. I consulted the directions again (carefully, this time), got it installed correctly, and slowly coaxed everything back together. By the time that was all done, the glue was dry on the front piece, and I was able to get that back on without breaking anything else.
Et voila! All done! And I was delighted to discover that not only was the carousel now properly illuminated, the staircase now rotated easily the full 45° to the left, like it was supposed to do. I don’t know what I did differently during the reassembly, but that was quite the serendipity. In the little video below, you can see how the parts move (except for that dang door) and also how the lights change. It’s so pretty!